When you click on links to various merchants on this site and make a purchase, this can result in this site earning a commission. Affiliate programs and affiliations include, but are not limited to, the eBay Partner Network.
I personally like to do a little research whenever I'm looking for parts or plan on installing something. I did not find a diy that was detailed with pictures that was to my liking so I decided to create one.
The install was really simple. The hardest part to me was drilling into the bumper because I've never done it before and it's always a bit nerve racking to drill into your car.
This part was purchased from Infiniti Parts USA I believe. There was a 25% off coupon code. It came with all of the necessary hardware to install. The tools needed include:
- Power drill
- 1/8 (3mm) drill bit (for a pilot hole)
- 5/16 (8mm) drill bit
- Jack
- Jack Stands
If your ramps are low enough then ramps are possible. The ramps I had was too high and the lip would scrape. So I would test fit the lip first and make sure you won't scrape on your ramps.
I also used painter's tape to cover the areas I drilled.
If you plan on picking up the part, it does fit in the sedan with the passenger seat set all the way back.
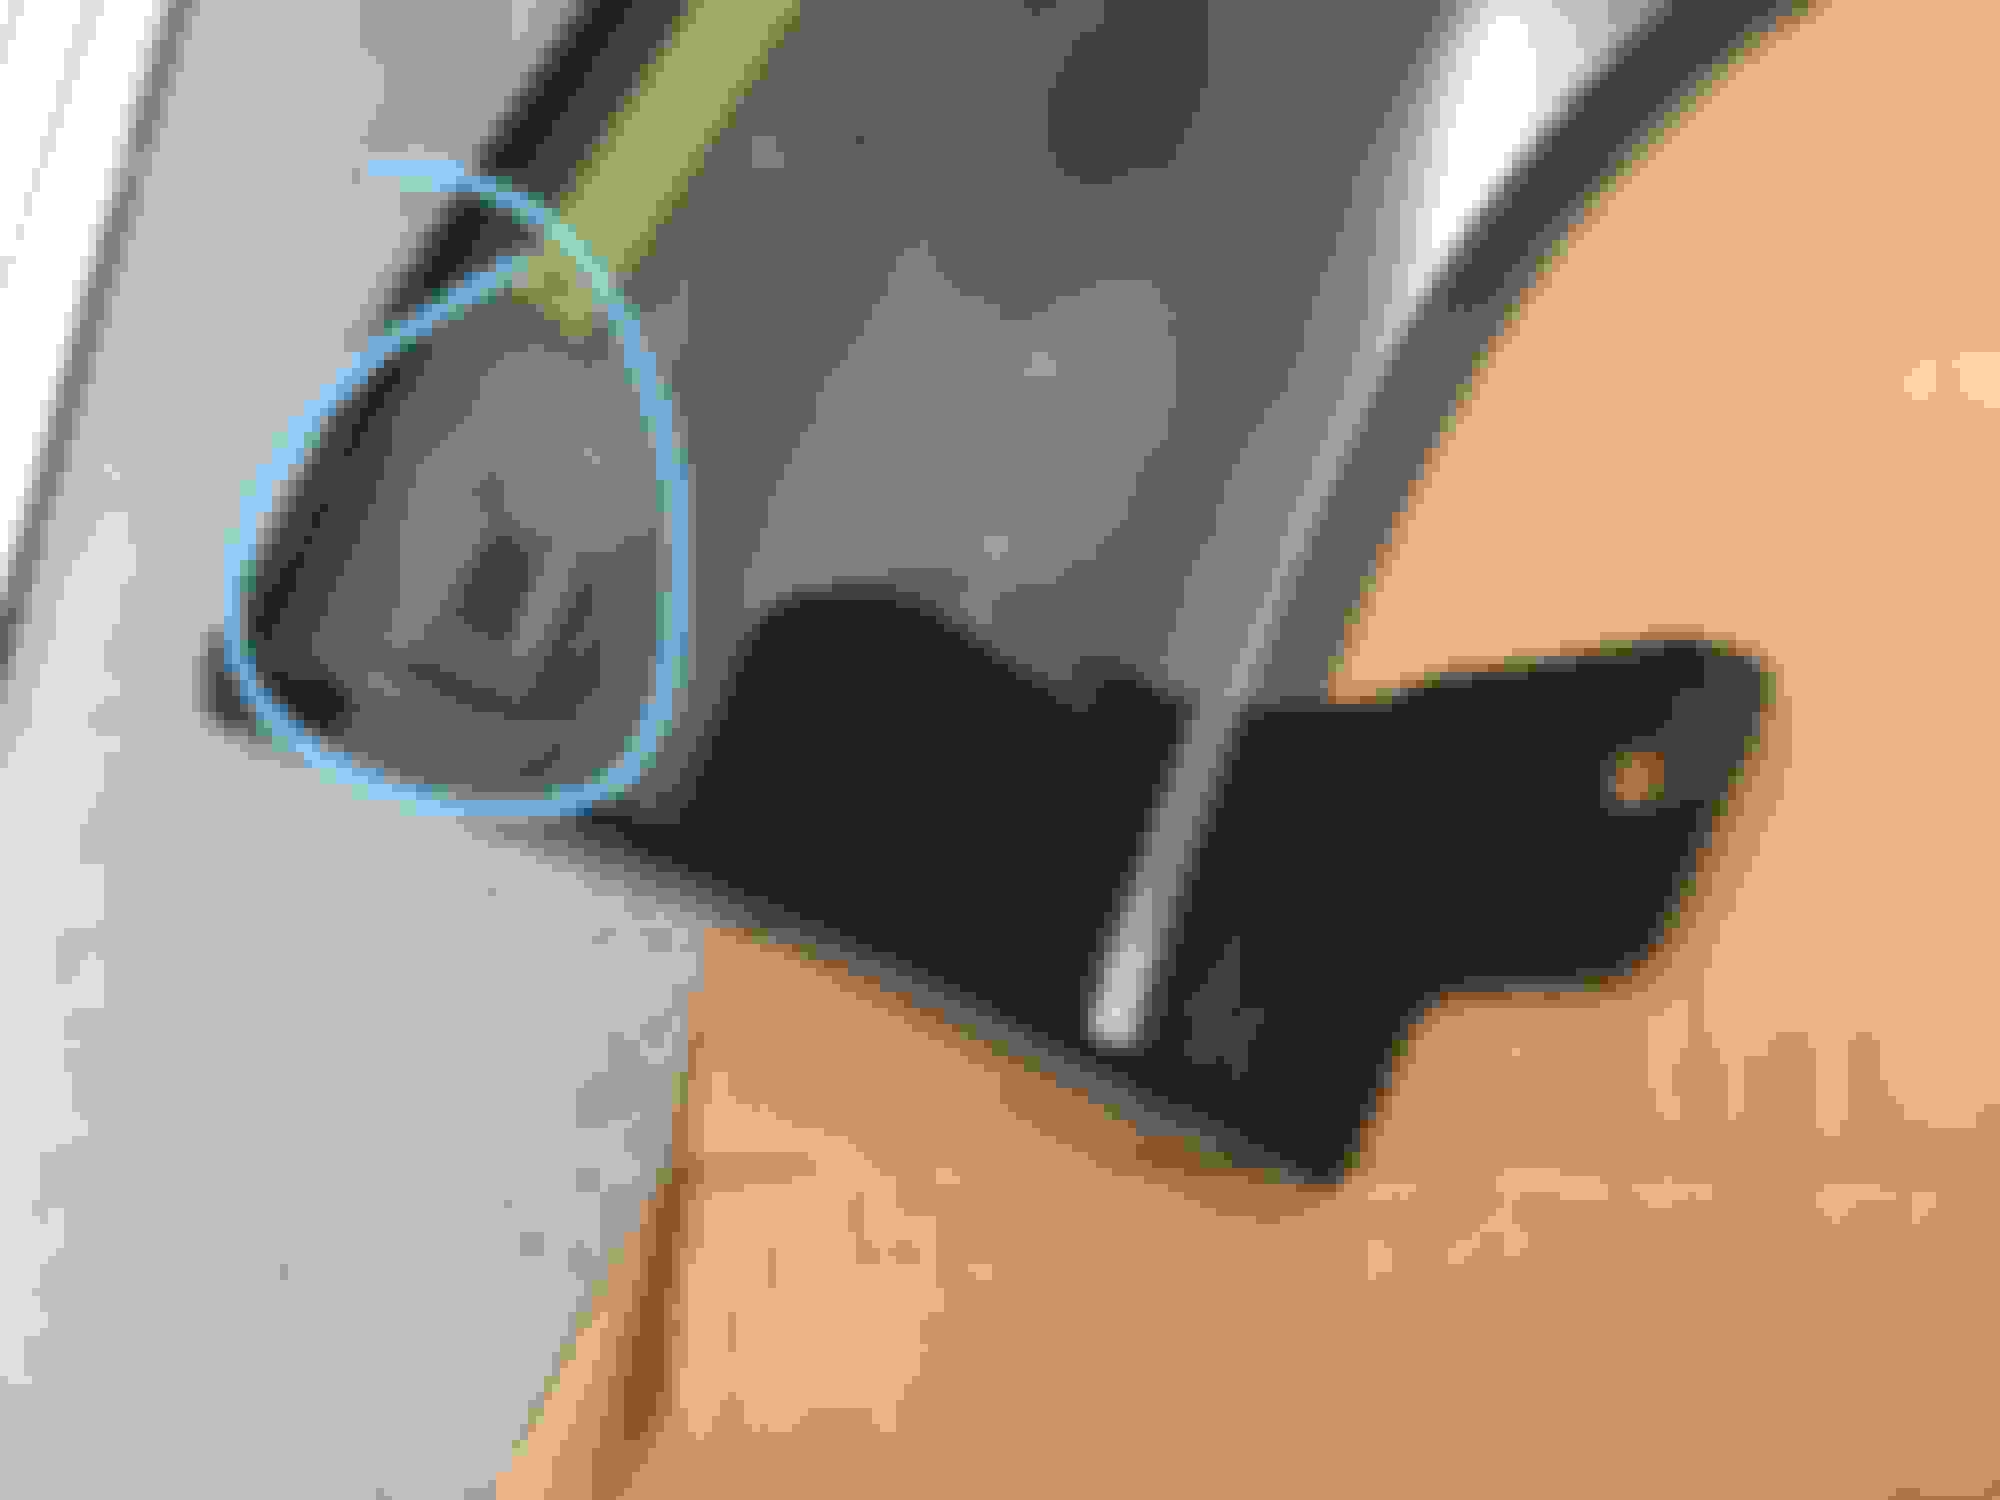
A template and instructions were included. I opted to not to install the side bolts because I did not want to drill on the side of the bumper. This was also recommended by other forum members. The circled hardware is the ones that are to be used if you would prefer to drill those holes.
Those hardware would be slotted here in the lip:
1. I found it best to fit the lip on the bumper. The lip will fit very snuggly without any hardware so I just drilled through the mounting holes instead of using the template.
2. After lining it up, I jacked up the car and placed painter's tape where I was going to drill through the mounting point which is this metal bracket here:
There are 4 brackets total.
3. Now just drill the holes for the 4 included plastic clips. Start off with the 1/8 (3mm) drill bit to start off. Then use the 5/16 (8mm) drill bit to finish it off. The plastic clip should fit pretty snuggly in the hole now.
4. Next, remove the lip and clean the bumper where the double-sided tape (also included installed to the lip) so the tape will stick to the bumper.
5. Now reinstall the lip with the backing tape tabs sticking out to make it easier to peel off and stick.
6. At this point, I installed the 4 included plastic clips and reused the clips that were already on the car (I forgot to take pictures of this. I will update the thread later when I have some pictures).
7. Now check the fitment and see if everything lines up to your liking. Then peel off the tape backing and press down the portion of the lip so the tape will stick to the bumper.
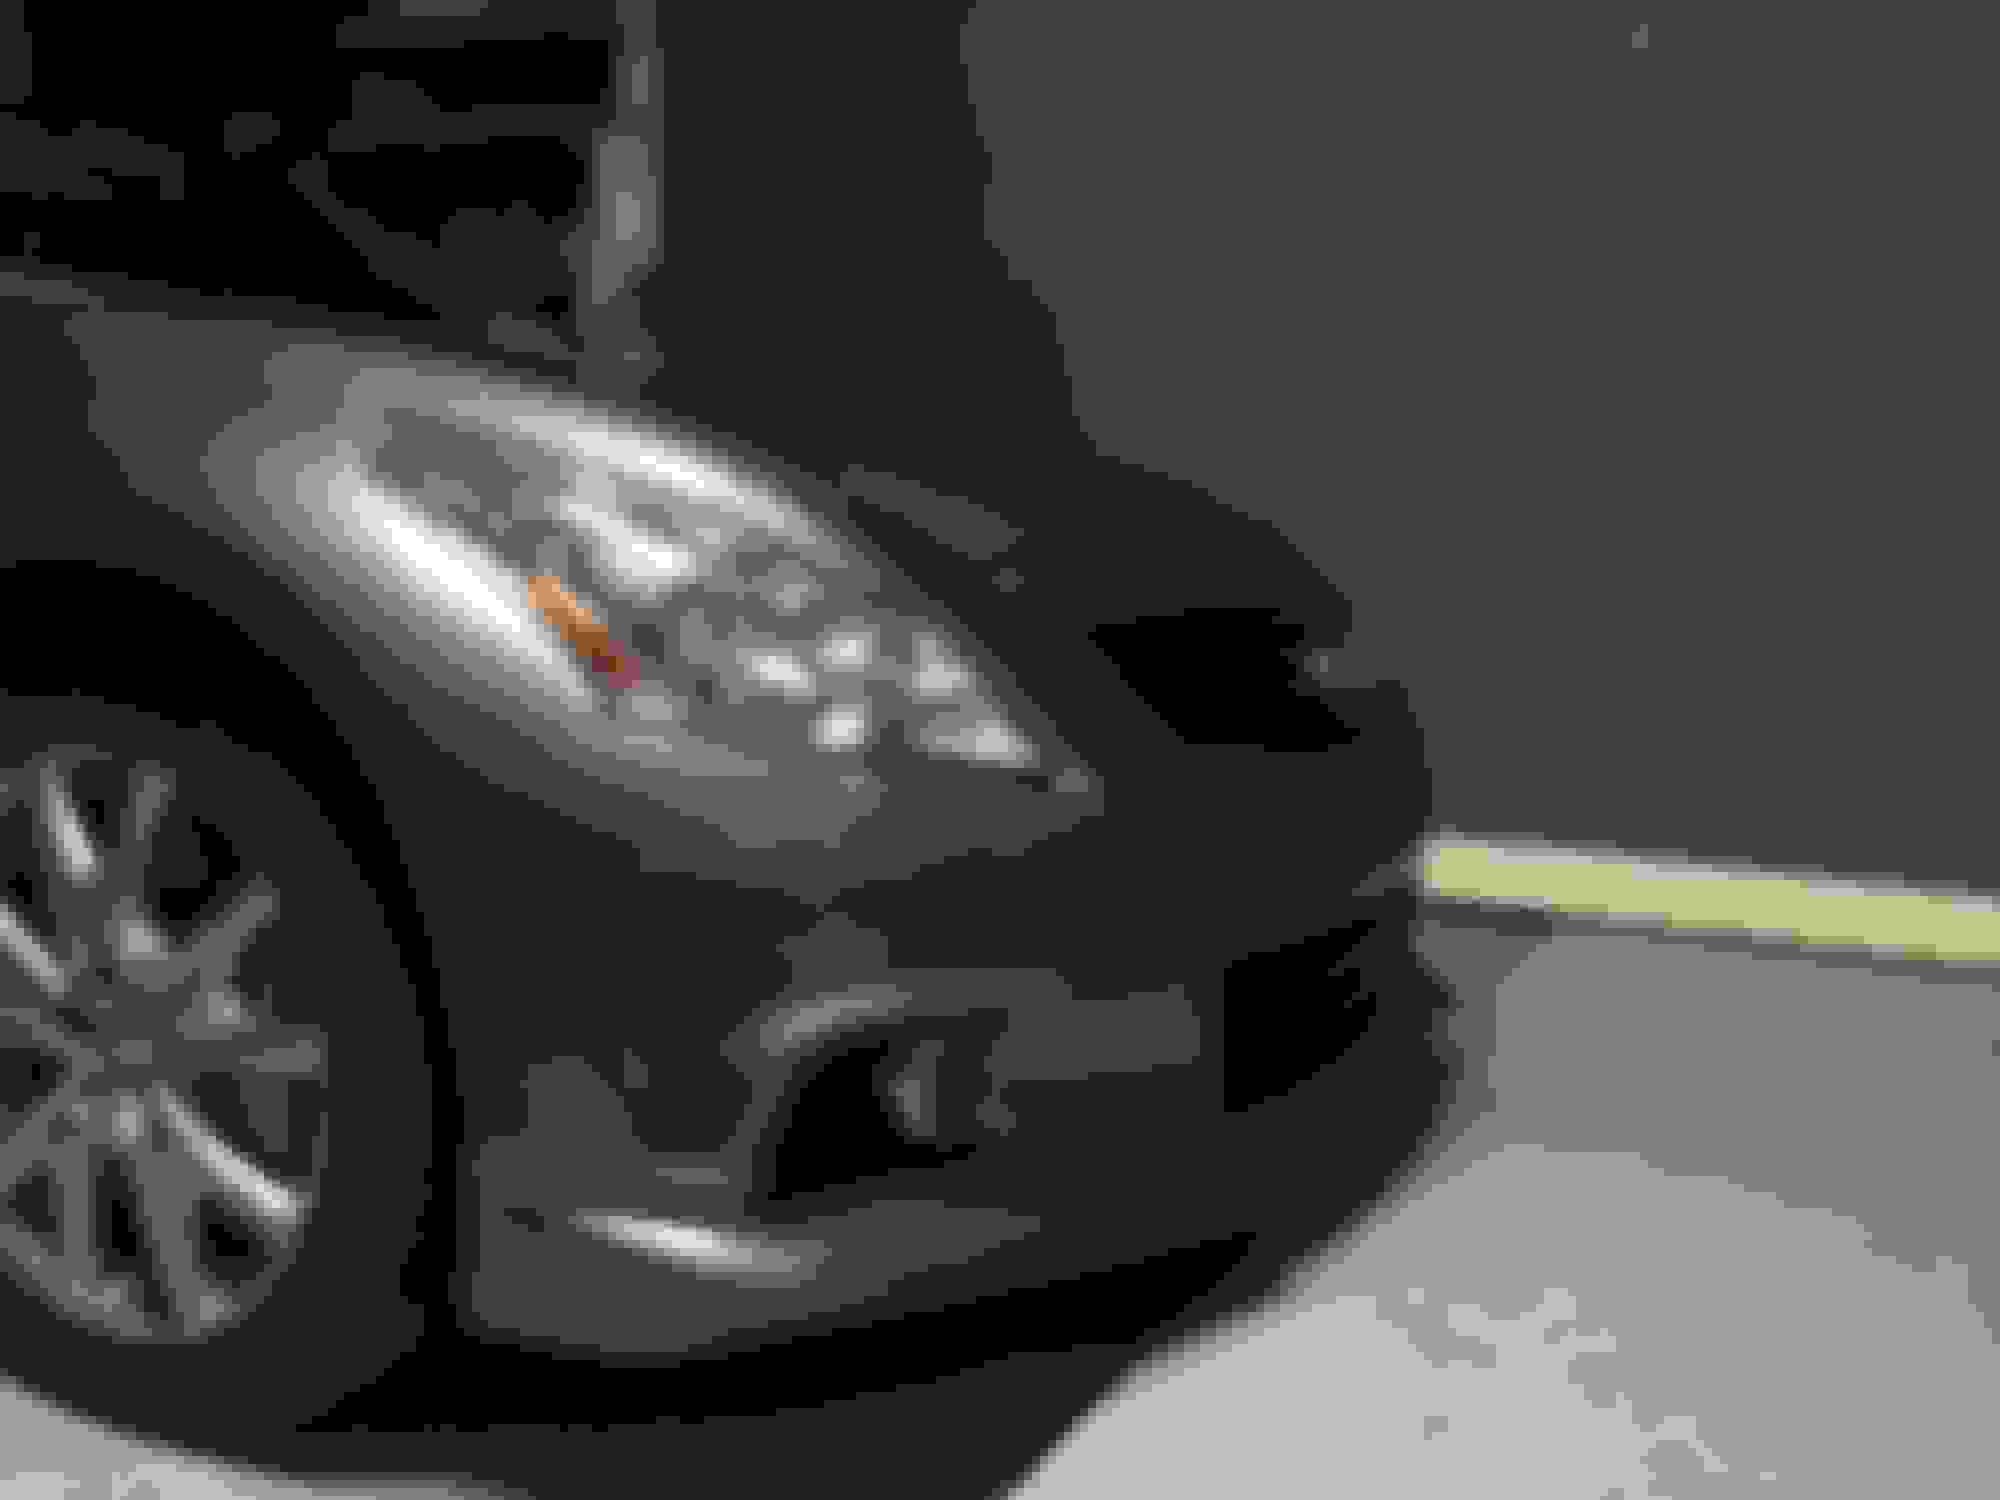
And that's it. Pretty simple install. I don't have many pictures of the car after the install though. Here are some that I do have:
I know, my headlights are pretty nasty. I'll fix that later.
 11-30-2017, 11:40 PM