When you click on links to various merchants on this site and make a purchase, this can result in this site earning a commission. Affiliate programs and affiliations include, but are not limited to, the eBay Partner Network.
First off, I want to address something that seems to be a source of confusion in this thread. It needs to be understood the size of spring spacer will not equal the gap correction. This is due to the suspension Motion Ratio. Basically, think of that lower Control Arm that the spring sits in as a lever. This lever pivots around the inner Control Arm mounting point, and the fat guy leaning on the lever is the tire (and the weight of that corner of the car). When you lean on a lever, once end moves a lot, and the other end moves none, and all the spots in between move less than the fat guy moves his end (closer to fat guy, more movement, closer to pivot, less).
If the car goes over a bump and the tire moves one inch, the amount that the spring moves is much less. Lets assume the spring is exactly half way between pivot and tire (its not, but its in that neighborhood). That would mean the spring would move 1/2 inch if tire moves one inch. Likewise, a 1/2" spacer at the spring would lift the car 1 inch.
Since our cars Motion Ratio isn't really .5 (the spring isn't exactly half way down the arm), its not really an exact 2:1 ratio, buts its pretty close as far as what spacer size to use. So if you want to raise the droopy bum by 3/8", you'd want something around 3/16" spacer.
My Droopy Bum 2.0 simply places the spacer ABOVE the upper spring mount. It goes between that rubber cone and the chassis. So it doesn't affect the springs relationship to the mounts. Therefore spring doesn't cause to distort over time, no excessive settle, etc. I know I have seen at least one other post somewhere suggesting this, so I am not claiming this as the first ever mention of it. I independently came to the spacer on the other side idea before I saw that other post.
I bought some cheap 3/16" plastic sheet off Amazon. I laid the rubber cone mount on top, and traced its round shape. Then I cut out its round shape using a pair of tin snips (sheet metal sheers). Then I marked the center, and used a hole saw to cut out the center, making the thing look like a large, flat plastic washer. I then just installed the springs and placed these spacer washers above the upper mount. Done.
Using the 3/16" spacer, I have about 3/8" butt lift. There is still a small amount of droopy bum, but way less than photos I've seen. I can simply add another layer of spacer to raise it more, which I may do. When its warmer out. I will just use a floor jack to raise the rear until I like the stance, and measure how much higher I still want it to go, then divide by 2, and thats how much more spacer I need.
It should be noted you could instead space out the lower rubber mount (or space both upper and lower). Again, this lower spacer would be UNDER the lower mount, so as not to interfere with spring to mount relationship. Between mount and, in this case, the lower Control Arm. The lower rubber mount is not flat on the bottom. Its keyed to a ramp shape molded into lower arm. So you would need to make a washer spacer, then slice it, so it resembles one of those lock washers that is a split washer. Then you could just lay the spacer under the mount, and let it assume the ramp shape.
A dab of silicone sealer (caulk gun or tube of gasket sealant) would be helpful to hold the spacer to the rubber mount, so it stays put when you are juggling the spring and spacers and control arm...
Last edited by Car Analogy; 12-12-2018 at 05:09 PM.
Absolutely. Tein Basis rear CO's with SPC rear camber arm... problem solved.
And I'm satisfied with the fronts on Swifts, for now. Point in fact, I'm not planning on installing the front Tein's until next year.
...which I never did, and won't be able to if I wanted because I sold them. Point in fact, the rear Teins got squeaky, and I put the original Tokico shocks back in. So the only thing that's Tein on the car are the rear springs and the adjustable rear spring collars.
Looking back at old comments, thought I'll follow back around about that.
I just want to share my solution to fix droopy bum after installing Nismo 370z springs on my G37 sedan. I don't like the idea of inserting aftermarket isolators that fit in between the coil springs because I feel like it may alter the springs ability to compress properly. So I am trying a solution that will sit on top of the stock top rubber isolator and fit inside of it. It's in the 4th post on my thread here: https://www.myg37.com/forums/brakes-...ml#post4287115
Interesting. Same idea, but on the other side of the isolator. Hope it works out for you. Certainly a less expensive way to get an extra bit of height without buying coilovers.
My original idea only seemed like genius until it failed spectacularly, LOL.
The isolators are supposed to arrive today so I'll probably install them tomorrow or Friday and post the results. The isolator is 1/4" thick and because of the motion ratio that Car Analogy explained, it should raise the car 3/8 - 1/2". So that would mean the nismo springs would give an equal F / R drop of about .75" after installing the isolators.
Installed the isolators today and I couldn't be happier with the results! The thickness of the isolator claimed to be 1/4" so I was expecting about a 3/8" bump in ride height. But, I think the isolators are actually a little bit thinner than 1/4" because my ride height only went up by 1/4". So that would bring the overall effective drop in the rears to 7/8" and the fronts were 3/4". The final height of the rears from floor to fender are: L - 26 15/16" and R - 26 7/8". I think it's common on our cars for one side to be slightly lower than the other..
So here's the info on the isolator and the fitment, installation etc.
The isolator didn't fit perfectly into the stock rubber one because the diameter of the inner circle was a bit smaller. I already knew the outer diameter was smaller but it's fine because it fits in the upper spring mount pretty well.
When I tested the fit in the upper spring cup, there are 3 prongs that are used to hold the stock isolator in place. Because the inner diameter of the stock isolator is larger than the piece I was adding, I simply used some pliers to bend in the 3 prongs a little bit to accompany the new isolator and it held it in place pretty well!
And it sits in there really nicely, just like stock! Basically no chance of slipping out because it's held in place up top really well.
Pictures of the results will be in the next post because I'm not sure if there's a limit for amount of pictures per post.
Last edited by backman_66; 12-25-2020 at 04:28 PM.
You know how people comment that one side of the car sometimes is higher/lower than the other side? Well, that happened to mine and became more noticeable after I lowered it and did droopy bum fix.
The right side was sitting about 1/4" - 5/16" lower than the left and it was driving me crazy so I ordered a thicker isolator to put on the right side.
Upon removing the spring on the right rear, the first black isolator that I put on there a few weeks ago was still looking great and was firmly in place. I removed it so I could replace it with the thicker isolator. But there was a problem....
The new isolators center hole diameter was a little too big to fit inside the top of the stock rubber isolator. I don't have a lot of tools at my disposal and I'm quite the amateur mechanic, but I decided to try cutting around the center of the stock mount with a sharp knife. I cut as much off as I could and then used a rotary tool to remove more. I think after removing enough rubber, it gets down to a metal core because I could only remove so much rubber material to make the new isolator fit.
That's when I had to actually take the rotary tool to the new isolator and try thinning down the lip on it as well. I was finally able to remove enough material to get it to fit snugly inside of the stock rubber isolator.
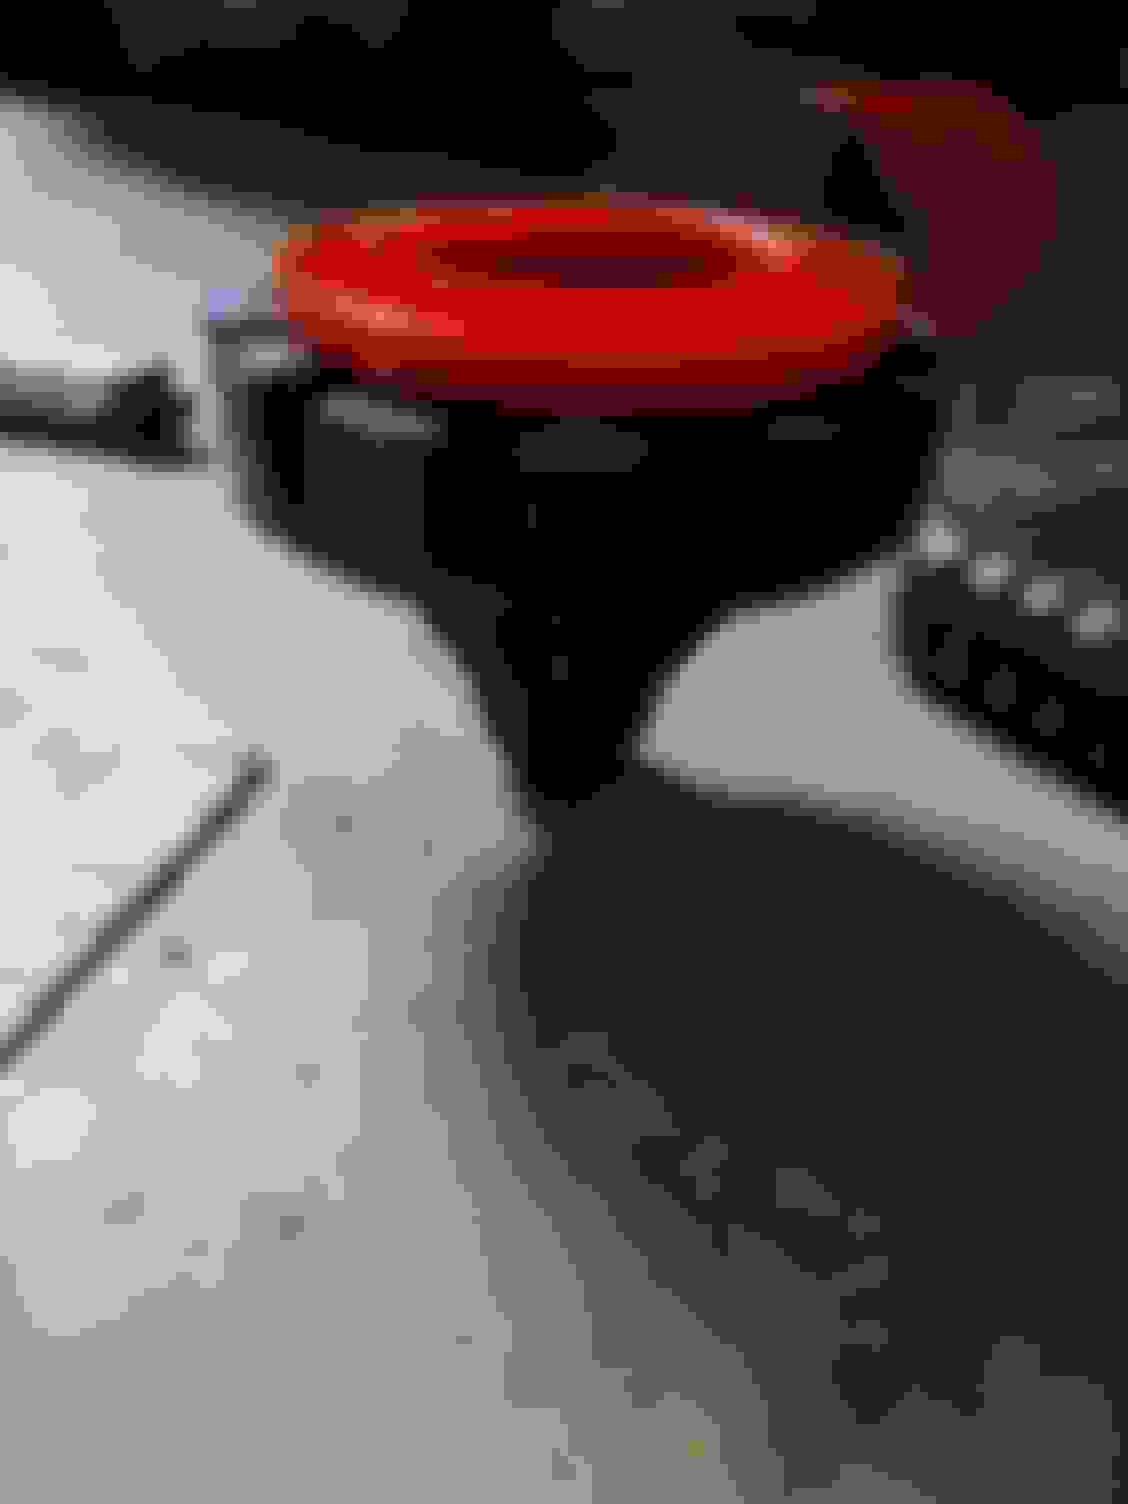
This picture is with the spring uncompressed. Once it actually gets some weight on it, the isolator tucks up into the cup further.
The end result is just fantastic and it's finally perfect. Both rears are sitting at about 26 7/8".
Last edited by backman_66; 01-10-2021 at 08:59 PM.


 12-12-2018, 05:02 PM