Nismo R-Tune intake installed on IPL


 06-21-2016, 08:16 AM
#17

The tube is aluminum and very light weight even with the filter on the end. You'd be surprised by its weight if you picked it up. Significantly lighter than the stock airbox setup. The bar stock I used was probably 4mm thick? It takes tools and a good deal of force to bend it. I used the same type of bar stock to fab oil cooler mounts way back when and those are heavier and oil filled.
The entire intake would support itself without that bracket actually and I ran it as such for two days. The mount up top takes 90% of the weight and the bottom bracket is mostly for positioning purposes. That one pipe has two mounting brackets alone. I'll naturally keep an eye on it.
The entire intake would support itself without that bracket actually and I ran it as such for two days. The mount up top takes 90% of the weight and the bottom bracket is mostly for positioning purposes. That one pipe has two mounting brackets alone. I'll naturally keep an eye on it.
06-21-2016, 02:15 PM
#19
Thank you for this write up ! I was also doing my homework to get these NISMO intakes into my convertible G. Trying to keep everything OEM+ with the mods. Got a Infiniti sport muffler on the way and figured might as well add the intakes as well. I should have the same issues your having as well I assume ?
06-21-2016, 10:02 PM
#20
You will. It will not be an easy, painless installation. The worst part is, it'd be so easy to design one specifically for the G too. They could just run a pipe pretty much straight down on both sides and it'd work without any interference. Instead, they add a 90 degree bend on both pipes. Why is beyond me.
 06-21-2016, 11:19 PM
#23
No offense taken at all.
The Injens neck down around the MAF and then swell back up again. Plus they don't make an intake for the IPL either.
I could do one of the other intakes like Stillen but it'd require a lot of the same work in terms of removing the stock components and then I'd have to remove the stock bumper and cut the support. Just as much work honestly.
Last edited by Ape Factory; 06-21-2016 at 11:24 PM.
The following users liked this post:
ctyke (07-11-2016)
07-11-2016, 11:44 PM
#25
Car on the dyno today. I'm waiting on jpegs of the runs, STD, SAE and uncorrected.
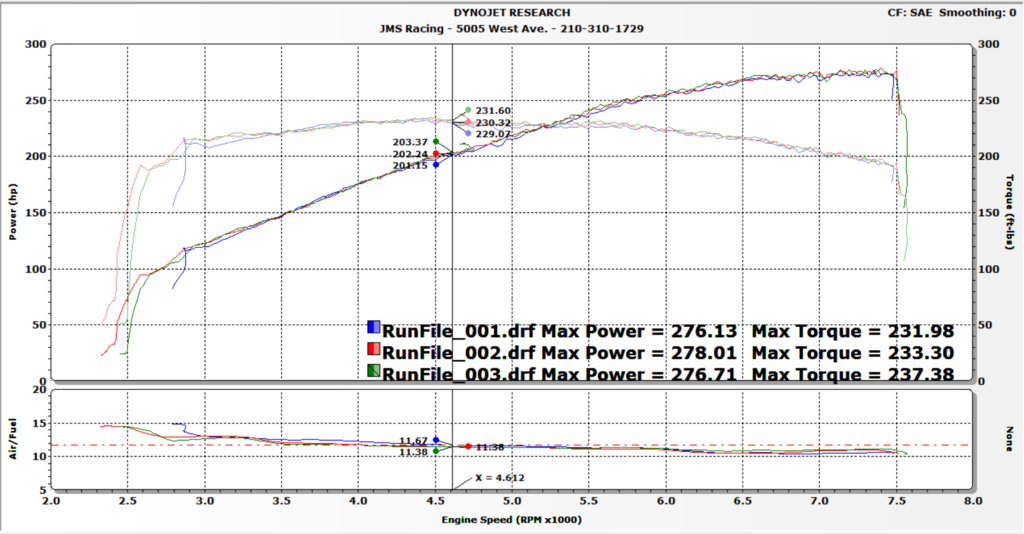
I was pig rich in the top end. Tuner thinks the intake is messing with the MAF readings. So there's a good gain to come from tuning. I was in the mid to low 10's from 6K on up from what I can remember.
SAE numbers were in the high 270's. Will post graphs as soon as I have them.

I was pig rich in the top end. Tuner thinks the intake is messing with the MAF readings. So there's a good gain to come from tuning. I was in the mid to low 10's from 6K on up from what I can remember.
SAE numbers were in the high 270's. Will post graphs as soon as I have them.
Last edited by Ape Factory; 07-11-2016 at 11:50 PM.
The following users liked this post:
chinabean (07-12-2016)
07-11-2016, 11:51 PM
#26
Car on the dyno today. I'm waiting on jpegs of the runs, STD, SAE and uncorrected.
I was pig rich in the top end. Tuner thinks the intake is messing with the MAF readings. So there's a good gain to come from tuning. I was in the mid to low 10's from 6K on up from what I can remember.
SAE numbers were in the high 270's. Will post graphs as soon as I have them.
I was pig rich in the top end. Tuner thinks the intake is messing with the MAF readings. So there's a good gain to come from tuning. I was in the mid to low 10's from 6K on up from what I can remember.
SAE numbers were in the high 270's. Will post graphs as soon as I have them.
Those things sure look purdy
07-12-2016, 08:29 PM
#27
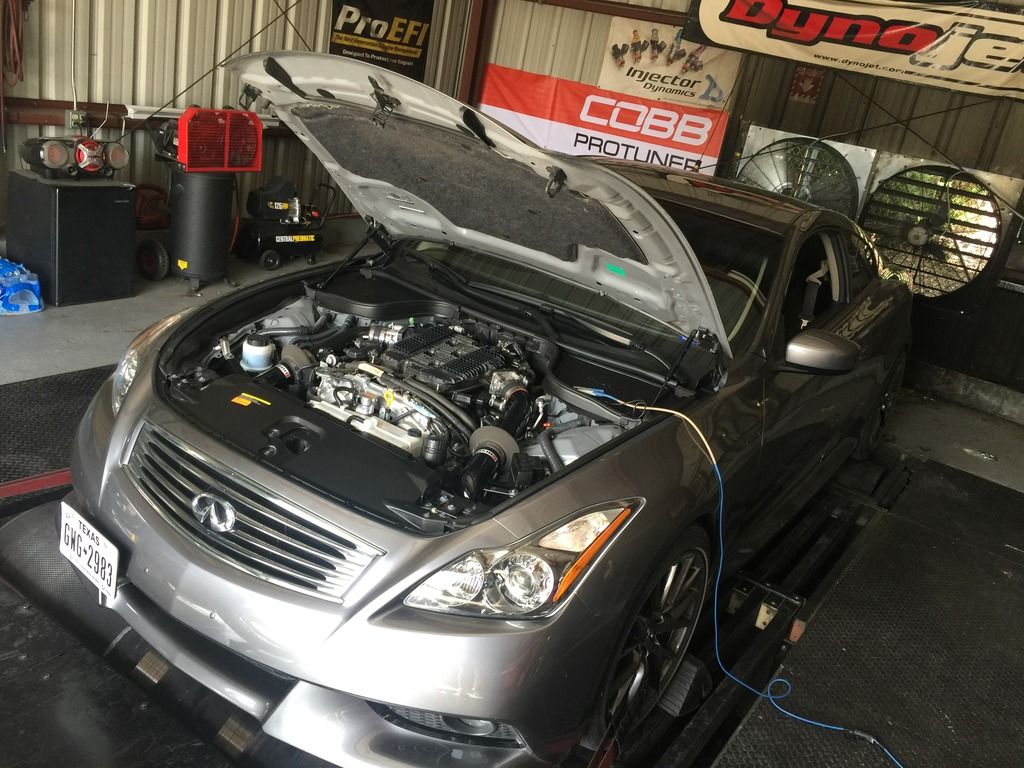
Ok dyno plots. Finally!
Car was dyno'd at JMS Racing in San Antonio. I think they've stuck a 2JZ in just about every car imaginable. They had a lot of cool stuff in the workshop.
Anyway the dyno operator/tuner was very cool, knowledgeable and a Floridian to boot (my former haunt). We did three runs with the wideband hooked up.
I need to talk to any Nismo 370Z owners who may have the Nismo intake and have dynode the car. Want to see if they go rich after 6K as well. He said it's most likely due to the intake messing with the MAF sensors. The intake does come with a venturi insert which is supposed to prevent this. Lots of power left on the table. He did comment the Stillen intake is about the only one that doesn't screw with the MAF settings. The Takeda is really bad in that regard apparently.
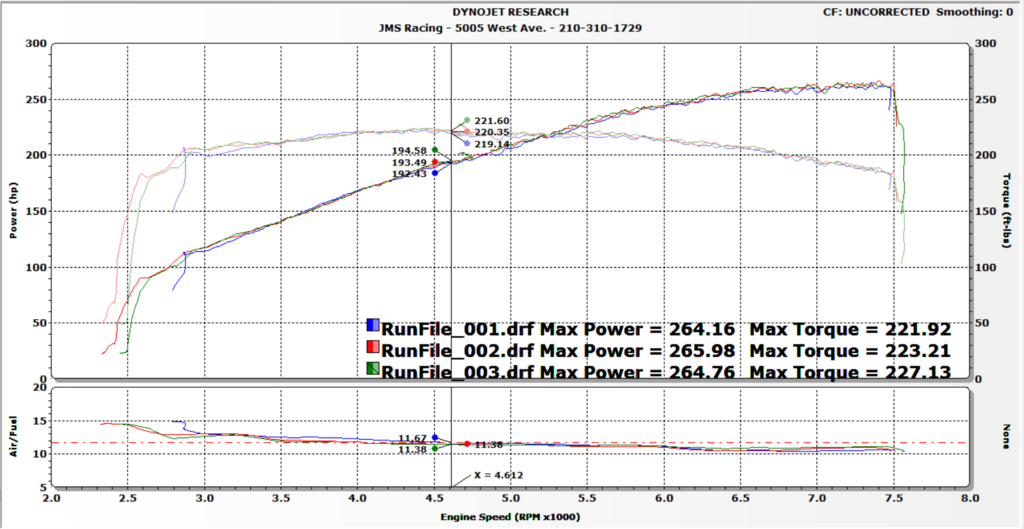
Graphs are STD, SAE Corrected and uncorrected.

Car was dyno'd at JMS Racing in San Antonio. I think they've stuck a 2JZ in just about every car imaginable. They had a lot of cool stuff in the workshop.
Anyway the dyno operator/tuner was very cool, knowledgeable and a Floridian to boot (my former haunt). We did three runs with the wideband hooked up.
I need to talk to any Nismo 370Z owners who may have the Nismo intake and have dynode the car. Want to see if they go rich after 6K as well. He said it's most likely due to the intake messing with the MAF sensors. The intake does come with a venturi insert which is supposed to prevent this. Lots of power left on the table. He did comment the Stillen intake is about the only one that doesn't screw with the MAF settings. The Takeda is really bad in that regard apparently.
Graphs are STD, SAE Corrected and uncorrected.
07-18-2016, 04:00 PM
#28
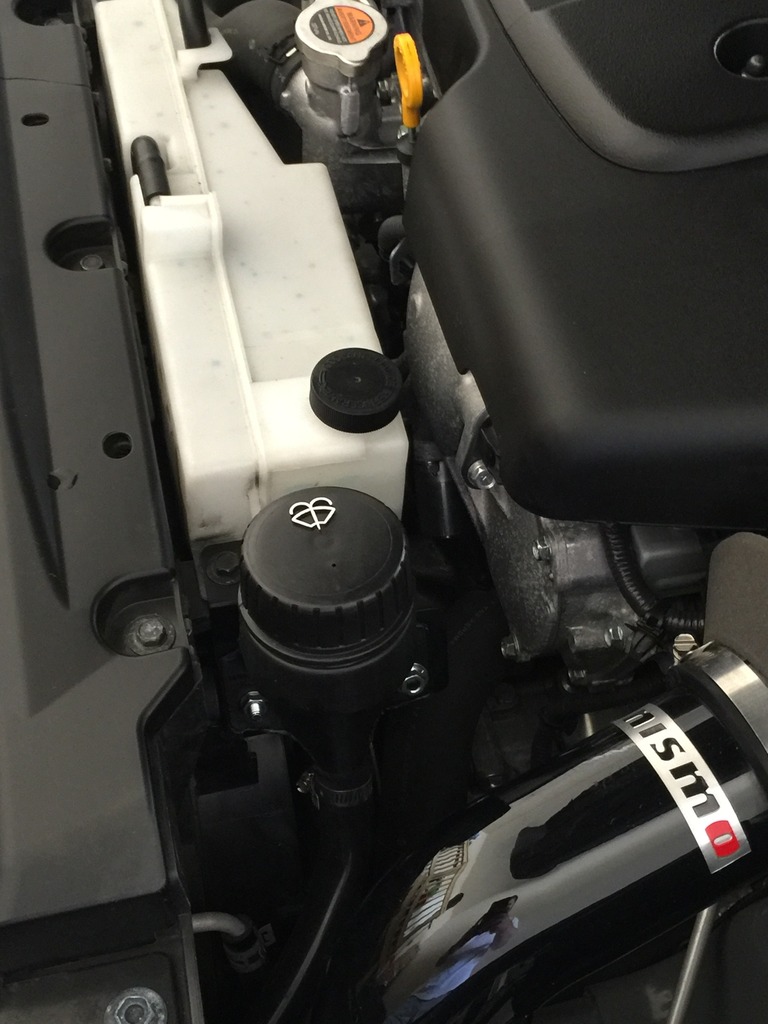
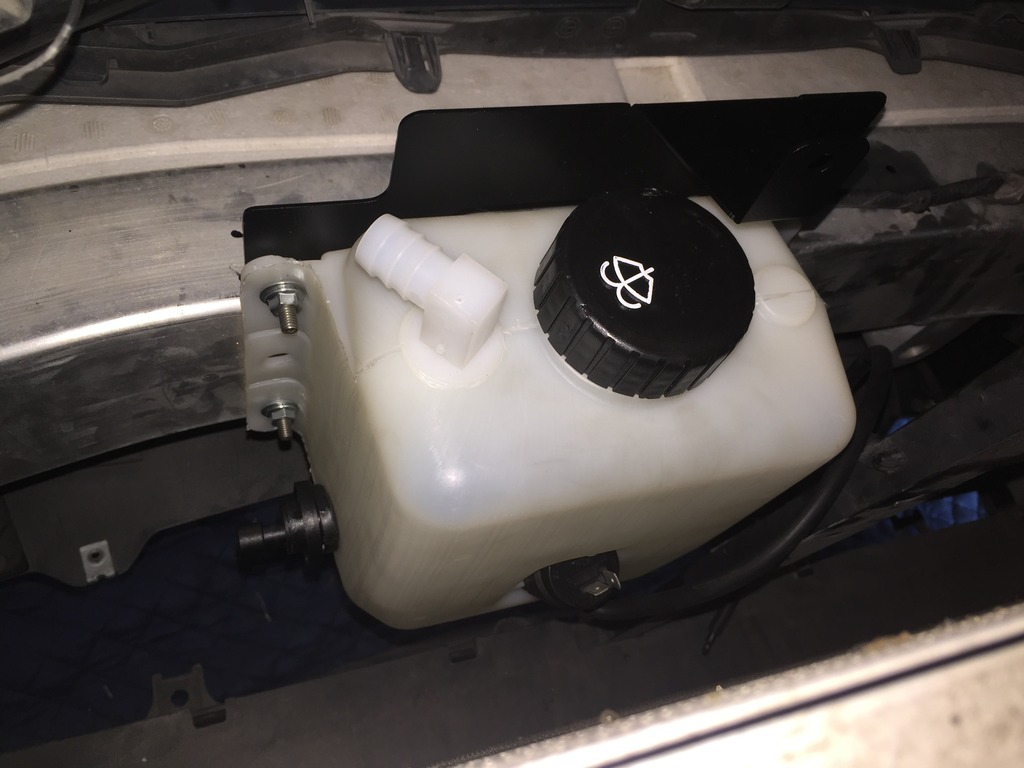
Forgot to post more info on the rest of the installation. The washer fluid reservoir is installed. This again is a semi-custom job but you don't need anything additional other than perhaps some quality, flexible silicone hose to run from the reservoir to the fill cap.
I ended up installing the reservoir just off center to the driver's side and I used the included 370Z non-nimso filler cap on the driver's side as well. Was the easiest, most logical layout.
I ran the silicone tubing from the filler nipple on the reservoir through the stock cold air duct and around to the reservoir which uses the included mount to bolt to the same spot as the radiator overflow tank. Looks totally OEM.
For the wiring, I did not cut the original harness at all. I used small spade-type connectors to insert them into the plug slots. It's a work-around for now as I try to narrow down some OEM style connectors and make a plug-and-play intermediate harness. Everything works and as others will tell you, the orientation of the fluid level sensor is critical to it working right.
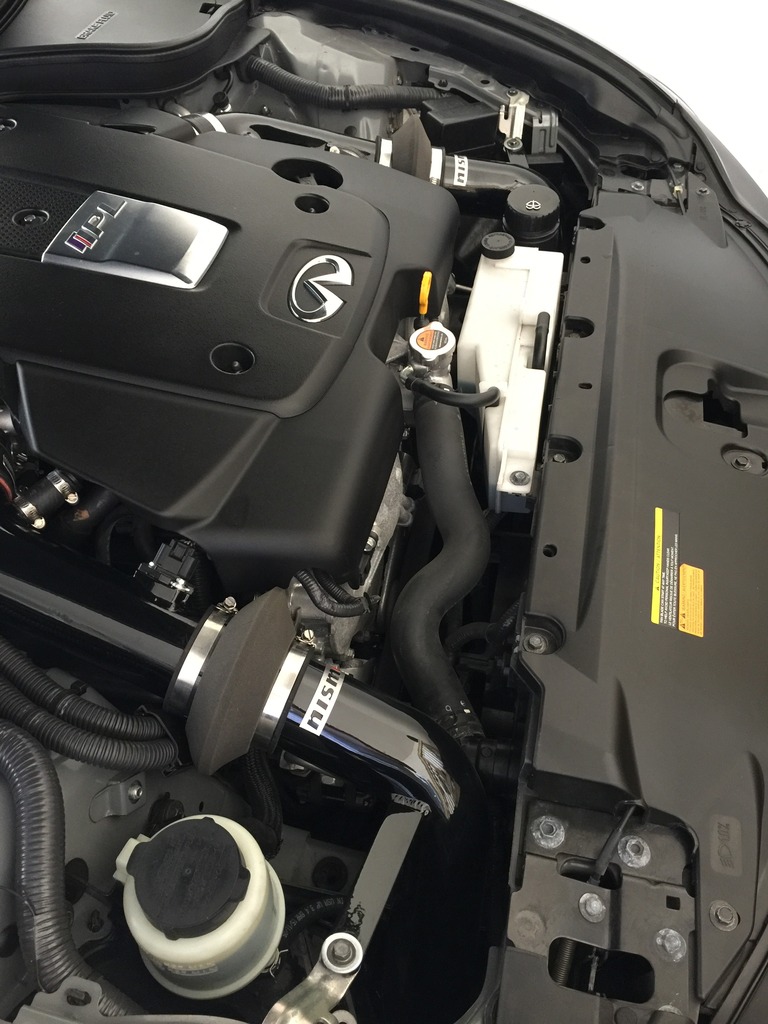
Finished from the engine bay. Look on driver's side and you can see filler cap.
The kit does require you drill a few holes to mount the reservoir bracket. The subframe is aluminum and you can drill through it quite easily with cordless drill. There are two brackets that come with the kit, I'm assuming I used the non-nimso bracket. Because some of the divider plastics are different between the Z and the G, the Nismo bracket and location won't work.
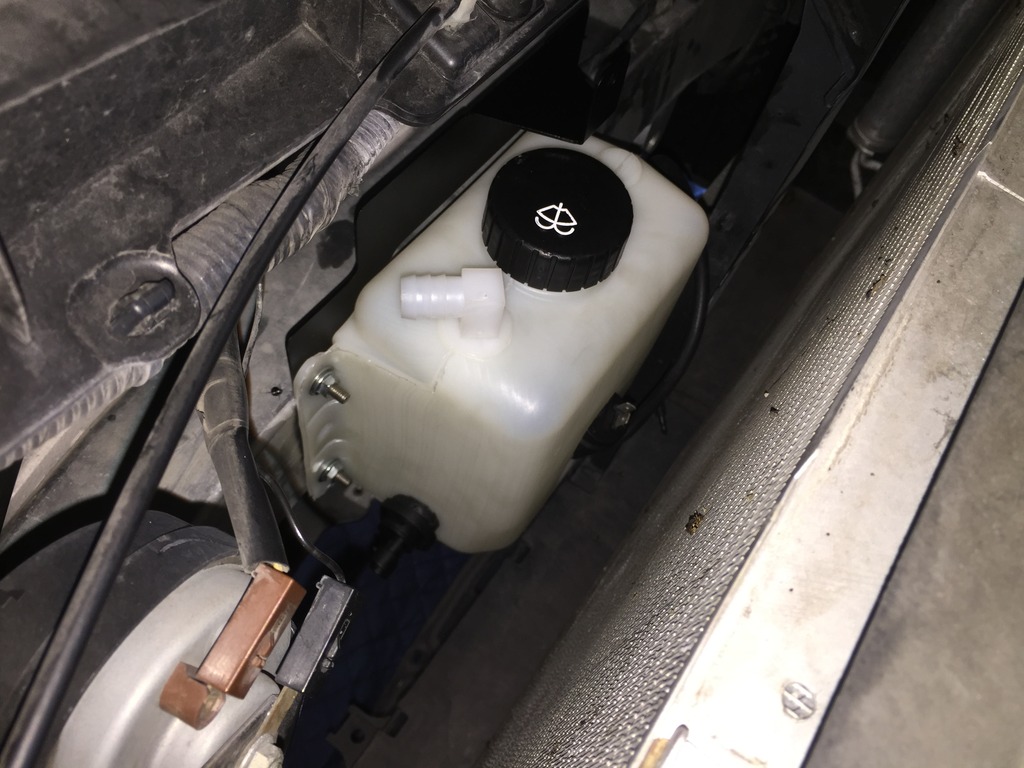
I think the motor on the Nismo kit is actually stronger than the OEM motor. I rarely if ever use the wiper fluid as I tend to use RainX and we don't get the salty road conditions or billions of bugs which necessitate windshield washer fluid. Florida was a different story. Run-ins with the local love bug population can be life altering.
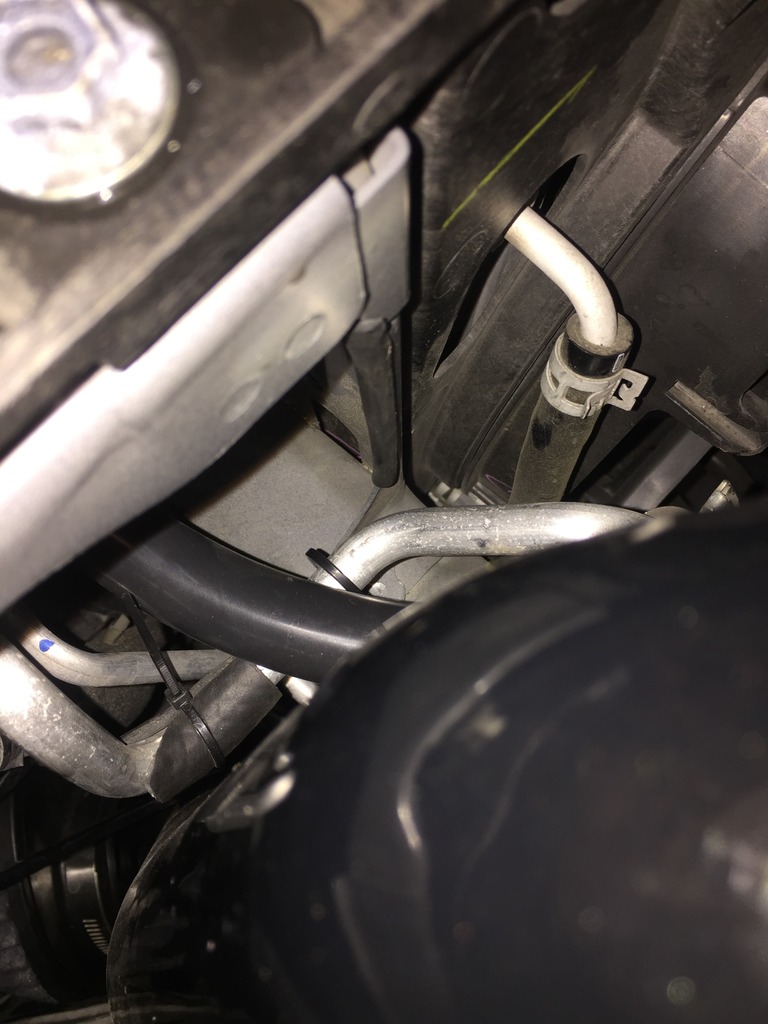
Looking from the bottom...four sheetmetal screws secure it to the crash bar.
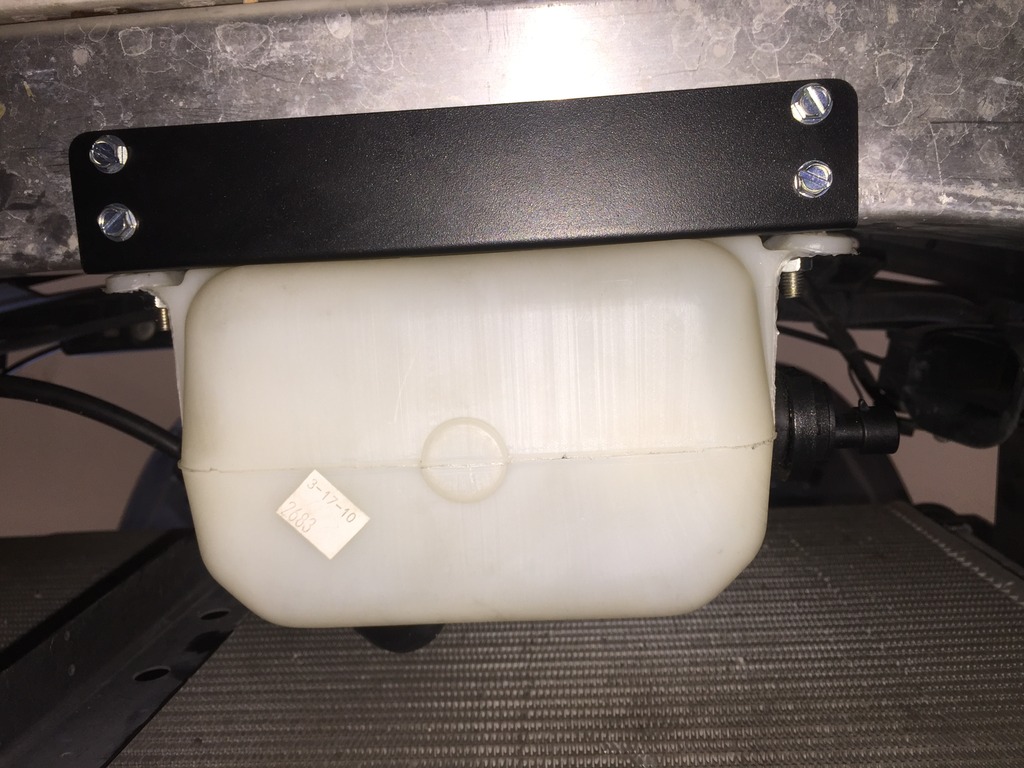
From the top, top of the photo is the front of the car.
You can see the silicone tubing coming through the air inlet duct.
I ended up running the wiring along part of the OEM harness and securing with zip ties. I still need to redo the connectors and sheath all the wiring with a protective sleeve.
I ended up installing the reservoir just off center to the driver's side and I used the included 370Z non-nimso filler cap on the driver's side as well. Was the easiest, most logical layout.
I ran the silicone tubing from the filler nipple on the reservoir through the stock cold air duct and around to the reservoir which uses the included mount to bolt to the same spot as the radiator overflow tank. Looks totally OEM.
For the wiring, I did not cut the original harness at all. I used small spade-type connectors to insert them into the plug slots. It's a work-around for now as I try to narrow down some OEM style connectors and make a plug-and-play intermediate harness. Everything works and as others will tell you, the orientation of the fluid level sensor is critical to it working right.
Finished from the engine bay. Look on driver's side and you can see filler cap.
The kit does require you drill a few holes to mount the reservoir bracket. The subframe is aluminum and you can drill through it quite easily with cordless drill. There are two brackets that come with the kit, I'm assuming I used the non-nimso bracket. Because some of the divider plastics are different between the Z and the G, the Nismo bracket and location won't work.
I think the motor on the Nismo kit is actually stronger than the OEM motor. I rarely if ever use the wiper fluid as I tend to use RainX and we don't get the salty road conditions or billions of bugs which necessitate windshield washer fluid. Florida was a different story. Run-ins with the local love bug population can be life altering.
Looking from the bottom...four sheetmetal screws secure it to the crash bar.
From the top, top of the photo is the front of the car.
You can see the silicone tubing coming through the air inlet duct.
I ended up running the wiring along part of the OEM harness and securing with zip ties. I still need to redo the connectors and sheath all the wiring with a protective sleeve.
07-19-2016, 10:15 AM
#29
Registered User

You did a hell of a job on this project and the end result looks fabulous. Big props for DIY on this. I wish i had the time and place to take on such a task...
The following users liked this post:
ColumbiaSkinny (07-19-2016)