DIY: Make your own emblemless grille
 09-09-2014, 09:35 AM
#1
Registered Member
Thread Starter

Make your own emblemless grille
I was asked to put this here for others to see. Basically I wanted a grill without the logo and really couldn't justify having someone else make one for me. So I made my own using this basic process.
There was another thread on the forum (FOUND IT) that talked bout how to do this using only Bondo. Personally, I have never been a fan of that stuff, especially for something structural. I used a mix of fiberglass cloth, resin and a metal mesh. Less than $20 in materials I believe. I just had these lying around the garage when I did this. I'll try and do a quick DIY here, but I apologize that I did not take pics of every step.
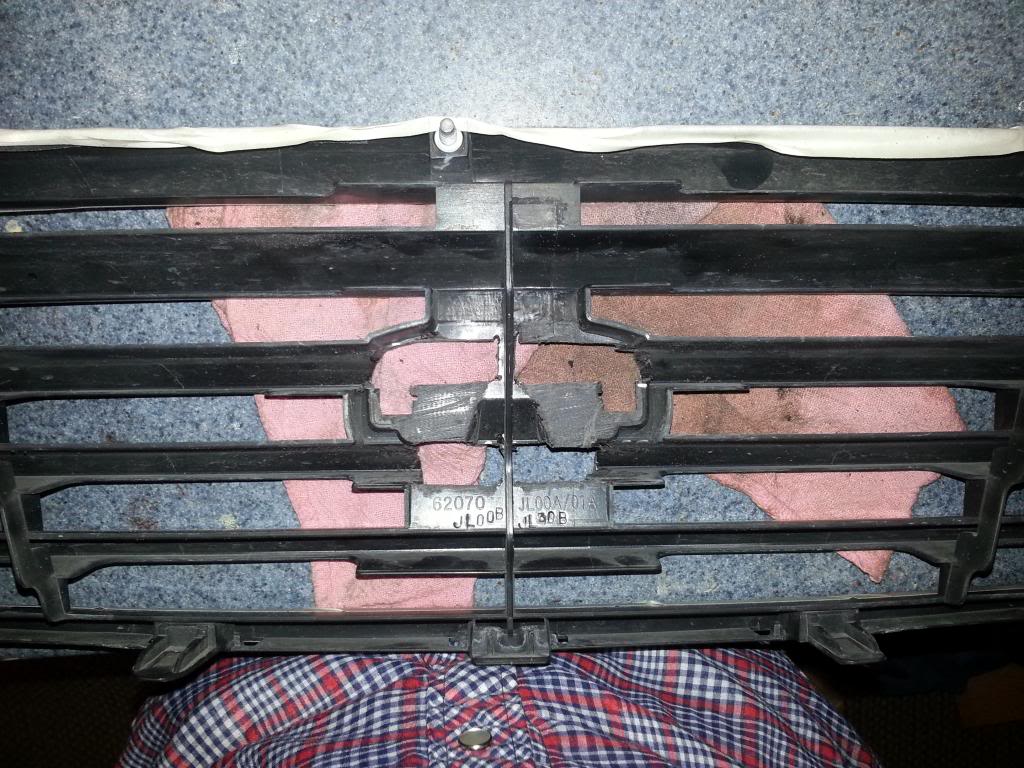
First I cut out the area that housed the emblem (see below). I marked off the area I wanted to remove and used a Dremel with a basic cutting bit to remove this. I updated this later on, but it is a lot easier to completely remove the middle section as well. It is a lot harder to do this if you try and retain the loop portion of the logo. I left the lower connection (w/ part numbers) and the upper 'upside down Y' section attached.
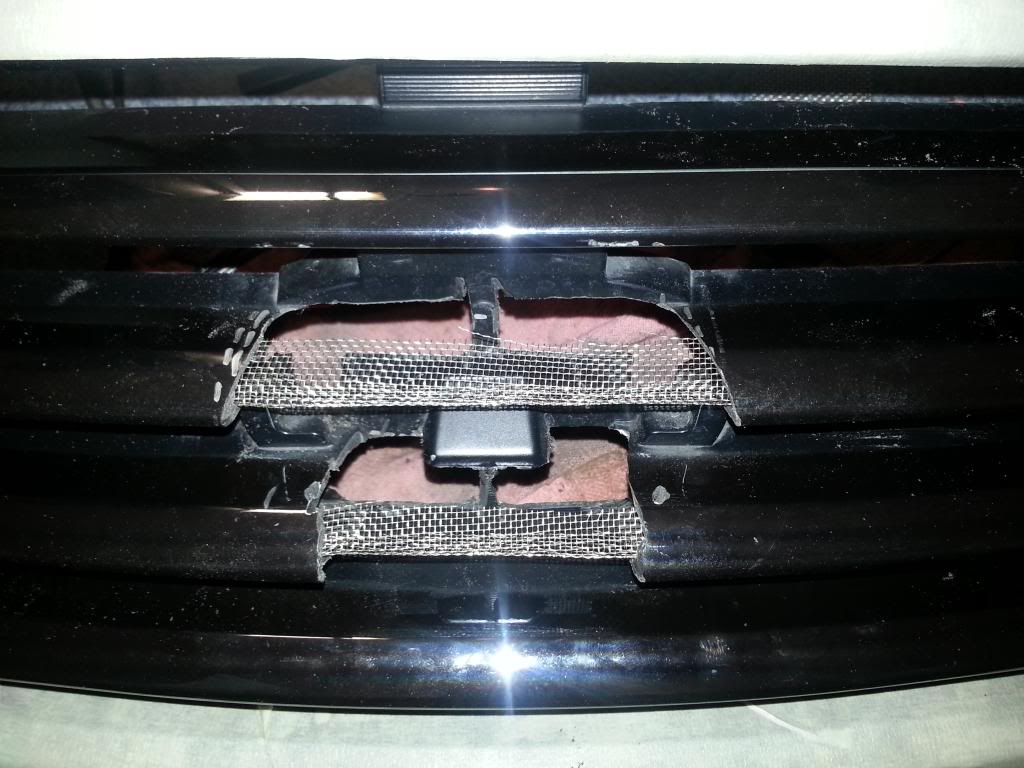
Next I simply ran some painters tape across the front half, connecting the bars across where the emblem was. This essentially made a loose trough that would later form the initial shape. I placed my metal mesh into this area (below pic was a test fit, but this is basically it minus the tape. **PLEASE NOTE: I still had not removed the complete center section at this point. I realized my mistake later after I had already laid some fiberglass**
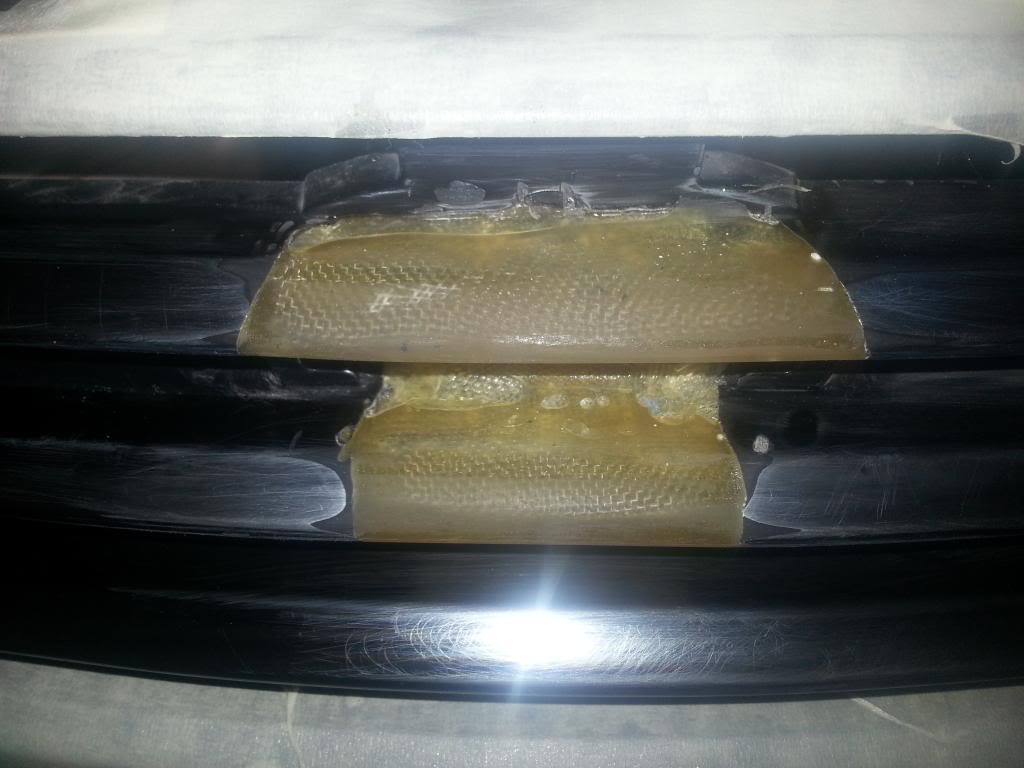
Once you have the front taped up and the mesh in place, begin to lay down layers of resin and fiberglass cloth. Just follow the instructions and This gets messy, so wear gloves and make sure to tape off anything you don't want covered. The resin takes just a few hours to harden, so you can continue after a long lunch or something. You will eventually get something like the below pic.
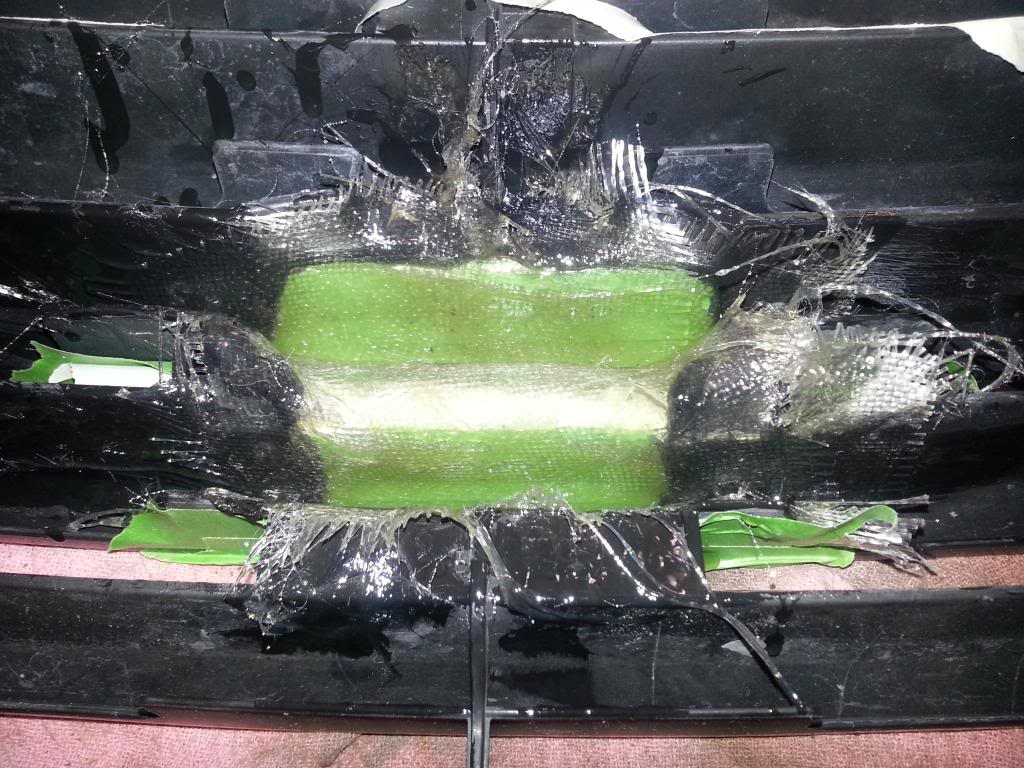
As precaution, I added another mesh screen
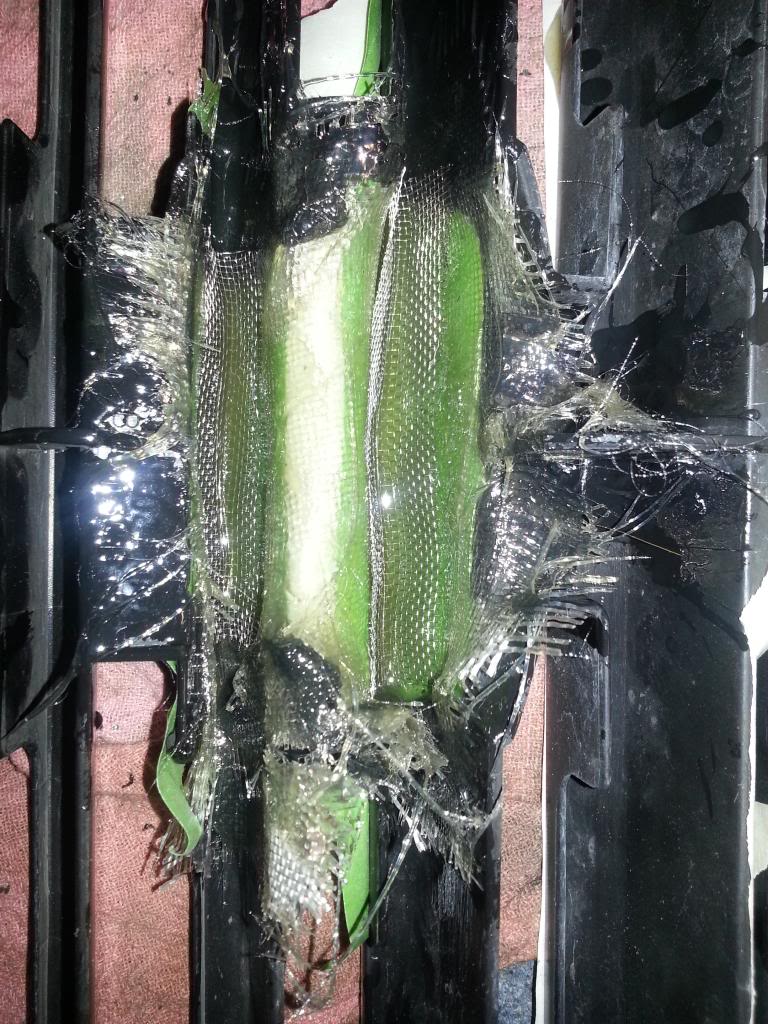
After making a mess, I got this as a result. A little sanding was needed to clear minor imperfections. You can see in the below pic that I made my own little bridge support between the bars using fiberglass. I really didn't like how this looked and would later cut this out and simply rely on the upper and lower supports only. Make sure to clean up the backside of the fiberglass area as well, otherwise it looks pretty bad. I just used a demel with the sanding wheel to grind down the stray fiberglass. Sure, nobody will see it, but you will know its there. If you accidentally get a drop of resin somewhere on the grille, it will pop off once cured, so don't freak out if it hits a spot you forgot to mask off.
After cutting out the center, I did a little more cleaning with a little filler. Make sure that your lines are clean and match the other bars. the (coupe) grille has a small vertical face on the bottom that is easy to sand away if not careful. Sand as smooth as possible across the bars using sandpaper of increasing grits.
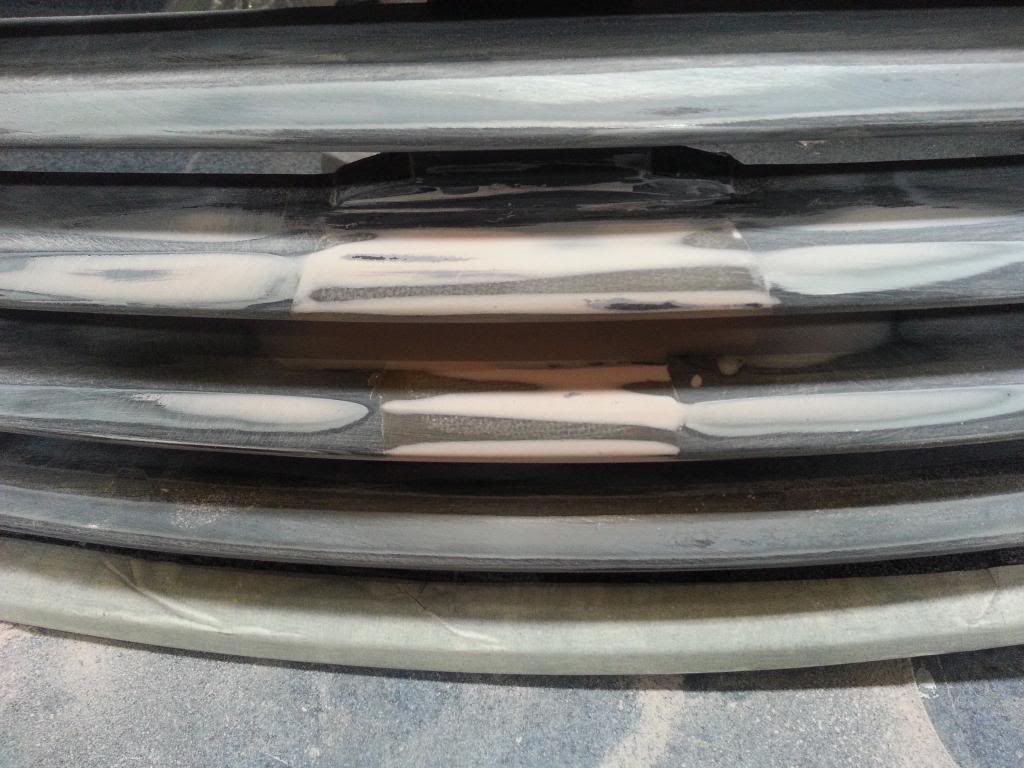
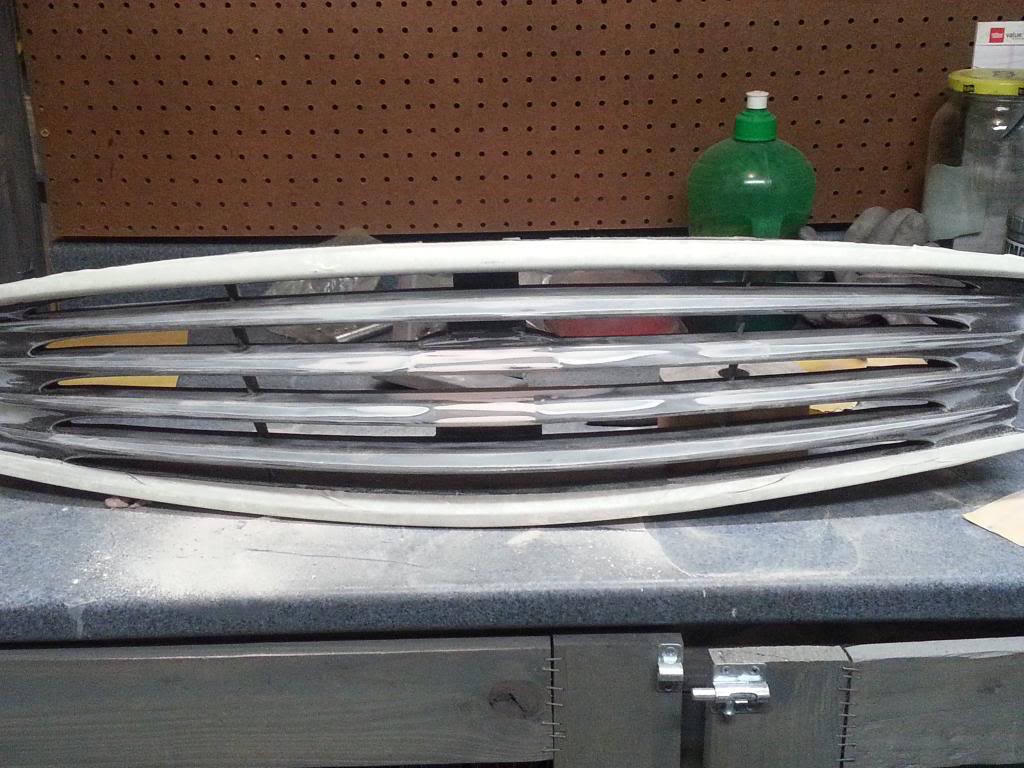
Spray with a plastic compliant primer (most are already) and finally coat in the color of your choice. Before you put this on your bumper, I would suggest painting the part if the bumper that goes up behind the grill, otherwise it will show through. Mine is white and is driving me nuts.
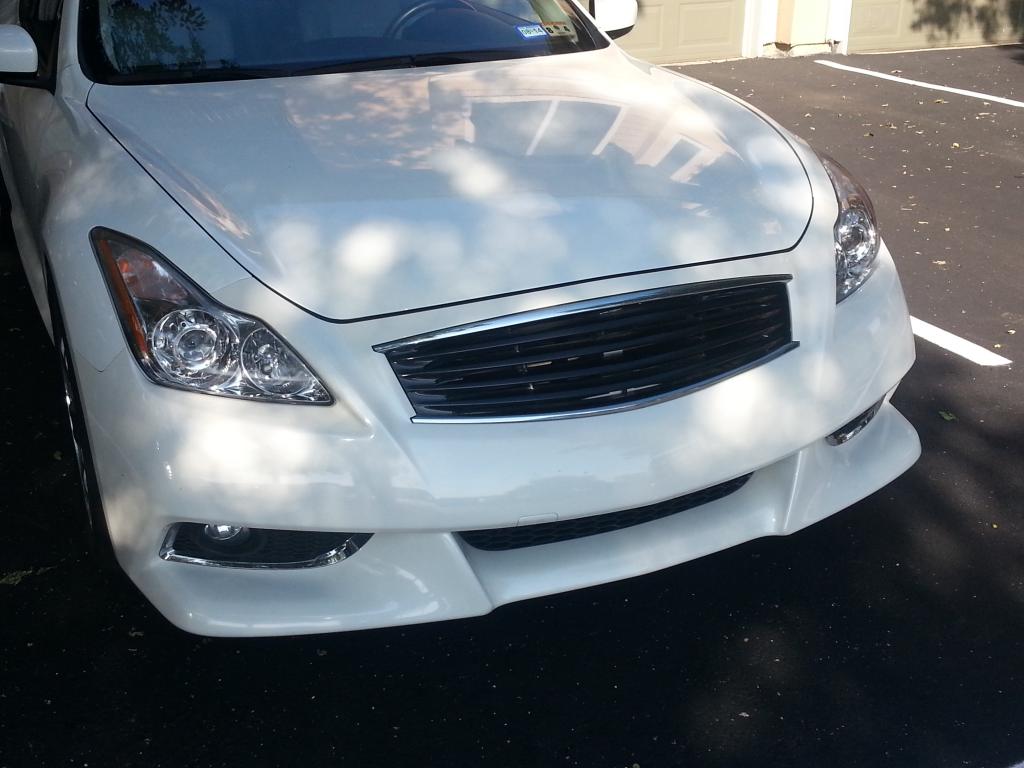
This was my final result. I used auto grade paint and clear, but I really need to buff/polish it out better.
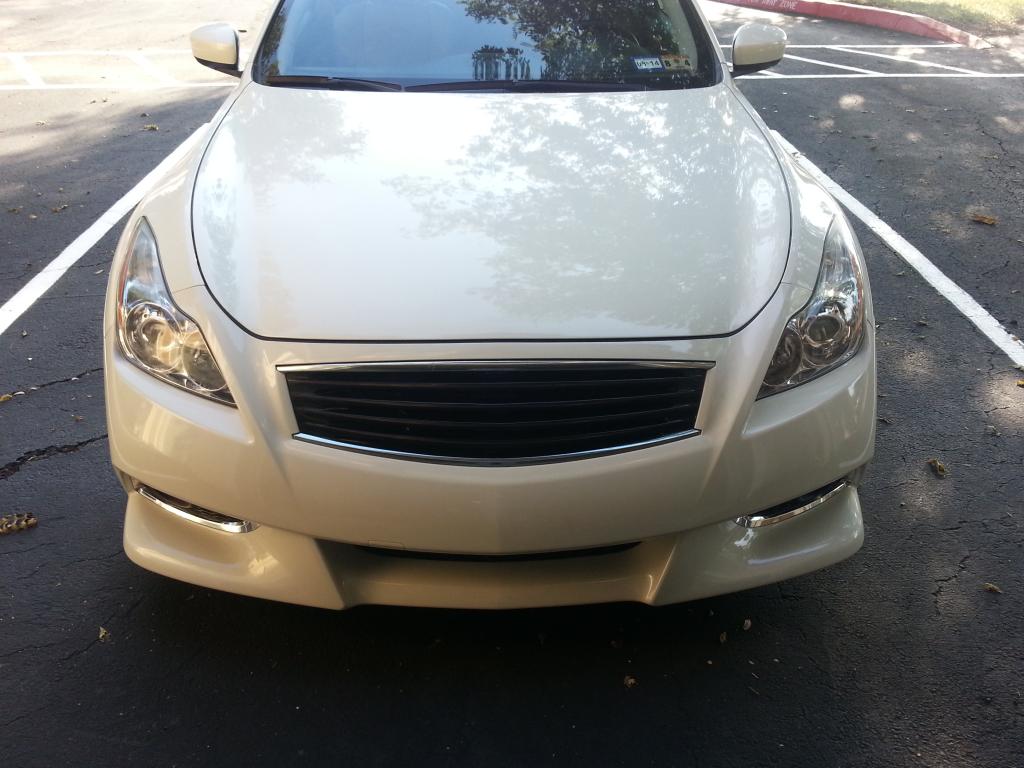
Hopefully this helps someone out. I worked on this over the course of several weeks in my free time. I'm sure it can easily be done in a weekend for those with enough initiative. Sorry if I glazed over anything, I quickly made this at work. I don't check the DIY's too often, but I will try and answer any questions that I can.
Thanks,
Matt
There was another thread on the forum (FOUND IT) that talked bout how to do this using only Bondo. Personally, I have never been a fan of that stuff, especially for something structural. I used a mix of fiberglass cloth, resin and a metal mesh. Less than $20 in materials I believe. I just had these lying around the garage when I did this. I'll try and do a quick DIY here, but I apologize that I did not take pics of every step.
First I cut out the area that housed the emblem (see below). I marked off the area I wanted to remove and used a Dremel with a basic cutting bit to remove this. I updated this later on, but it is a lot easier to completely remove the middle section as well. It is a lot harder to do this if you try and retain the loop portion of the logo. I left the lower connection (w/ part numbers) and the upper 'upside down Y' section attached.
Next I simply ran some painters tape across the front half, connecting the bars across where the emblem was. This essentially made a loose trough that would later form the initial shape. I placed my metal mesh into this area (below pic was a test fit, but this is basically it minus the tape. **PLEASE NOTE: I still had not removed the complete center section at this point. I realized my mistake later after I had already laid some fiberglass**
Once you have the front taped up and the mesh in place, begin to lay down layers of resin and fiberglass cloth. Just follow the instructions and This gets messy, so wear gloves and make sure to tape off anything you don't want covered. The resin takes just a few hours to harden, so you can continue after a long lunch or something. You will eventually get something like the below pic.
As precaution, I added another mesh screen
After making a mess, I got this as a result. A little sanding was needed to clear minor imperfections. You can see in the below pic that I made my own little bridge support between the bars using fiberglass. I really didn't like how this looked and would later cut this out and simply rely on the upper and lower supports only. Make sure to clean up the backside of the fiberglass area as well, otherwise it looks pretty bad. I just used a demel with the sanding wheel to grind down the stray fiberglass. Sure, nobody will see it, but you will know its there. If you accidentally get a drop of resin somewhere on the grille, it will pop off once cured, so don't freak out if it hits a spot you forgot to mask off.
After cutting out the center, I did a little more cleaning with a little filler. Make sure that your lines are clean and match the other bars. the (coupe) grille has a small vertical face on the bottom that is easy to sand away if not careful. Sand as smooth as possible across the bars using sandpaper of increasing grits.
Spray with a plastic compliant primer (most are already) and finally coat in the color of your choice. Before you put this on your bumper, I would suggest painting the part if the bumper that goes up behind the grill, otherwise it will show through. Mine is white and is driving me nuts.
This was my final result. I used auto grade paint and clear, but I really need to buff/polish it out better.
Hopefully this helps someone out. I worked on this over the course of several weeks in my free time. I'm sure it can easily be done in a weekend for those with enough initiative. Sorry if I glazed over anything, I quickly made this at work. I don't check the DIY's too often, but I will try and answer any questions that I can.
Thanks,
Matt

The following 3 users liked this post by Mattimus:

The following users liked this post:
Mattimus (09-09-2014)


Thread
Thread Starter
Forum
Replies
Last Post
bingpwr
Private Classifieds
1
09-04-2015 09:44 PM