DIY: How to install the GT-Spec Tower Strut Bar
 05-24-2009, 12:22 PM
#1
Registered User
Thread Starter

DIY: How to install the GT-Spec Tower Strut Bar
So, this hasn't been posted yet and it's relatively easy...if you do it right the first time.
The items you will need for this install:
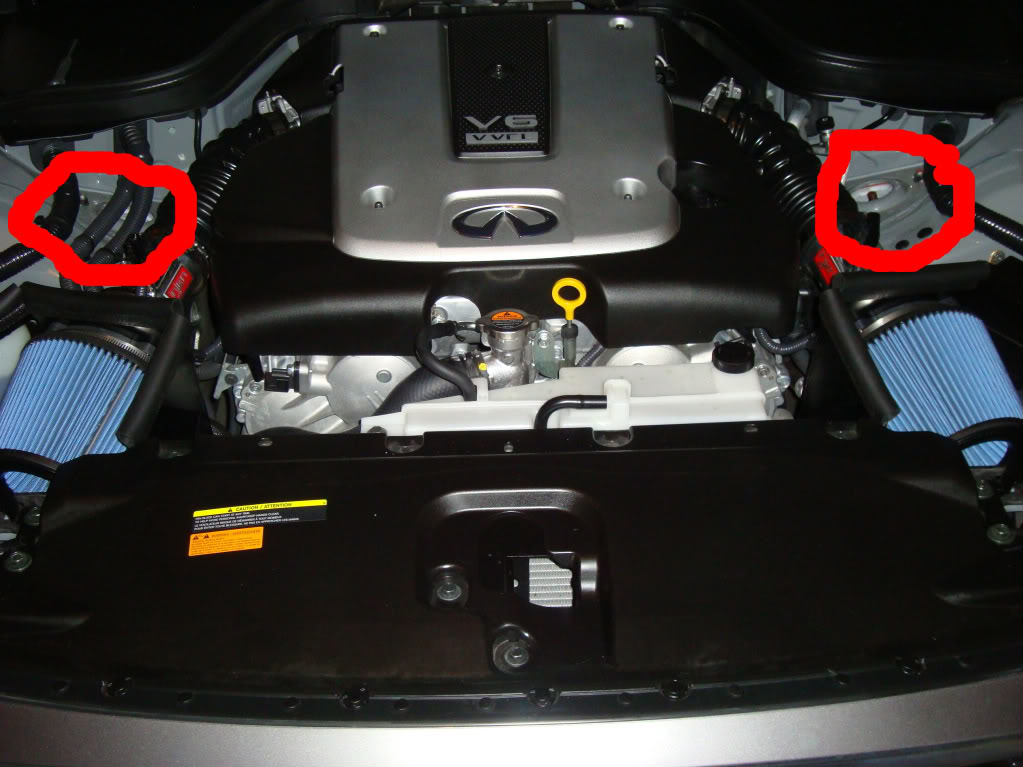
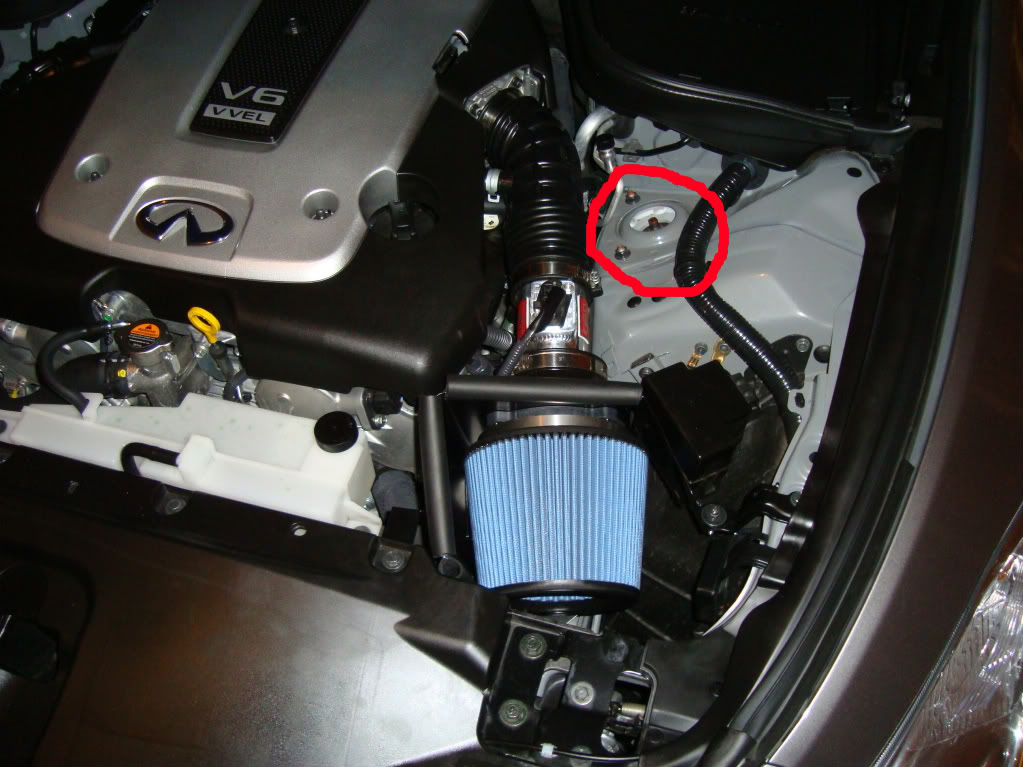
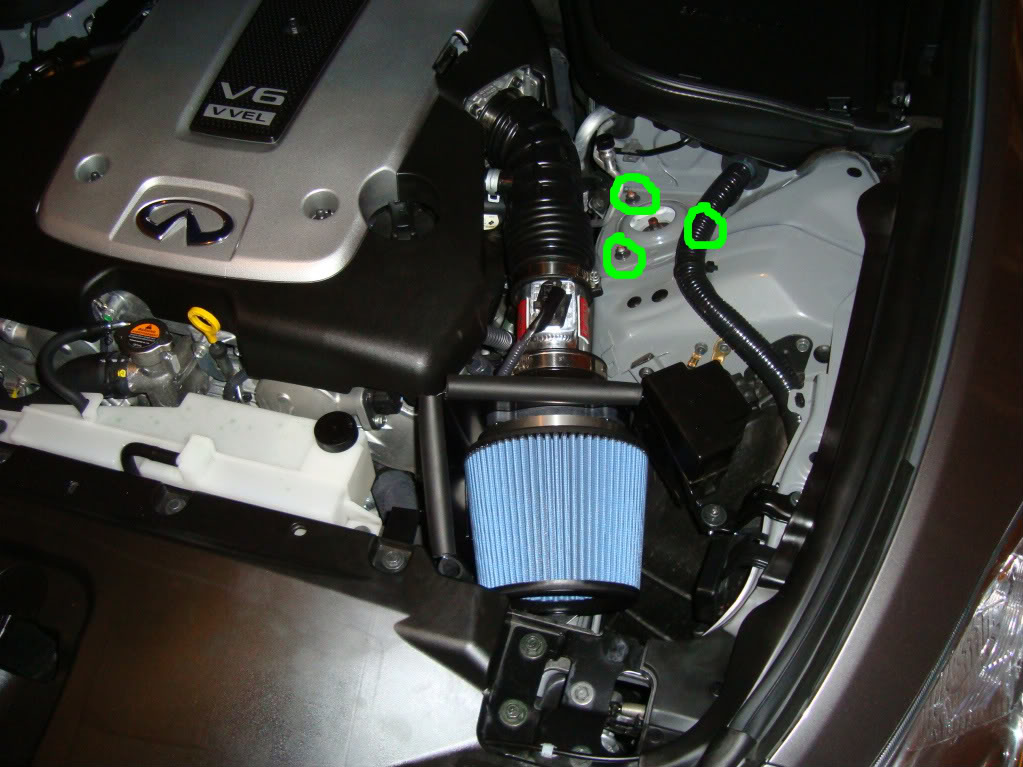
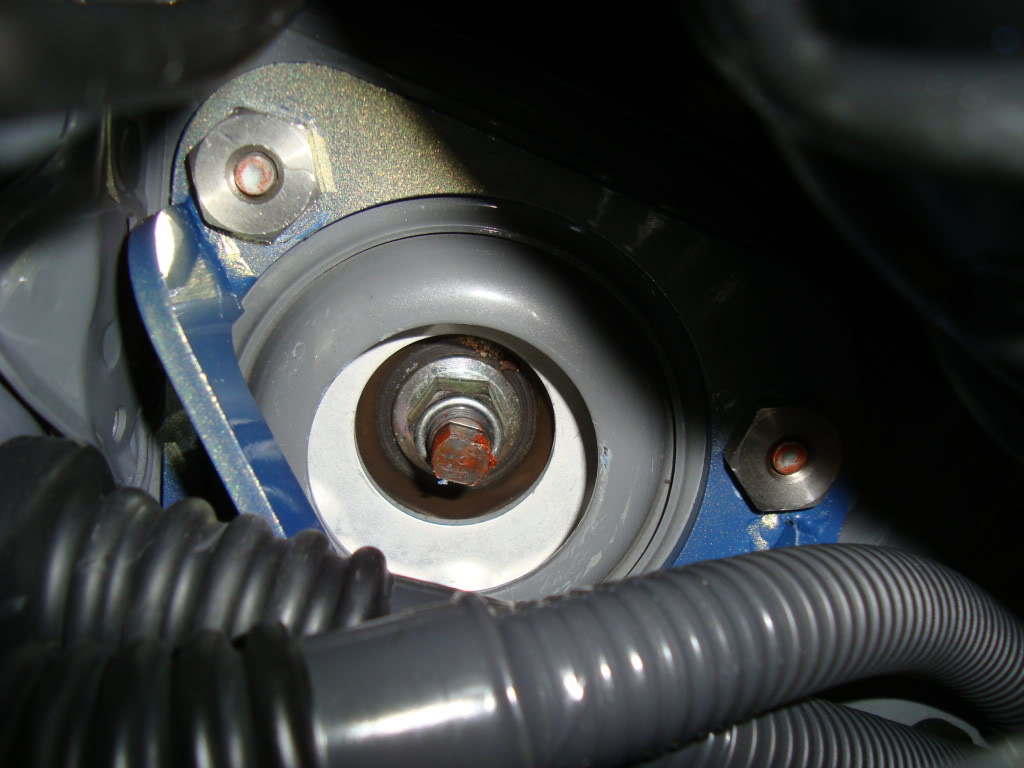
Next, locate the 3 bolts in the shape of a triangle. You will loosen these with a 12mm socket with extension. Repeat on the passenger side. Save these bolts should you want to return to stock.
Next, attach the PASSENGER side bracket first. You will have to be creative and thread the bracket through these 3 hoses that come from the battery compartment.
Use 3 of the 6 supplied 3/4" bolts that come with the GTSpec bar. Hand tighten these. Do NOT firmly tighten at this point.
Next attach the GTSpec bar to the PASSENGER side bracket that has been attached to the strut tower. Again, only hand tighten. You will torque everything down tight at the very end.
Next, you will attach the DRIVER side end of the GTSpec strut bar to the BRACKET that is yet UNATTACHED to the strut tower. Hand tighten the bar to the bracket.
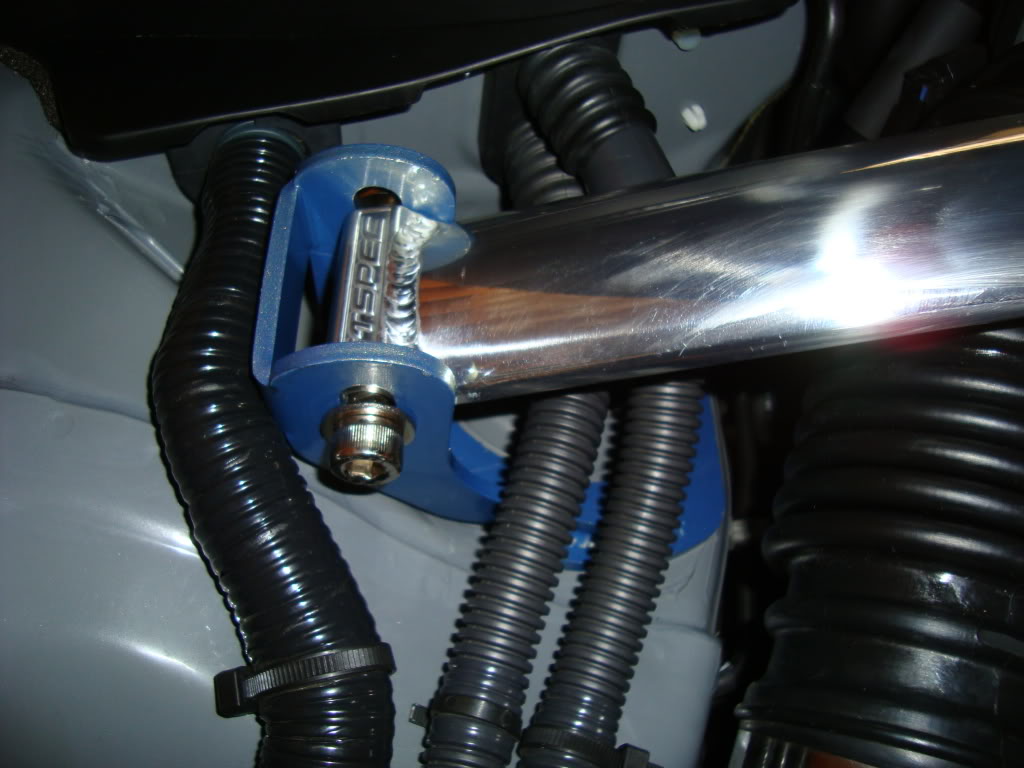
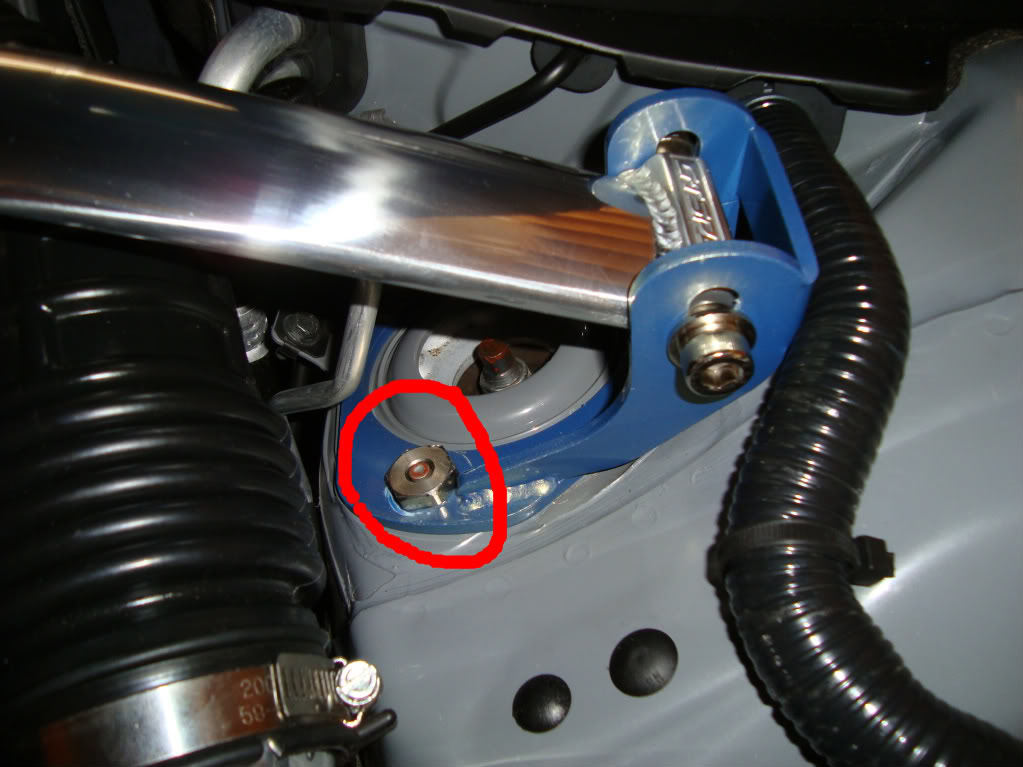
FINALLY, you will attach the DRIVER side bracket with attached GTSpec bar to the strut tower. This will take some pushing, but it DOES fit. Hand tighten the remaining 3 supplied 3/4" bolts. (Note: on my installation, the bolt circled in red was the most difficult to tighten on the final tightening of the bolts.)
Now, go through and tighten the blue brackets first using your 3/4" socket (or 3/4" wrench since some of the bolts are too close to the bracket for the socket to fit). You will have to be creative on how you tighten these. HamstersG recommended a 3/4" Crows Foot Wrench (which I didn't have on hand, but is a PERFECT idea). Torque these down to 28 ft/lb (thanks Black Betty for the specification).
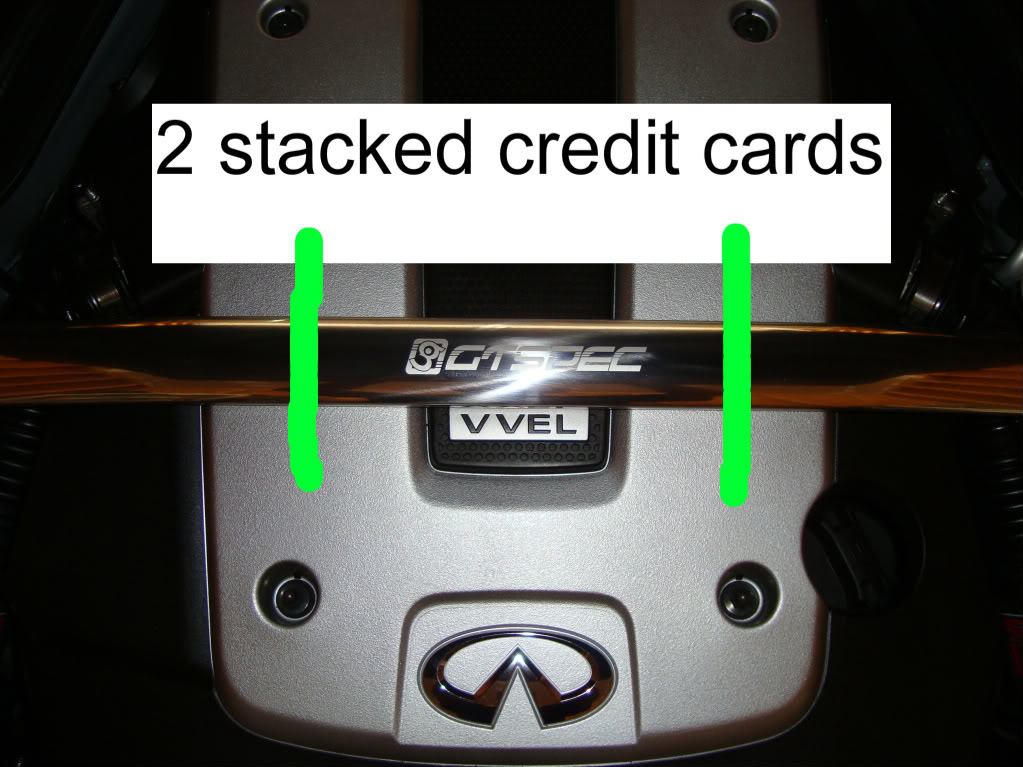
Then, insert 2 credit cards underneath the GTSpec bar on the right and left sides on top of your engine cover. This has been shown to be proper spacing.
FINALLY....using your 5/16 Hex/Allen wrench and your 11/16 wrench, and keeping the 2 credit cards under the bar, go through and tighten the bar to the passenger and driver side brackets.
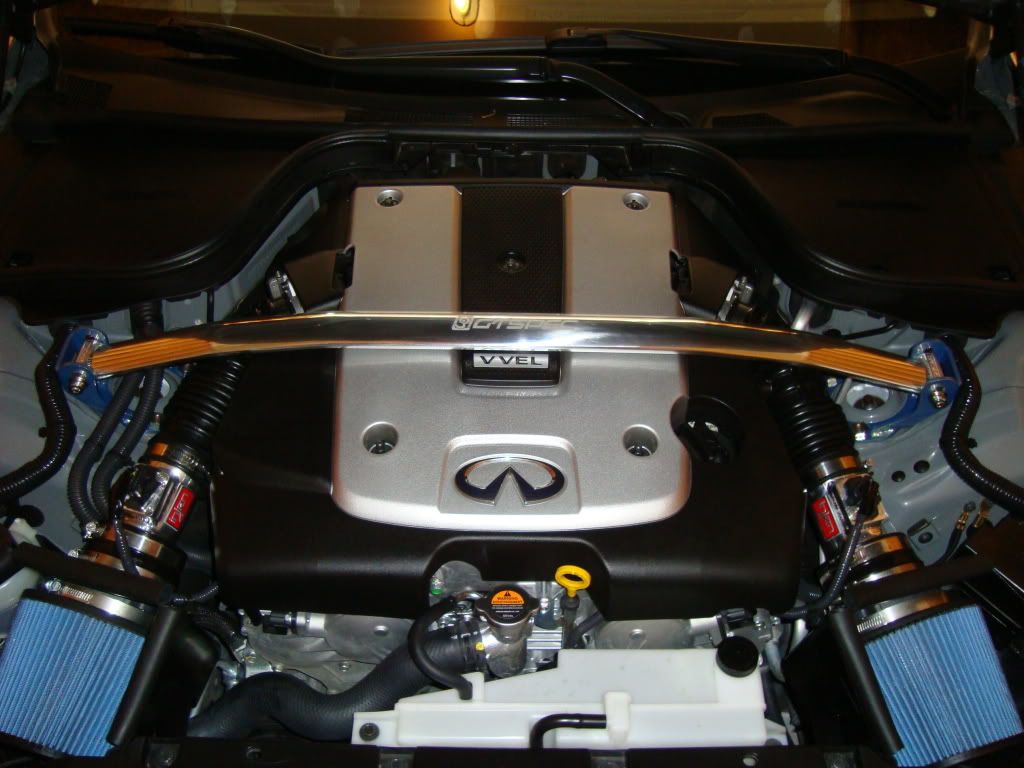
THERE YOU GO. YOU'RE DONE!
The items you will need for this install:
- Ratchet with socket extension
- 12mm socket
- 3/4" socket
- 3/4" wrench
- 11/16" wrench
- 5/16" Hex/Allen wrench
- 4 Credit Cards
- GT Spec Front Tower Strut Bar (from the vendor of your choosing)
Next, locate the 3 bolts in the shape of a triangle. You will loosen these with a 12mm socket with extension. Repeat on the passenger side. Save these bolts should you want to return to stock.
Next, attach the PASSENGER side bracket first. You will have to be creative and thread the bracket through these 3 hoses that come from the battery compartment.
Use 3 of the 6 supplied 3/4" bolts that come with the GTSpec bar. Hand tighten these. Do NOT firmly tighten at this point.
Next attach the GTSpec bar to the PASSENGER side bracket that has been attached to the strut tower. Again, only hand tighten. You will torque everything down tight at the very end.
Next, you will attach the DRIVER side end of the GTSpec strut bar to the BRACKET that is yet UNATTACHED to the strut tower. Hand tighten the bar to the bracket.
FINALLY, you will attach the DRIVER side bracket with attached GTSpec bar to the strut tower. This will take some pushing, but it DOES fit. Hand tighten the remaining 3 supplied 3/4" bolts. (Note: on my installation, the bolt circled in red was the most difficult to tighten on the final tightening of the bolts.)
Now, go through and tighten the blue brackets first using your 3/4" socket (or 3/4" wrench since some of the bolts are too close to the bracket for the socket to fit). You will have to be creative on how you tighten these. HamstersG recommended a 3/4" Crows Foot Wrench (which I didn't have on hand, but is a PERFECT idea). Torque these down to 28 ft/lb (thanks Black Betty for the specification).
Then, insert 2 credit cards underneath the GTSpec bar on the right and left sides on top of your engine cover. This has been shown to be proper spacing.
FINALLY....using your 5/16 Hex/Allen wrench and your 11/16 wrench, and keeping the 2 credit cards under the bar, go through and tighten the bar to the passenger and driver side brackets.
THERE YOU GO. YOU'RE DONE!
Last edited by KnoxvilleG37; 10-19-2009 at 07:07 PM.

The following 2 users liked this post by KnoxvilleG37:
Baadnewsburr (03-18-2015),
PNW_IPL (03-24-2016)
05-24-2009, 12:39 PM
#2
Administrator

very nice write up thanks for dedicating the time..
just curious, do your credit cards still function?
just curious, do your credit cards still function?
 05-24-2009, 03:39 PM
#6
Registered User
Thread Starter
")
Yeah, iPhoto sucks in some ways, so I had to label them on Photobucket, but it works and serves its purpose. At least I could give back to the myG37 family.
Trending Topics

 05-24-2009, 10:15 PM
#10
Nice job on the DIY. Be nice if all these got stickied, but I see several good ones that never make it to that elite status. 
With 2-credit card method I found that the bar rubbed the OEM engine cover but that is better than the top of the bar hitting. Once I lowered the OEM enginer cover, I was able to go 3 credit cards and not rub the top or bottom of the bar.
With 2-credit card method I found that the bar rubbed the OEM engine cover but that is better than the top of the bar hitting. Once I lowered the OEM enginer cover, I was able to go 3 credit cards and not rub the top or bottom of the bar.

 05-25-2009, 10:46 AM
#13
Registered User
Thread Starter
I'll go check my bar today and see if it's been rubbing.....so far no issues, but I'll update this afternoon. Good luck on your install!
05-25-2009, 11:33 AM
#14
HamstersG suggested sprinkling baby powder on the bar to see if it transferred to the hood liner upon closing. I recall his did transfer some of the time (think it depended whether he dropped the hood or closed it gently). A search for "baby powder" should find the thread.
Last edited by Mid-Life Crisis; 05-25-2009 at 11:34 AM. Reason: .
05-25-2009, 01:05 PM
#15
Yeah. Just a little. Good news for me is that you can't see the rubbed area unless you take the bar off. It is very minor and it is where the rear bottom edge of the bar hits the OEM cover while driving. Get in your car and with the hood open, you will see that the engine moves a little as expected when you rev it up. This is what causes the rubbing.
With the OEM engine cover, you got four choices that I know of:
1) Get lucky. A few have reported no rubbing top or bottom with standard install.
2) Lower the engine cover (see my DIY) and run 3 credit card method. This worked for me.
3) Place a small strip of clear bra material on the OEM engine cover directly under the rear edge of the brace. This will protect your engine cover paint and not be seen by those looking in your engine bay.
4) Set the bar higher and clear bra the top of the strut bar. I think several have done this, but have not seen any pictures.