DIY: How to remove interior door panel.
 02-05-2009, 09:47 PM
#1

How to remove interior door panel.
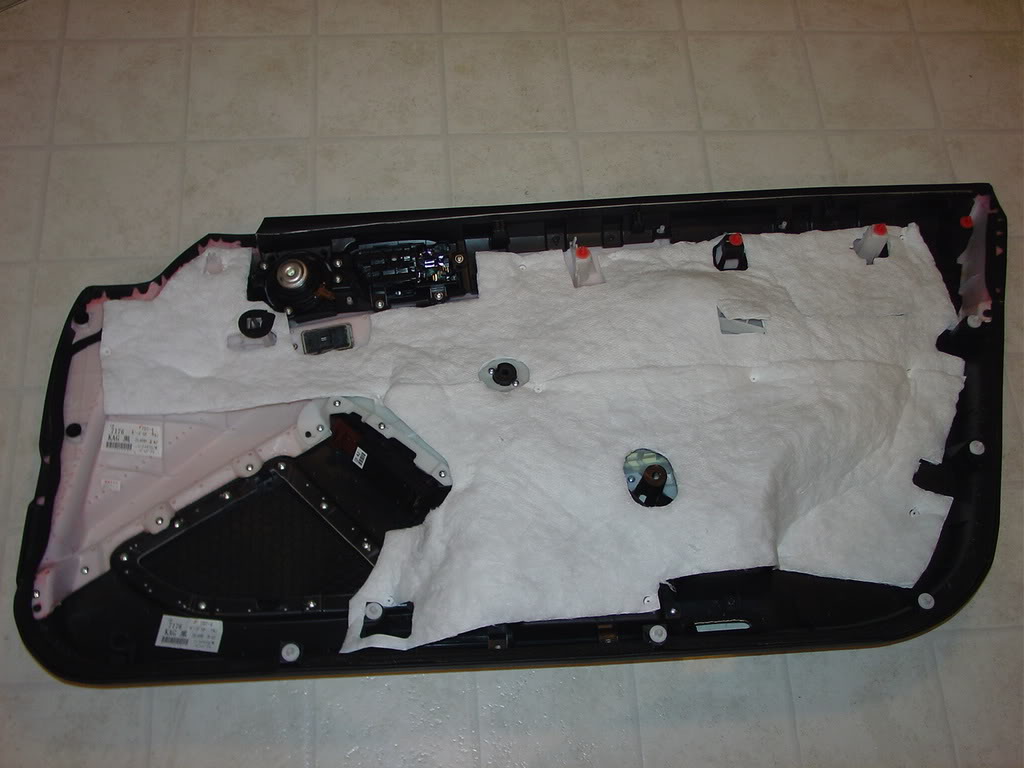
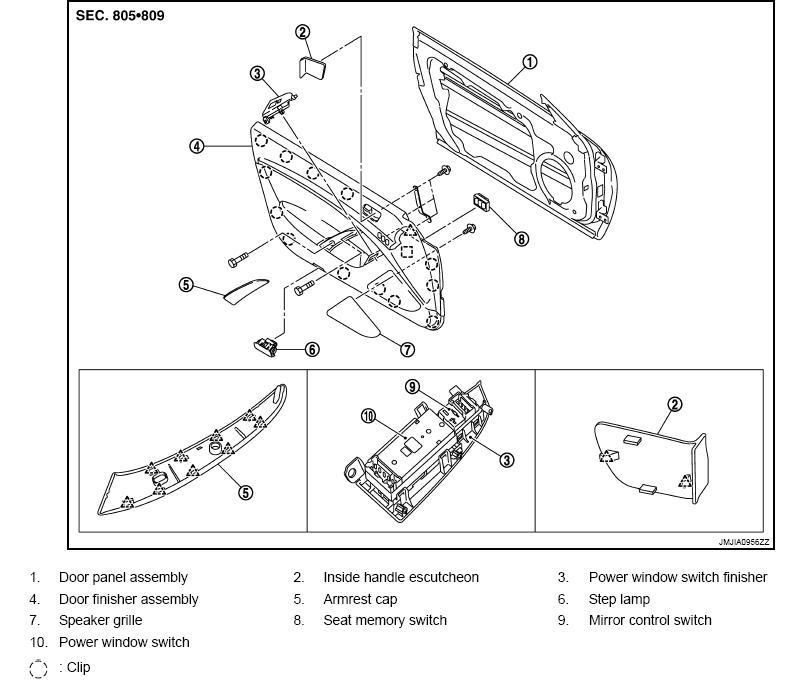
To make it real easy, just follow these instructions. Almost all the bolts are 10mm.

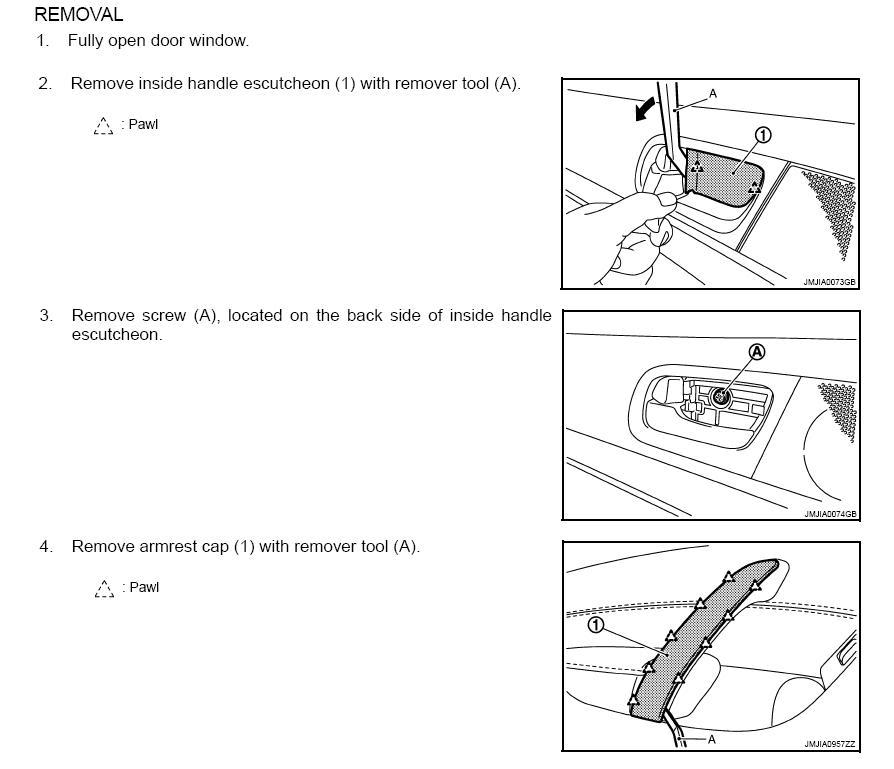

Here are some pictures to help you out. You don't need any tools to remove this piece. Just use your fingers.
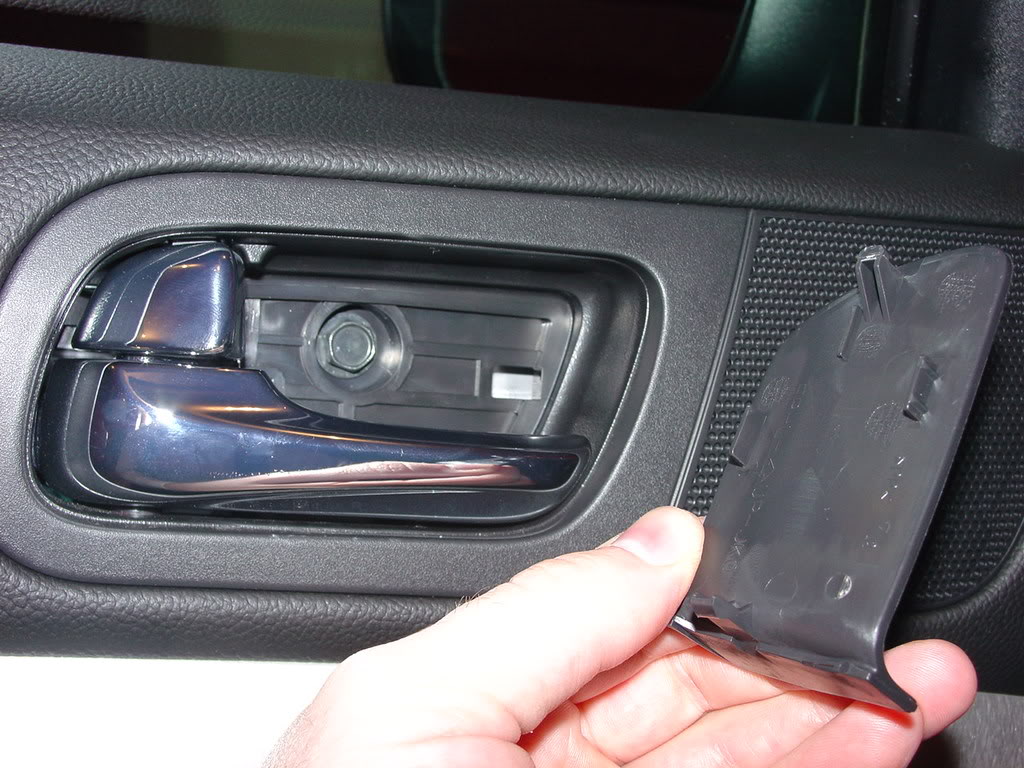
A screwdriver with the tip covered in something soft can be used at the bottom (there's a groove). Pry out the bottom and then work your way to the top.

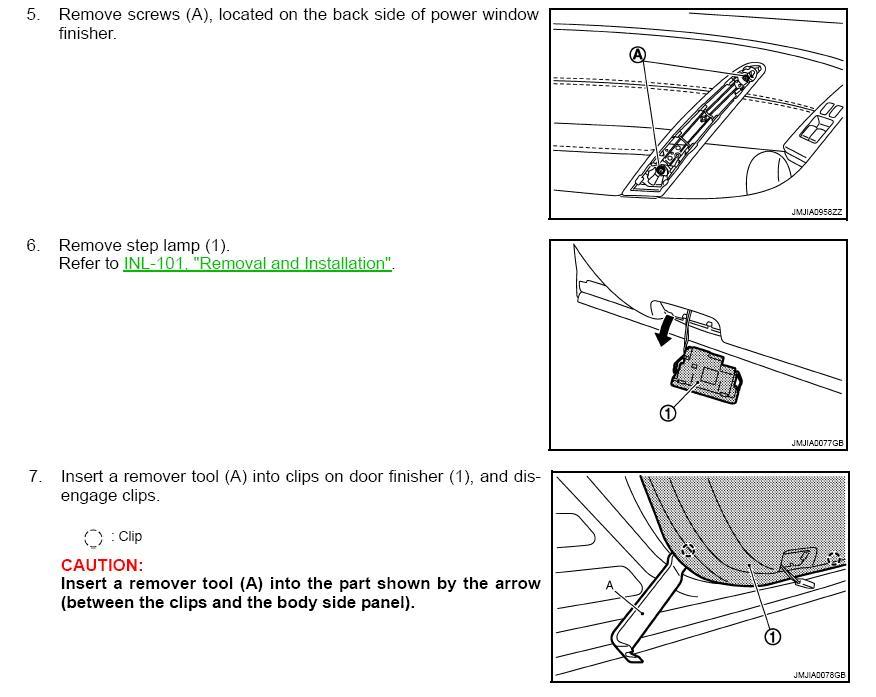
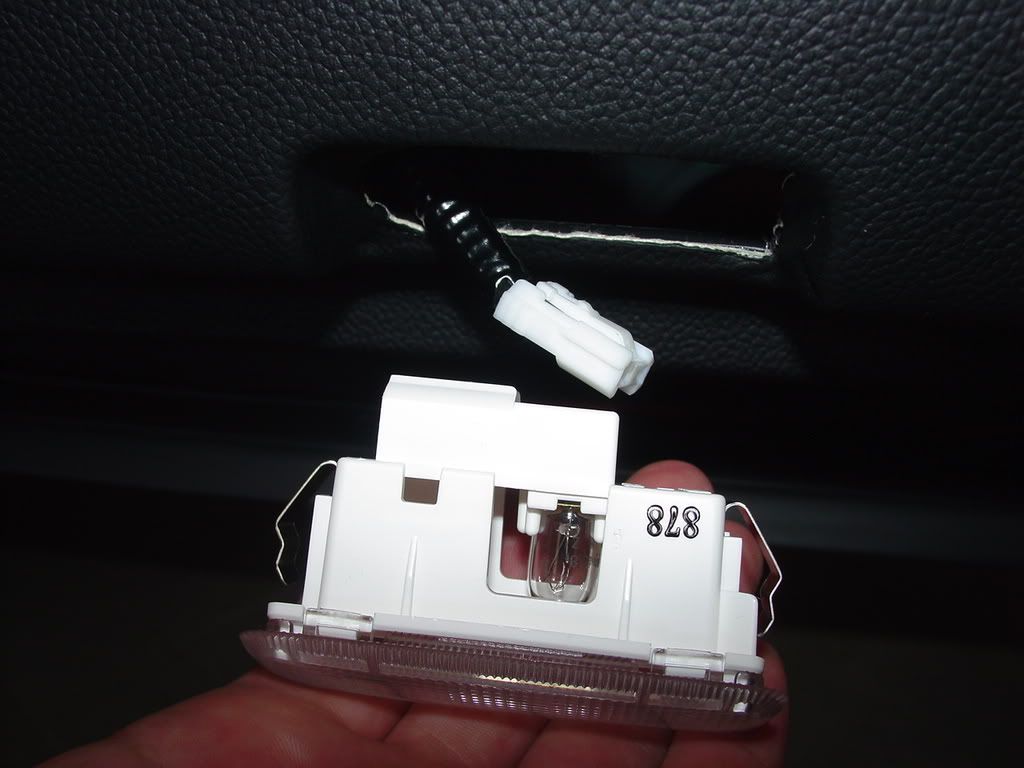
The light pops right out. Use a small flat screwdriver on the bottom.
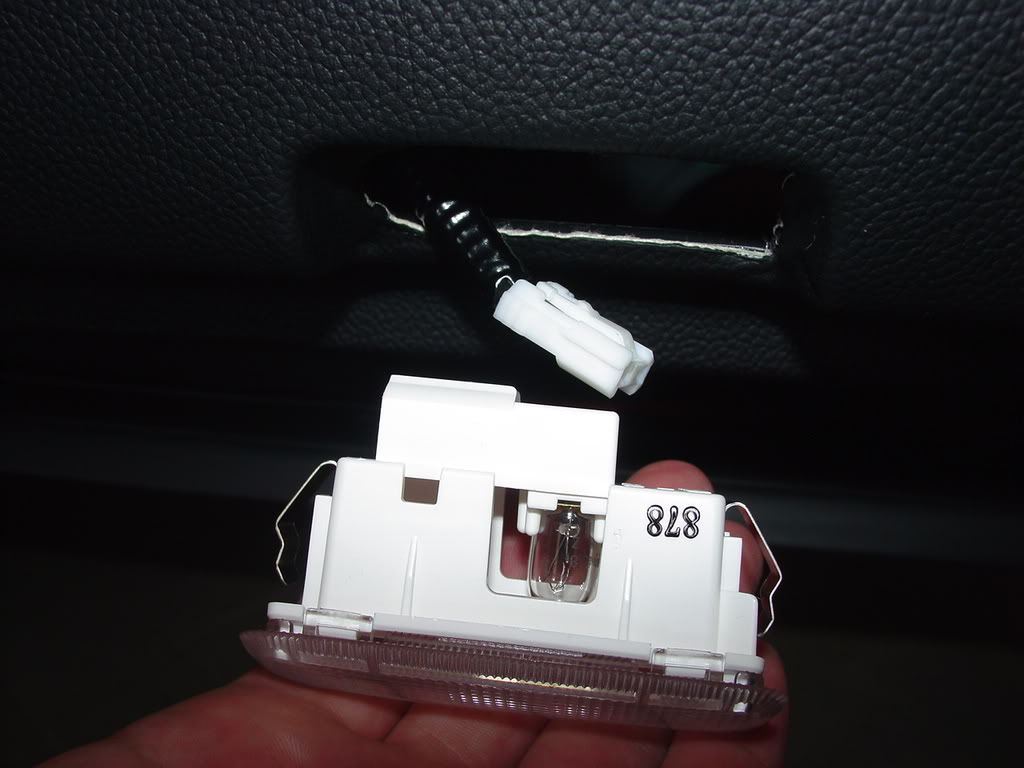
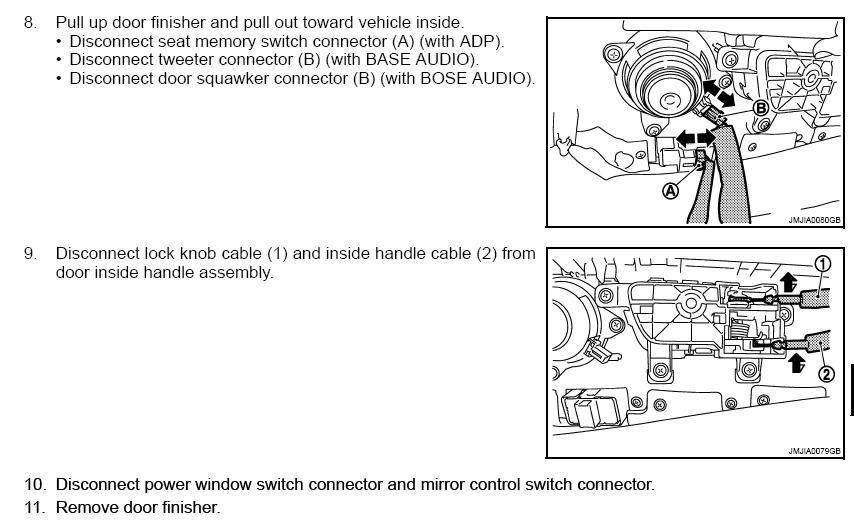
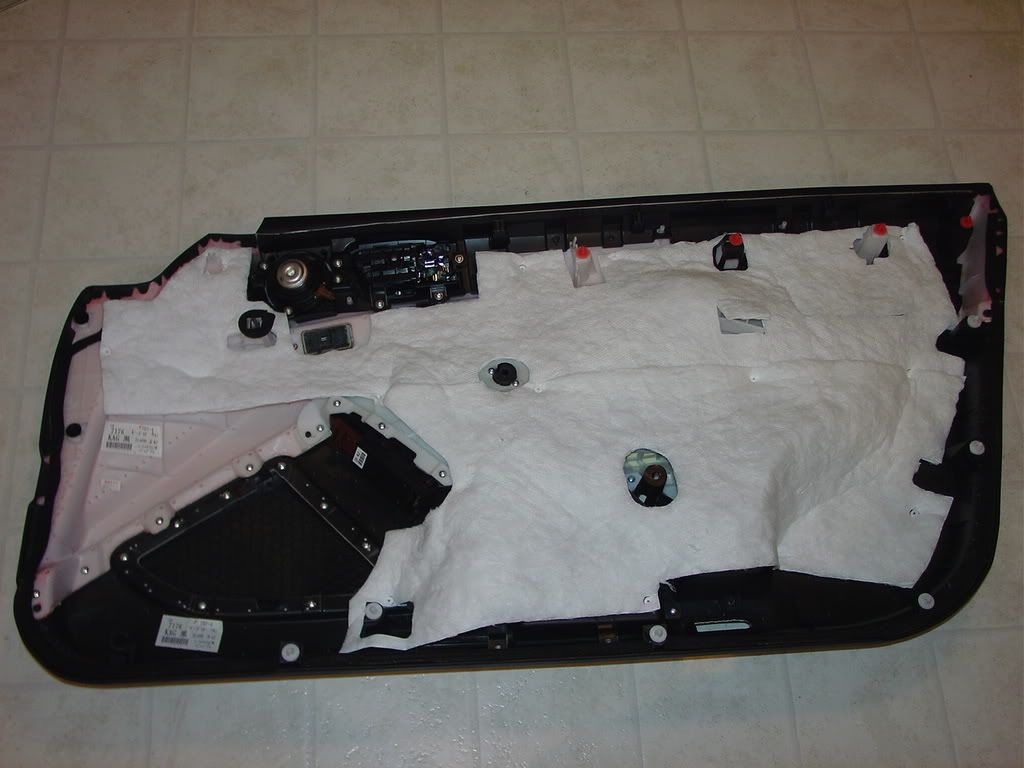
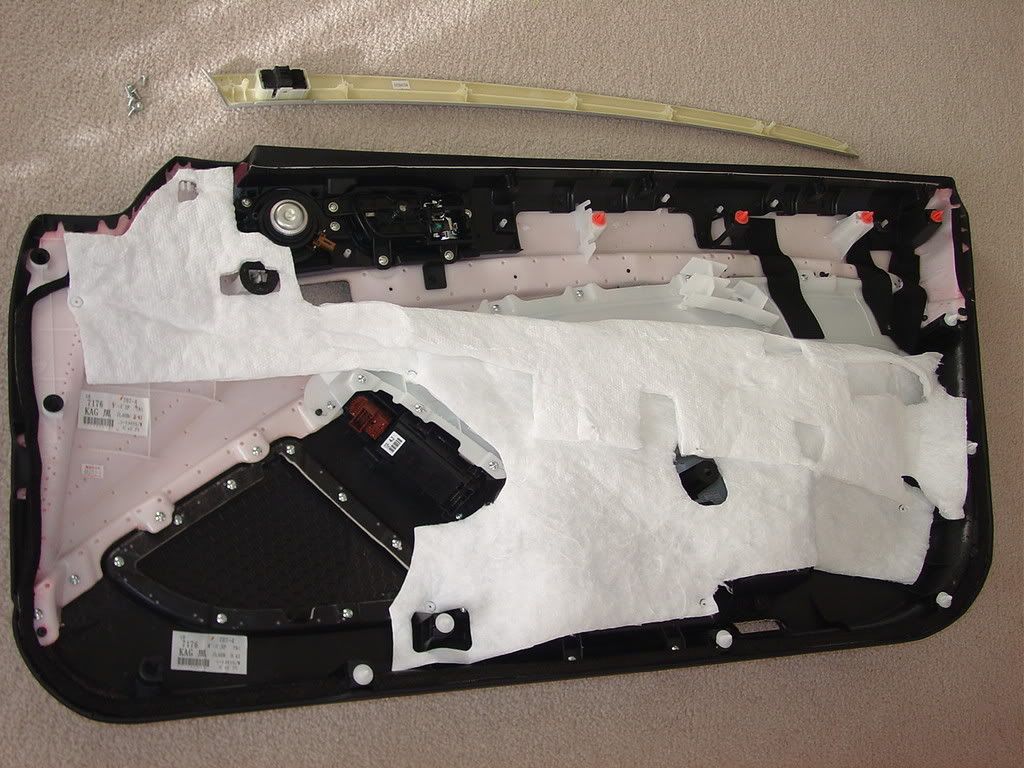
The trick to pulling the door panel off is to pull with authority. Either use a trim removal tool or use that hole vacated by the little light for a place
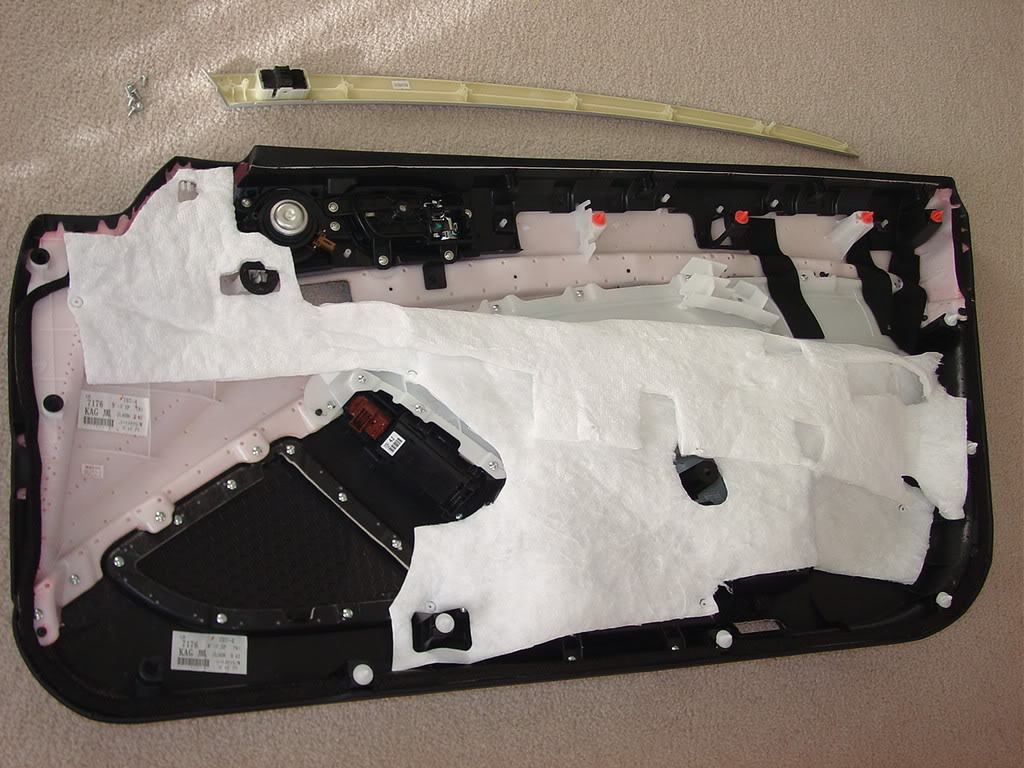
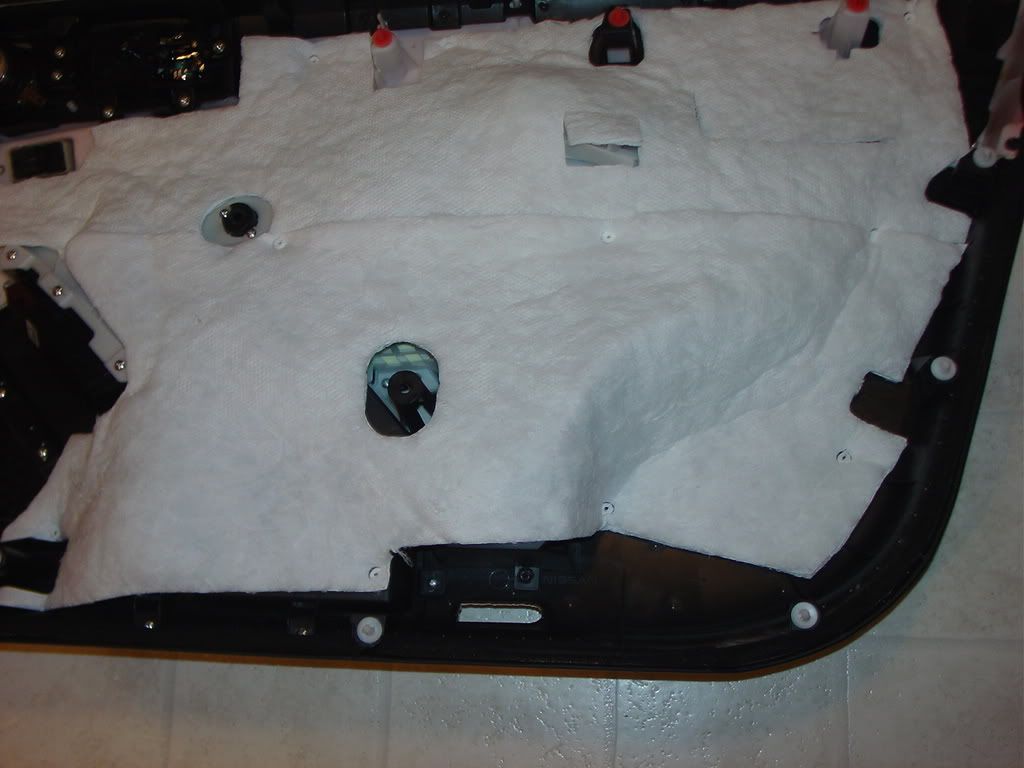
to pull from. Here are some pictures showing the plastic clips you are up against.
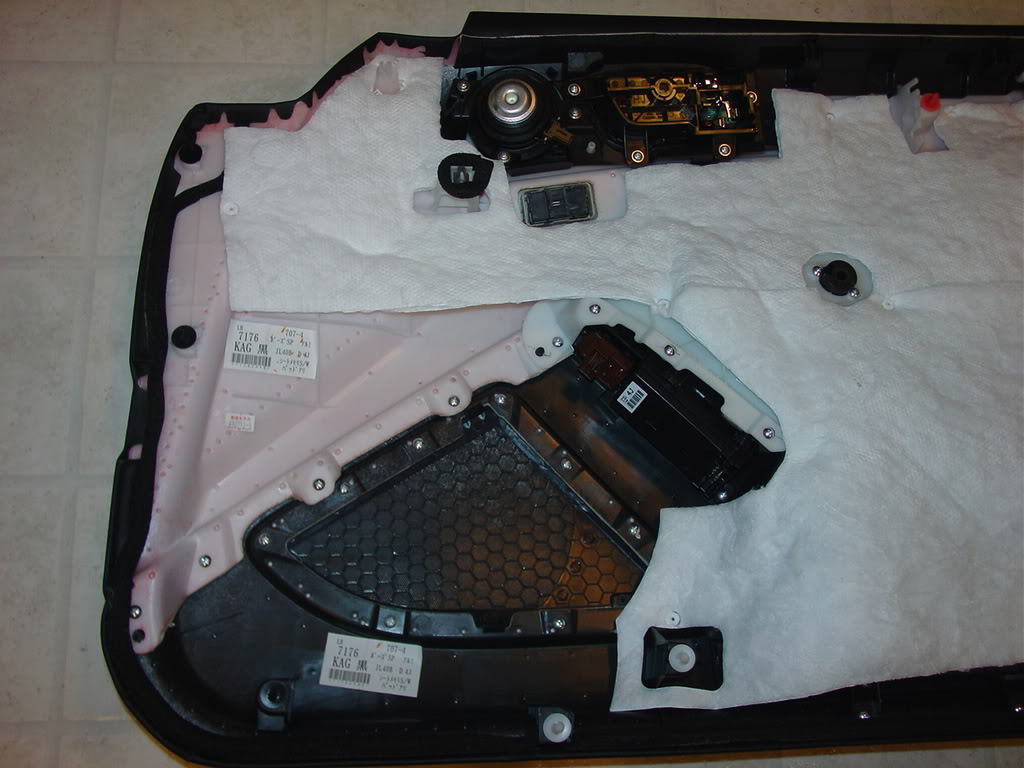


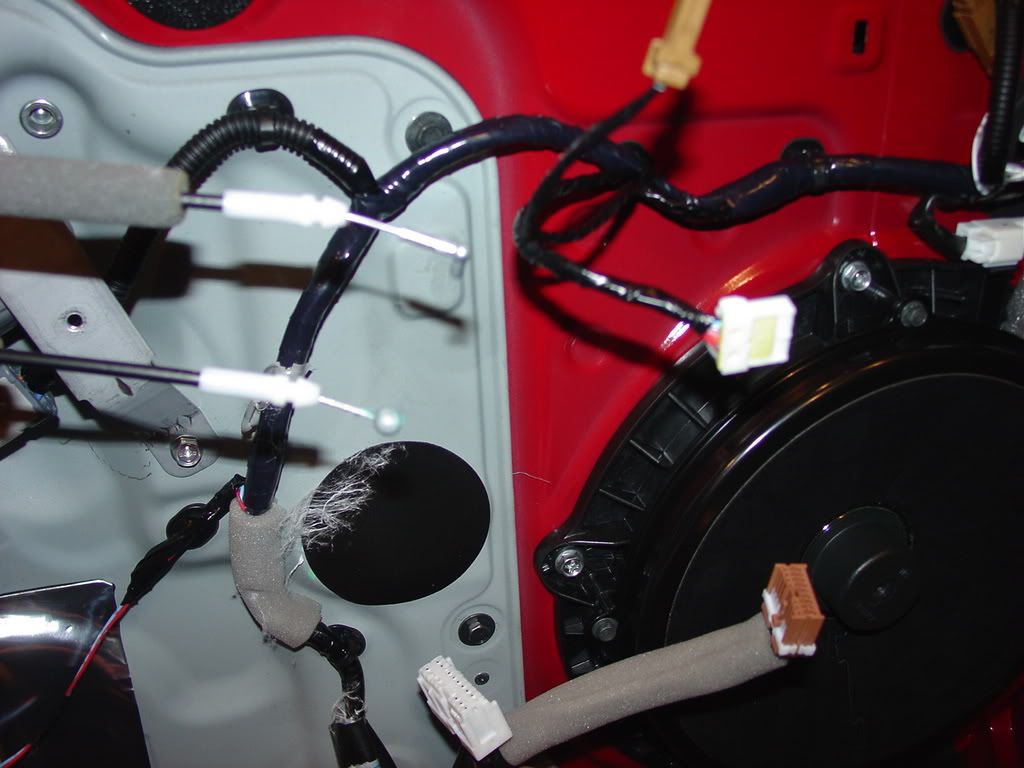
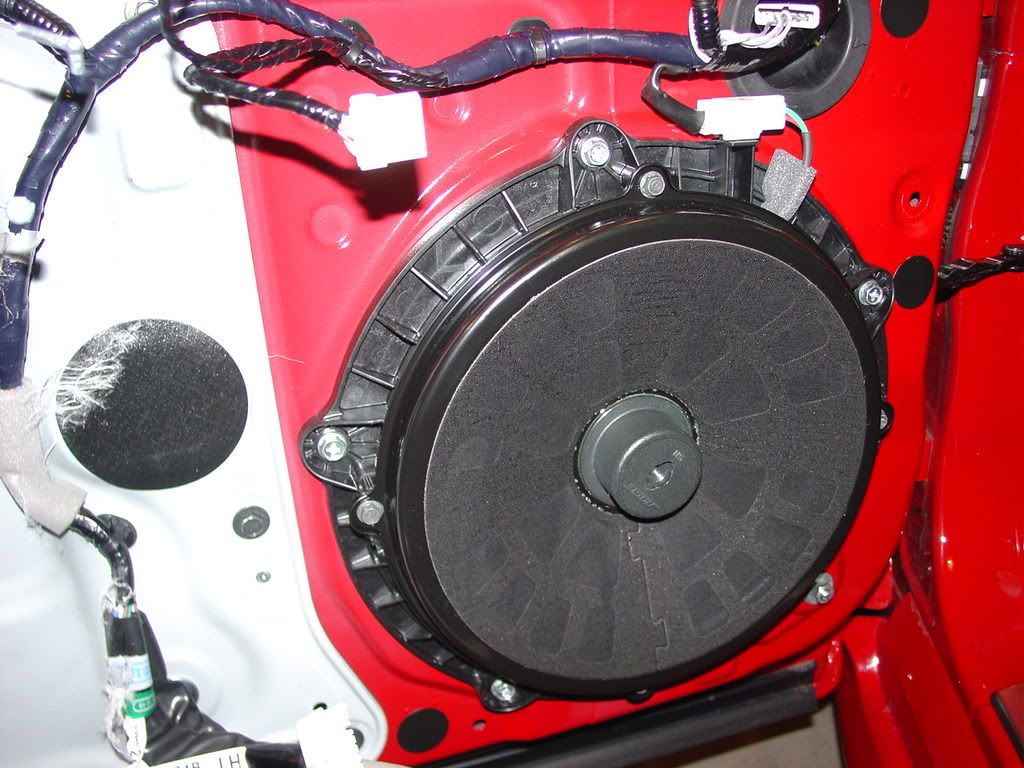
Here's a pretty good joke of a speaker.

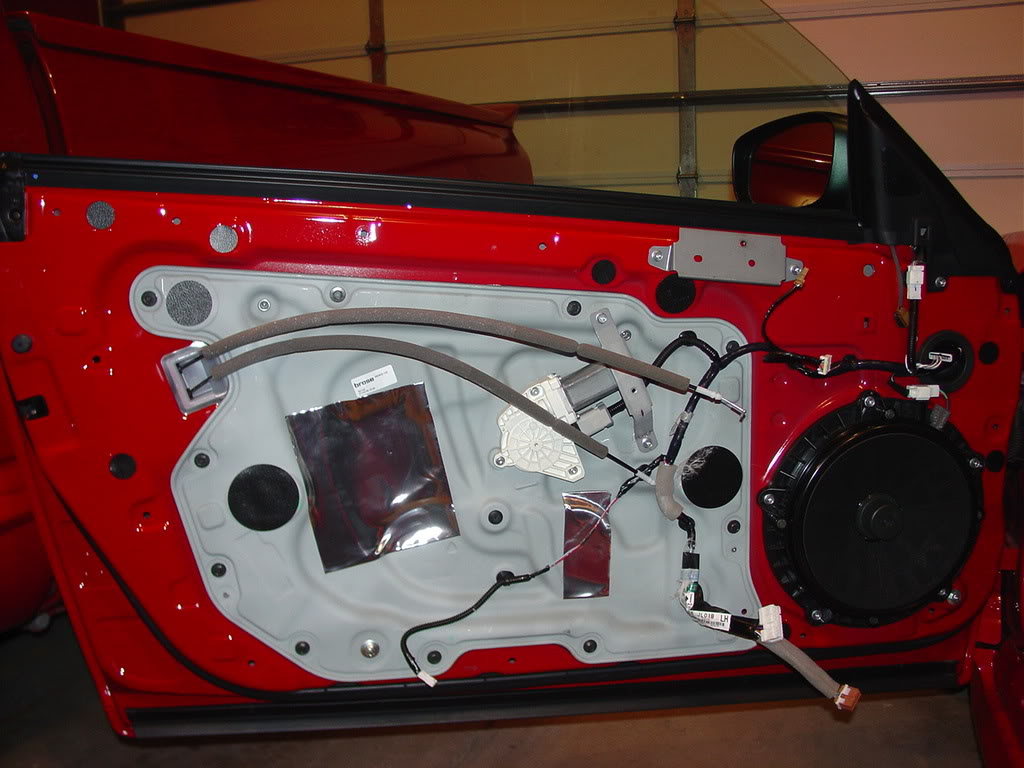
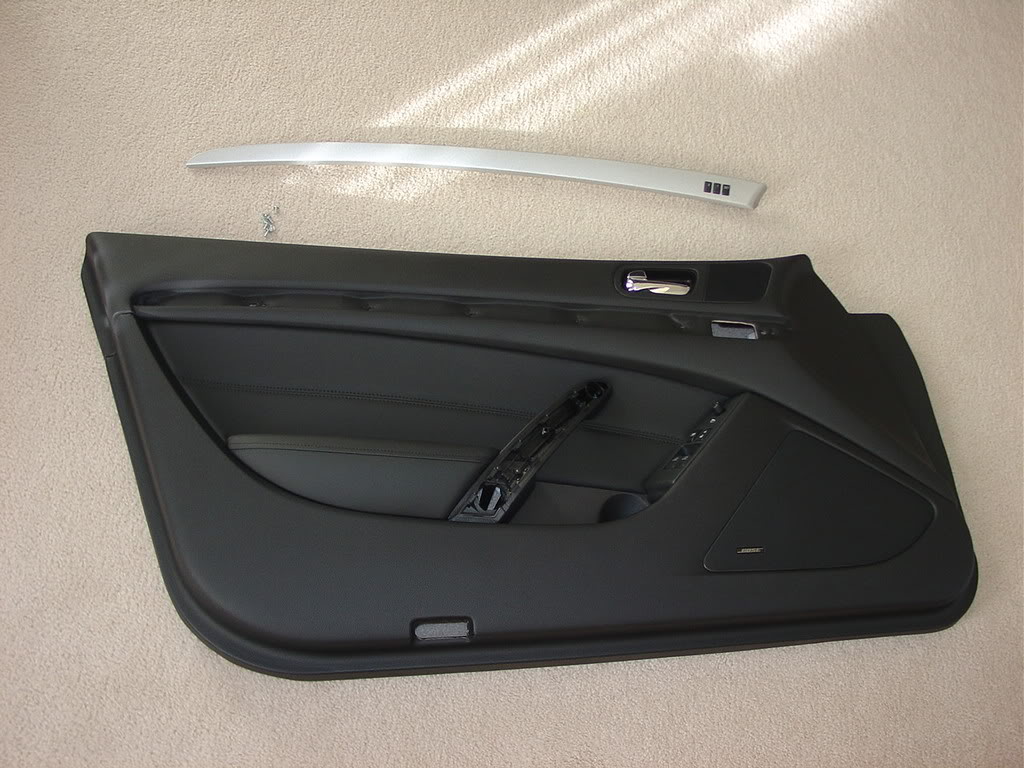
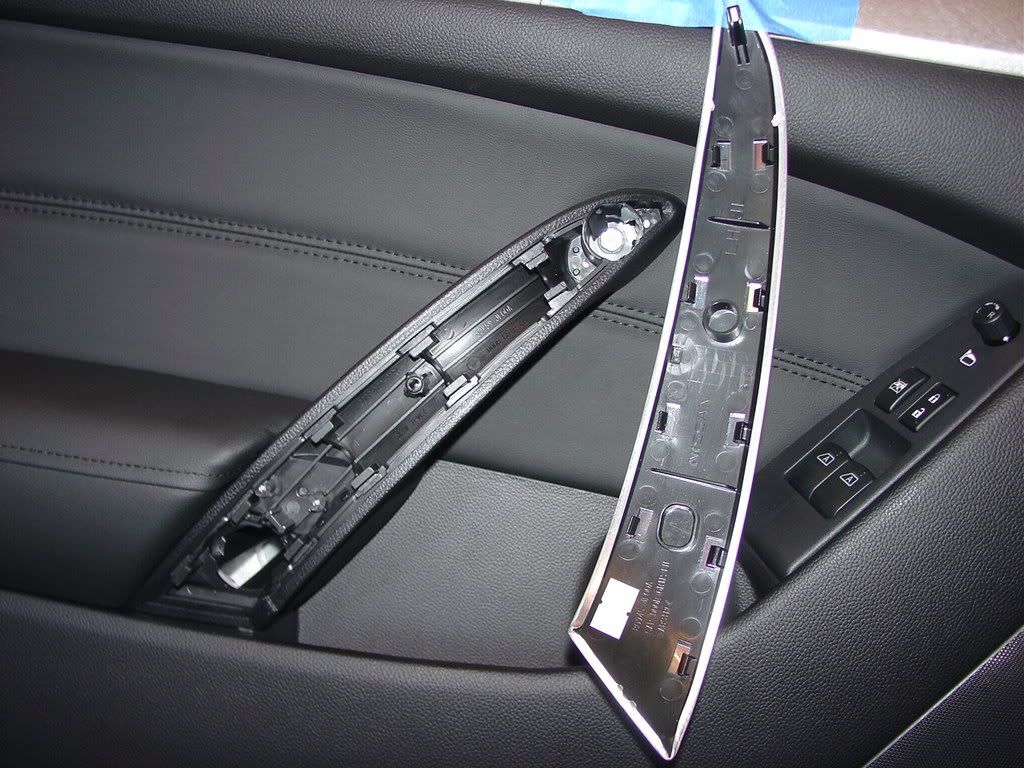
The brushed aluminum trim piece comes out by removing the bolts on the back side that hold it in.
If you're looking to get past the next panel, good luck. If you figure it out, take a lot of pictures and write a "How to" for me. It kicked my azz. I'll update this post later in life if I ever get that panel off.
Here are some pictures to help you out. You don't need any tools to remove this piece. Just use your fingers.
A screwdriver with the tip covered in something soft can be used at the bottom (there's a groove). Pry out the bottom and then work your way to the top.
The light pops right out. Use a small flat screwdriver on the bottom.
The trick to pulling the door panel off is to pull with authority. Either use a trim removal tool or use that hole vacated by the little light for a place
to pull from. Here are some pictures showing the plastic clips you are up against.
Here's a pretty good joke of a speaker.
The brushed aluminum trim piece comes out by removing the bolts on the back side that hold it in.
If you're looking to get past the next panel, good luck. If you figure it out, take a lot of pictures and write a "How to" for me. It kicked my azz. I'll update this post later in life if I ever get that panel off.
Last edited by DiamondGCoupe; 03-04-2009 at 03:08 PM.

The following 4 users liked this post by Ivoidwarranties:
DHS803 (12-30-2013),
stevensmfckng37 (03-16-2023),
tite_tite (01-24-2016),
YellowJacket (04-22-2013)

 02-06-2009, 12:25 AM
#4

Awesome. Thanks!
Do you think there's access from the inside of the door panel to the exterior?
__________________
Best Car Insurance | Auto Protection Today | FREE Trade-In Quote
Do you think there's access from the inside of the door panel to the exterior?
__________________
Best Car Insurance | Auto Protection Today | FREE Trade-In Quote
02-06-2009, 09:11 AM
#5
If you're talking about access to the outer door skin then yes. Remove the gray panel and you have full access to the intire inside of the door. The problem is, and I'm not positive about this, I think removing that gray panel requires removing the window.
 09-26-2010, 10:50 PM
#7
Registered User

Join Date: Nov 2008
Location: Same galaxy...
Posts: 252
Likes: 0
Received 0 Likes
on
0 Posts
To make it real easy, just follow these instructions. Almost all the bolts are 10mm.


Here are some pictures to help you out. You don't need any tools to remove this piece. Just use your fingers.

A screwdriver with the tip covered in something soft can be used at the bottom (there's a groove). Pry out the bottom and then work your way to the top.
The light pops right out. Use a small flat screwdriver on the bottom.
The trick to pulling the door panel off is to pull with authority. Either use a trim removal tool or use that hole vacated by the little light for a place
to pull from. Here are some pictures showing the plastic clips you are up against.


Here's a pretty good joke of a speaker.
The brushed aluminum trim piece comes out by removing the bolts on the back side that hold it in.

If you're looking to get past the next panel, good luck. If you figure it out, take a lot of pictures and write a "How to" for me. It kicked my azz. I'll update this post later in life if I ever get that panel off.
Here are some pictures to help you out. You don't need any tools to remove this piece. Just use your fingers.
A screwdriver with the tip covered in something soft can be used at the bottom (there's a groove). Pry out the bottom and then work your way to the top.
The light pops right out. Use a small flat screwdriver on the bottom.
The trick to pulling the door panel off is to pull with authority. Either use a trim removal tool or use that hole vacated by the little light for a place
to pull from. Here are some pictures showing the plastic clips you are up against.
Here's a pretty good joke of a speaker.
The brushed aluminum trim piece comes out by removing the bolts on the back side that hold it in.
If you're looking to get past the next panel, good luck. If you figure it out, take a lot of pictures and write a "How to" for me. It kicked my azz. I'll update this post later in life if I ever get that panel off.
Any help will be greatly appreciated.
Trending Topics
09-27-2010, 02:19 AM
#8

Hey Ivoid! Thanks for the DIY. I did get past the metal panel that you said was a pain to remove. You do indeed have to remove the window and I would recommend anyone that doesnt know how to adjust the window to not try this as it will screw up your whole window alignments. It took me quite a bit of work but I was able to get the piece off along wid the window.
 09-27-2010, 07:49 PM
#12
I have the service manual and looked into removing the windows but it looked like a lot more work than I wanted to do. Getting the window adjusted right is usually a PITA and I didn't want to go through all that just to add a little more sound dampening.
01-13-2011, 07:09 PM
#13

Someone asked how much a replacement interior door panel is and I can say that Infiniti charges $1200 for the door panel as I was given that quote when they repalced my door panel under warranty for the seatbelt going through it! Seems like a lot of money for that piece of plastic.
01-27-2011, 12:29 AM
#14
Registered User

Join Date: Aug 2010
Posts: 1
Likes: 0
Received 0 Likes
on
0 Posts
guys i need a little help...i successfully removed the door panel...but when i went to put it back on...the power window switch doesn't work anymore...any ideas?
edit: nvm put in passenger side first and then test...forgot to put in driver side first
edit: nvm put in passenger side first and then test...forgot to put in driver side first
Last edited by viet13oi228; 01-27-2011 at 12:53 AM.
