Ape's IPL build (How Nissan should have done it)
 01-08-2017, 04:18 PM
#46

OK makes sense. I ran with filters removed rest was stock on my sedan and got about 280/235 which is right in line with you. I believe I was on a dynojet and it was about 85 degrees outside.
Do you plan on doing a dyno with those HFC installed soon?
Do you plan on doing a dyno with those HFC installed soon?


 01-08-2017, 10:30 PM
#50
Speaking of high flow cats, I skipped over them. I did the high flow cats after the Nismo intake and before I did the rest of the suspension.
Everyone seemed to have nothing but good things to say about the Fast Intentions resonated high flow cats. Plus they're the only ones made that are resonated. I wanted to keep the exhaust noise to a tolerable level and not introduce any droning. I plan to keep the stock IPL exhaust since it's already a true dual.
I went ahead and pulled the trigger on a set and my only grievance with the Fast Intentions cats is there's no bracing and/or it won't bolt up to the stock brace.
After egging on from several forum members who shall remain nameless, I decided to do the installation myself using a few pointers and tricks learned on this forum. I was wary of the "demon" bolt and came up with a schedule to treat all the bolts in question and facilitate an easy installation.
I did my first application of PB Blasters and the bolts actually looked new. Regardless, I decided to try out the acetone/brake fluid the next evening evening and tackle the installation on a day where the the temperatures dropped from the low 100's to the high 80's with rain likely. That alone will make it so much easier as the heat can be really debilitating not to mention dehydration.
I also "invested" in this puppy:
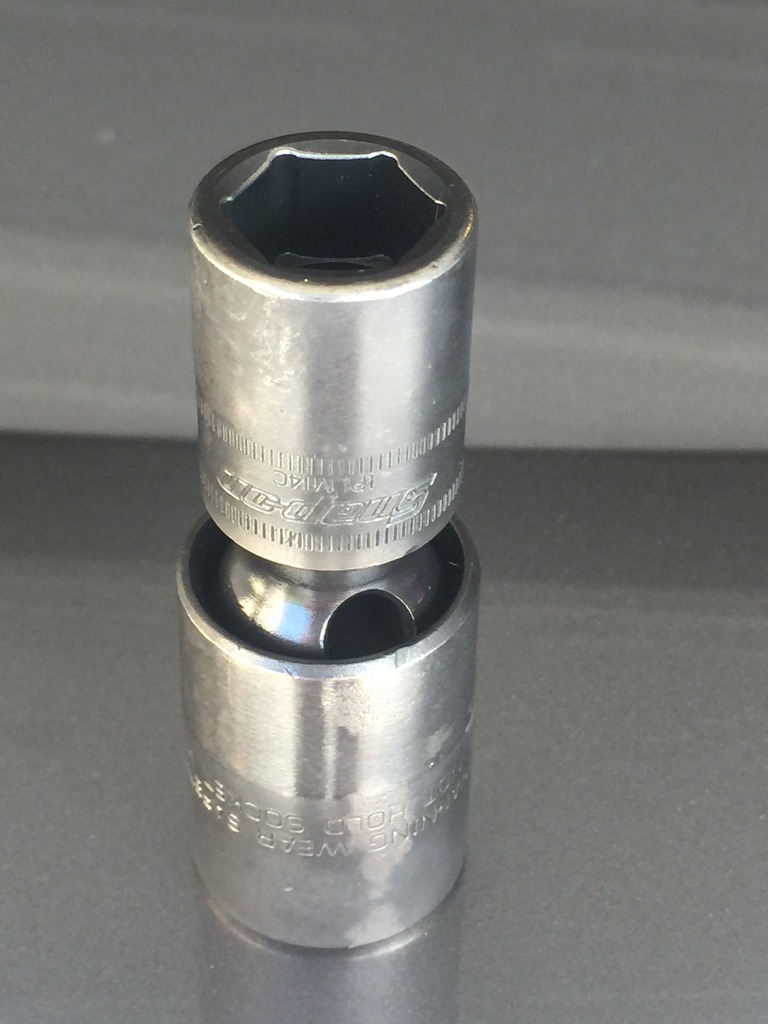
Snap-on 14mm six sided swivel impact socket. That should do the trick and not break apart. I have several inexpensive 14mm sockets as backup in addition to what I already owned as well as a bunch of wrenches.
I know some questioned how to get PB Blasters or the rust concoction on to the top bolt. Instead of a spray bottle, mix it up in a plastic container. Use a long piece of rigid metal, like an antenna. Lay down some rags or paper towels over the more sensitive parts in the engine bay, poke the top demon bolt with the rod so the tip of the rod is sitting on where the bolt mates to the flange surface. Now take your concoction on a brush and "run it down" the piece of metal. It'll slide down and run off at the very tip and onto the bolt. I actually used a flat piece of aluminum stock that was about 3ft long by 1" wide. I'd used it to make brackets for my Nismo intake and I had a big piece leftover. Worked like a charm. The PB just ran down the aluminum stock and coated the bolt, flange, everything down there. Did this on both sides naturally.
Alternatively, you could get some clear vacuum hose and strategically tape it to the side of a metal rod. That way the hose is rigid and you can place the end at the bolt head. Spray or use a baster to inject the vacuum tube with enough of the solvent to run down inside and treat the bolts as required. I may actually do this for the acetone/brake fluid combo as it'll prevent drips on places you would not want them. Hope that helps!
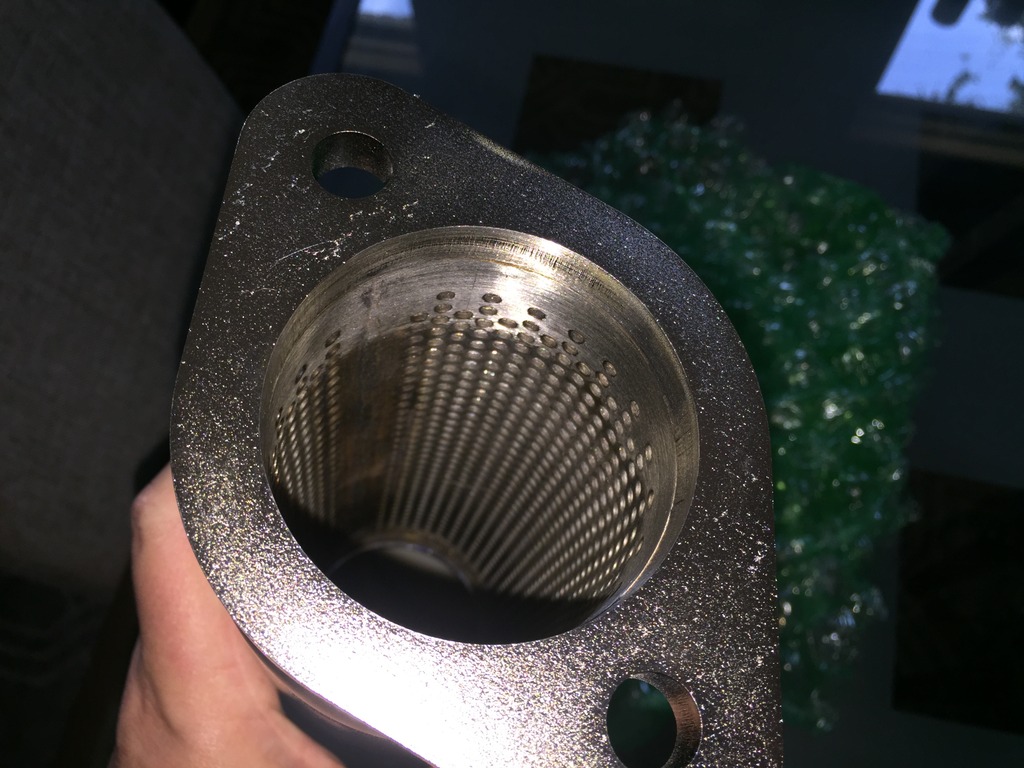
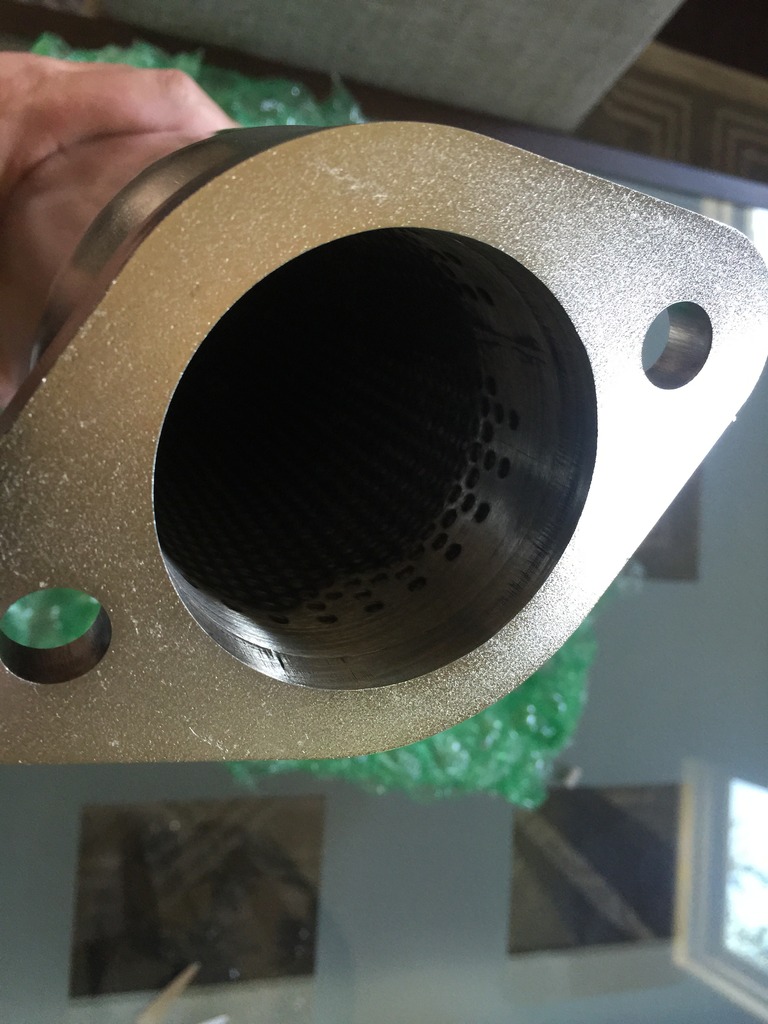
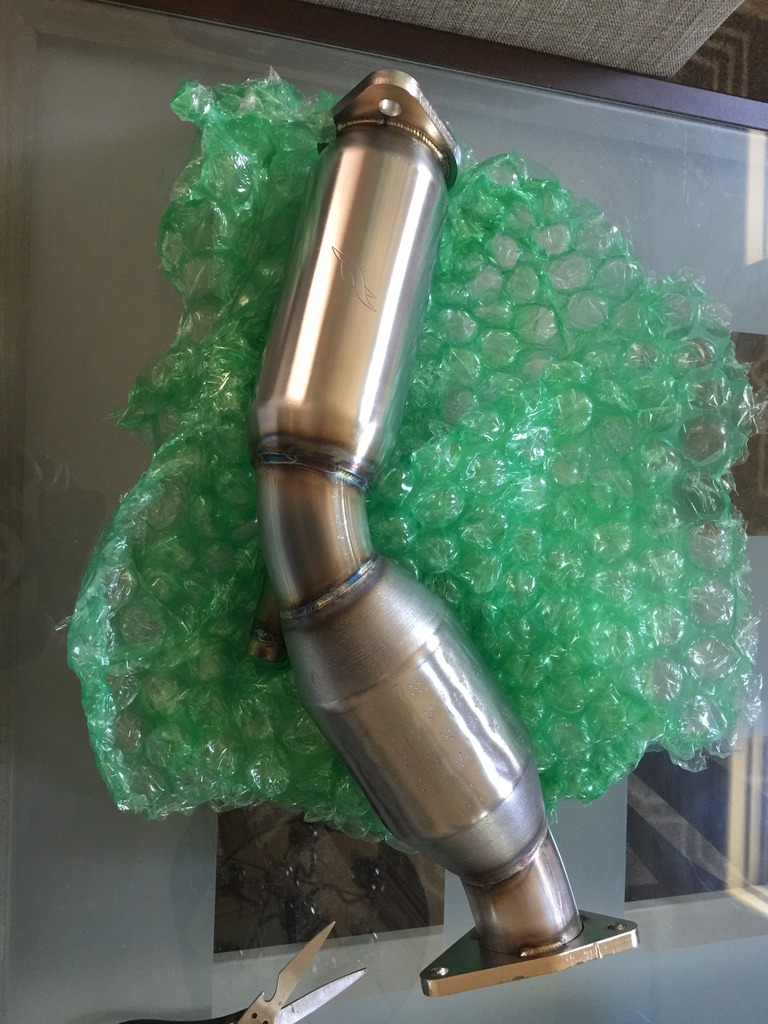
A few shots of the Fast Intentions resonated high flow cats. I'm going to bite the bullet and have brackets installed at some point in the not too distant future (I haven't done this yet, shame on me). I may make them myself out of stainless stock and then take them to be welded somewhere. Still really disappointed Fast Intentions didn't do this themselves. They did clean the RHFC's well inside where the flange meets the tubing. Nice and smooth and you can see someone went through with a grinder to remove any lips that would impede flow.


Everyone seemed to have nothing but good things to say about the Fast Intentions resonated high flow cats. Plus they're the only ones made that are resonated. I wanted to keep the exhaust noise to a tolerable level and not introduce any droning. I plan to keep the stock IPL exhaust since it's already a true dual.
I went ahead and pulled the trigger on a set and my only grievance with the Fast Intentions cats is there's no bracing and/or it won't bolt up to the stock brace.
After egging on from several forum members who shall remain nameless, I decided to do the installation myself using a few pointers and tricks learned on this forum. I was wary of the "demon" bolt and came up with a schedule to treat all the bolts in question and facilitate an easy installation.
I did my first application of PB Blasters and the bolts actually looked new. Regardless, I decided to try out the acetone/brake fluid the next evening evening and tackle the installation on a day where the the temperatures dropped from the low 100's to the high 80's with rain likely. That alone will make it so much easier as the heat can be really debilitating not to mention dehydration.
I also "invested" in this puppy:
Snap-on 14mm six sided swivel impact socket. That should do the trick and not break apart. I have several inexpensive 14mm sockets as backup in addition to what I already owned as well as a bunch of wrenches.
I know some questioned how to get PB Blasters or the rust concoction on to the top bolt. Instead of a spray bottle, mix it up in a plastic container. Use a long piece of rigid metal, like an antenna. Lay down some rags or paper towels over the more sensitive parts in the engine bay, poke the top demon bolt with the rod so the tip of the rod is sitting on where the bolt mates to the flange surface. Now take your concoction on a brush and "run it down" the piece of metal. It'll slide down and run off at the very tip and onto the bolt. I actually used a flat piece of aluminum stock that was about 3ft long by 1" wide. I'd used it to make brackets for my Nismo intake and I had a big piece leftover. Worked like a charm. The PB just ran down the aluminum stock and coated the bolt, flange, everything down there. Did this on both sides naturally.
Alternatively, you could get some clear vacuum hose and strategically tape it to the side of a metal rod. That way the hose is rigid and you can place the end at the bolt head. Spray or use a baster to inject the vacuum tube with enough of the solvent to run down inside and treat the bolts as required. I may actually do this for the acetone/brake fluid combo as it'll prevent drips on places you would not want them. Hope that helps!
A few shots of the Fast Intentions resonated high flow cats. I'm going to bite the bullet and have brackets installed at some point in the not too distant future (I haven't done this yet, shame on me). I may make them myself out of stainless stock and then take them to be welded somewhere. Still really disappointed Fast Intentions didn't do this themselves. They did clean the RHFC's well inside where the flange meets the tubing. Nice and smooth and you can see someone went through with a grinder to remove any lips that would impede flow.
01-08-2017, 10:33 PM
#51
Installation of any high flow cat can be quite difficult at home. I rolled the dice and I was actually surprised at how well the installation went. I was petrified I'd screw something up or the wrong bolt would snap. I'm sure it helped not being in the rust belt and not having that many miles on the car. And of course a good dose of the acetone/brake fluid sure helped. I did an application last night and let it soak til I tackled things this morning.
The driver's demon bolt. That Snap-on 14mm swivel came in handy. Theoretically, and according to the Fast Intentions instructions (I read them AFTER the installation, LOL), you're supposed to unbolt the bottom of the steering column and push it aside. I could get it without doing that but just barely. You could probably damage it if something slipped the wrong way. Anyway, I got it on the bolt, hammered the end of the extension with a rubber mallet, slapped on a breaker bar and then slid half of my jack's aluminum handle on the end of that. Pushed hard and I heard a snap. I thought maybe it'd slipped off (it had). So I put the socket back on the nut and started to push up on the bar again and it turned, much to my surprise. Literally the first try. The passenger's side top bolt snapped on the first try so I don't get a perfect score. O2's came out easily too. Honestly, the biggest pain is not having a lift and working in cramped spaces under the car. I had all four corners on stands to give me a bit more room.
I'd rate the difficulty at about 4 out of 10. I actually found installing coilovers a bit more difficult but there's some precision involved. Took me about four hours total, taking my time and stopping to eat breakfast.
01-08-2017, 10:35 PM
#52
From my review...I'll be adding more to the review as I put miles on the car and I'm actually able to "test" them fully (bad weather here currently).
I installed a set of Fast Intentions resonated high flow cats on my IPL with a 100% stock exhaust. I went with the resonated HFC's to keep noise down as the IPL exhaust already has some meat to it.
Starting off with the bad as this may be a concern to most folks and I think FI should update their design.
First, there are no brackets to bolt up to the stock exhaust hanger. That leaves all the weight on the header bolts going back all the way to the rear section before there are any muffler hangers. It most likely puts additional stress on the various exhaust welds. There's been at least one case of the FI's failing on this board.
Second, due to the lack of support brackets, there's more vibration at idle in the cabin. You can feel it in the seat, steering wheel and shifter. This goes away just off idle. I didn't notice any extra vibrations at speed.
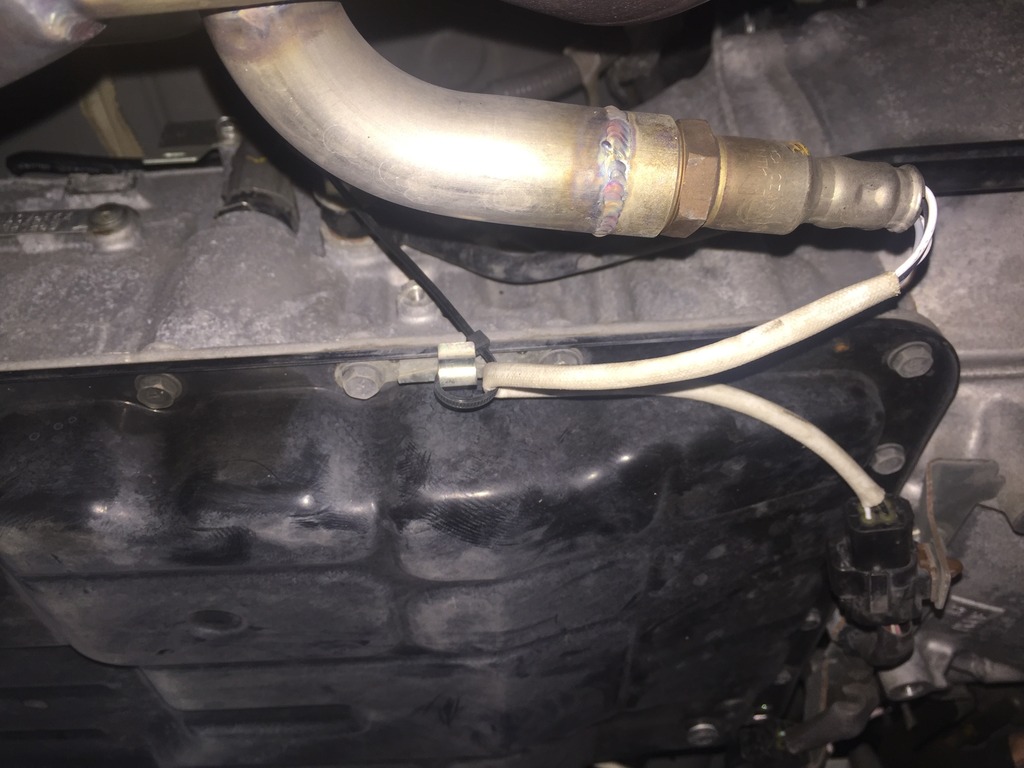
Third, due to the placement of the 02 J-bung (It's shaped like a J), the OEM 02 sensor wire retaining clips are no longer functional. You'll have to zip tie them to the clip as there isn't enough length to run them through the clip properly. I'll take photos of this later.
Fourth, the instructions are fairly basic with no torque specs or images. So be prepared to do a bit of homework ahead of time.
Now the good. They look to be very well-made, solid welds, the inside has been cleaned up and smoothed to help flow and they're lighter than the stock cats by a few pounds.
The sound on startup is a bit deeper and louder when cold and then quiets down as the car heats up. Once warm, the exhaust note is a bit more defined in that you can hear the individual exhaust pulses. The IPL exhaust is a true dual exhaust and at no point does it merge into one exhaust tube.
I had very little road time and couldn't get on it due to rainy weather. It's a bit louder over a 250rpm range from say 1600 rpm to 1750 rpm when lugging it in a tall gear. It's not annoying but it is louder than the stock exhaust. Once through that rpm range, the lower base of the exhaust note disappears in the cabin and the higher pitched end of things is a bit louder and more defined than stock. It's not much but it's there. I was only able to take it up to say 4500 or 5000 rpm at part throttle. Sound very authoritative but I felt the IPL exhaust did anyway. None the less, as of now, I'm pleased with the change in exhaust note. To put it bluntly, it sounds pretty damn good.
The car did seem to rev more freely and I needed less throttle input to get things going more rapidly. I did not reset the ECU.
I'll update this portion once I have some decent drive time and the weather clears up. Looks like it'll be at least a week if not more. Perfect timing.
Installation, theoretically, is very straightforward. It's not rocket science to install these but it entirely depends on the condition of your stock exhaust bolts. If you live in the rust belt and have salty winter roads, do not install these yourself and take it to a pro.
Fortunately I have a low mileage car and live in the South. I did two different applications of PB Blasters ahead of time and then an additional application of a 50/50 mix of acetone and brake fluid. Any home improvement store will have acetone in the paint section. While you're at the store, pick up a bit of clear tubing, about 3ft., along with a long wooden dowel if they have it. You'll use it to apply the rust breaker fluid to the bolts which face the front of the car and are accessed through the engine bay. A syringe is also a good idea as it's a bit more precise than a spray bottle and you can attach it to the clear tubing as well. I used a brush to dab on the mixture from below the car.
for the clear tubing and wooden dowel rod, tape the tubing to the rod at various locations so it stays straight and is rigid. Place one end of the tubing on top of the "demon" bolts and squirt a bit of the rust breaker mixture on top of them. Make sure it hits the area where the bolt flange contacts the exhaust flange mating surface. Do this on the lower bolt that's visible from the engine bay as well.
I also bought three small LED adjustable flashlights which helps in the visibility dept. and provide precise light where needed.
The rest is just following the directions or doing the reverse of removal.
DO NOT USE AN IMPACT GUN. It can damage 02 sensors and they're expensive to replace. Even if you've removed the two in either cat, there's one in both headers.
I could not find torque specs for the cat to header bolts. I went with 48ft/lbs. I believe all the other bolts are 35ft/lb and the 02 sensors are 45ft/lbs.
My next to do list is to help support the cats with metal zip ties on the stock exhaust bracket. This is a temporary step until I can get a shop to weld up some brackets.
I'll have a few photos and other details to add later.
And to clarify, I am, so far, happy with the purchase. I feel with their cost, they should be the best engineered on the market. But with no exhaust bracket, that's just not the case and it'll take extra effort from the end user, not to mention cost, to get these up to OEM snuff.
I installed a set of Fast Intentions resonated high flow cats on my IPL with a 100% stock exhaust. I went with the resonated HFC's to keep noise down as the IPL exhaust already has some meat to it.
Starting off with the bad as this may be a concern to most folks and I think FI should update their design.
First, there are no brackets to bolt up to the stock exhaust hanger. That leaves all the weight on the header bolts going back all the way to the rear section before there are any muffler hangers. It most likely puts additional stress on the various exhaust welds. There's been at least one case of the FI's failing on this board.
Second, due to the lack of support brackets, there's more vibration at idle in the cabin. You can feel it in the seat, steering wheel and shifter. This goes away just off idle. I didn't notice any extra vibrations at speed.
Third, due to the placement of the 02 J-bung (It's shaped like a J), the OEM 02 sensor wire retaining clips are no longer functional. You'll have to zip tie them to the clip as there isn't enough length to run them through the clip properly. I'll take photos of this later.
Fourth, the instructions are fairly basic with no torque specs or images. So be prepared to do a bit of homework ahead of time.
Now the good. They look to be very well-made, solid welds, the inside has been cleaned up and smoothed to help flow and they're lighter than the stock cats by a few pounds.
The sound on startup is a bit deeper and louder when cold and then quiets down as the car heats up. Once warm, the exhaust note is a bit more defined in that you can hear the individual exhaust pulses. The IPL exhaust is a true dual exhaust and at no point does it merge into one exhaust tube.
I had very little road time and couldn't get on it due to rainy weather. It's a bit louder over a 250rpm range from say 1600 rpm to 1750 rpm when lugging it in a tall gear. It's not annoying but it is louder than the stock exhaust. Once through that rpm range, the lower base of the exhaust note disappears in the cabin and the higher pitched end of things is a bit louder and more defined than stock. It's not much but it's there. I was only able to take it up to say 4500 or 5000 rpm at part throttle. Sound very authoritative but I felt the IPL exhaust did anyway. None the less, as of now, I'm pleased with the change in exhaust note. To put it bluntly, it sounds pretty damn good.
The car did seem to rev more freely and I needed less throttle input to get things going more rapidly. I did not reset the ECU.
I'll update this portion once I have some decent drive time and the weather clears up. Looks like it'll be at least a week if not more. Perfect timing.
Installation, theoretically, is very straightforward. It's not rocket science to install these but it entirely depends on the condition of your stock exhaust bolts. If you live in the rust belt and have salty winter roads, do not install these yourself and take it to a pro.
Fortunately I have a low mileage car and live in the South. I did two different applications of PB Blasters ahead of time and then an additional application of a 50/50 mix of acetone and brake fluid. Any home improvement store will have acetone in the paint section. While you're at the store, pick up a bit of clear tubing, about 3ft., along with a long wooden dowel if they have it. You'll use it to apply the rust breaker fluid to the bolts which face the front of the car and are accessed through the engine bay. A syringe is also a good idea as it's a bit more precise than a spray bottle and you can attach it to the clear tubing as well. I used a brush to dab on the mixture from below the car.
for the clear tubing and wooden dowel rod, tape the tubing to the rod at various locations so it stays straight and is rigid. Place one end of the tubing on top of the "demon" bolts and squirt a bit of the rust breaker mixture on top of them. Make sure it hits the area where the bolt flange contacts the exhaust flange mating surface. Do this on the lower bolt that's visible from the engine bay as well.
I also bought three small LED adjustable flashlights which helps in the visibility dept. and provide precise light where needed.
The rest is just following the directions or doing the reverse of removal.
DO NOT USE AN IMPACT GUN. It can damage 02 sensors and they're expensive to replace. Even if you've removed the two in either cat, there's one in both headers.
I could not find torque specs for the cat to header bolts. I went with 48ft/lbs. I believe all the other bolts are 35ft/lb and the 02 sensors are 45ft/lbs.
My next to do list is to help support the cats with metal zip ties on the stock exhaust bracket. This is a temporary step until I can get a shop to weld up some brackets.
I'll have a few photos and other details to add later.
And to clarify, I am, so far, happy with the purchase. I feel with their cost, they should be the best engineered on the market. But with no exhaust bracket, that's just not the case and it'll take extra effort from the end user, not to mention cost, to get these up to OEM snuff.
01-08-2017, 10:37 PM
#53
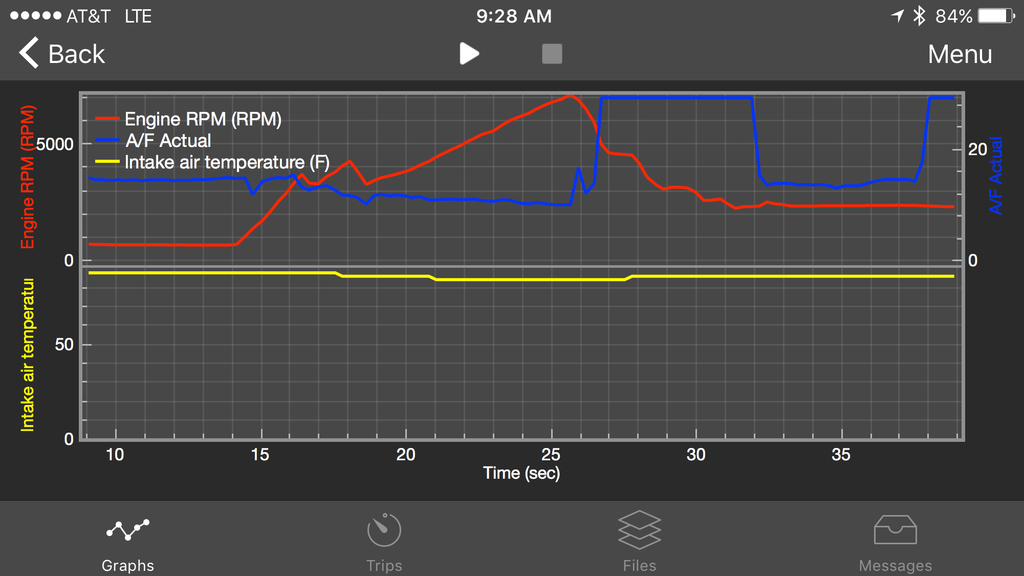
Ok I'd did some data logging of air/fuel and the FI RHFC's did lean the car out over just the Nismo intakes. It's still into the 10's by 5200 rpm and the a/f curve isn't as smooth so the ECU may be learning. This was my first WOT run to redline. Feels great in the low/midrange but falls flat up top.
Zip ties did arrive yesterday and it's a no-go on using them in any sort of support role.
Problem number one is the end of the bracket hits the 02 bung on one side. There's a small gap on the driver's side but none on the passenger's side. Theoretically, I could finesse the bracket a bit more and open up the gap between the bracket end and the 02 bung but the zip ties aren't going to do a lick of good.
While I was under there, I made sure the cats were aligned properly with the exhaust. It was more of an eyeball job but I seem to be pretty precise when doing things that way.
I'll reiterate the car is louder on cold startup but quickly settles into a mellow idle once everything heats up, expands and fully seals. Other than the more defined idle burble, you'd not know it was modified in any way.
Zip ties. Yep, not going to do a damn thing.
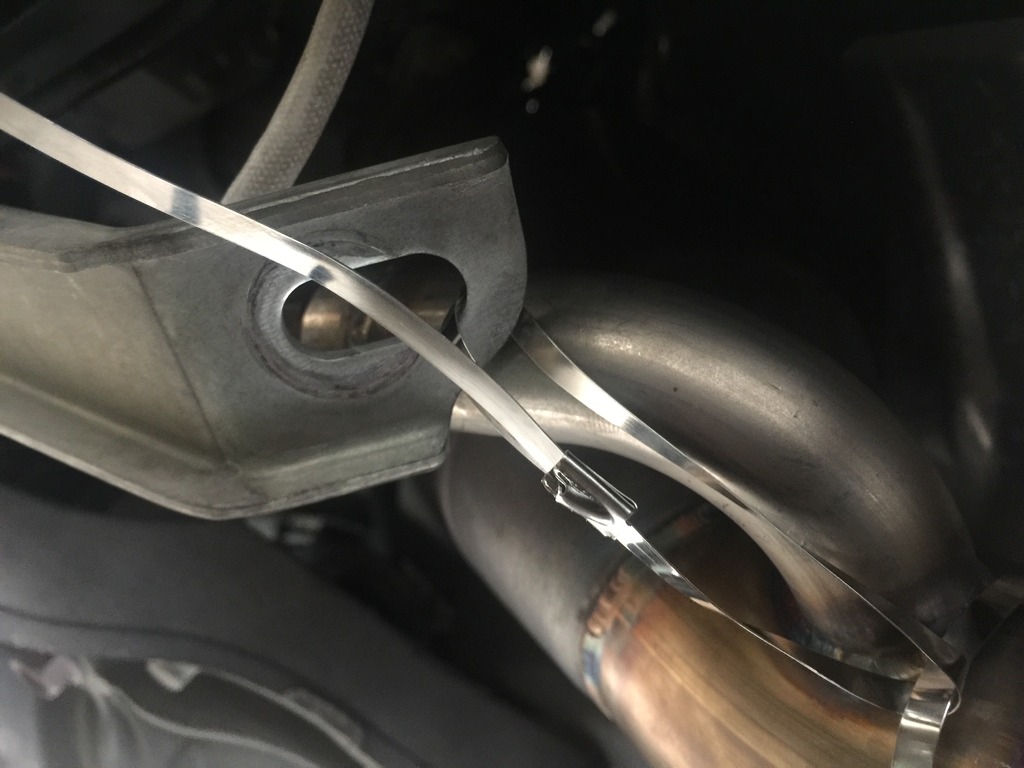
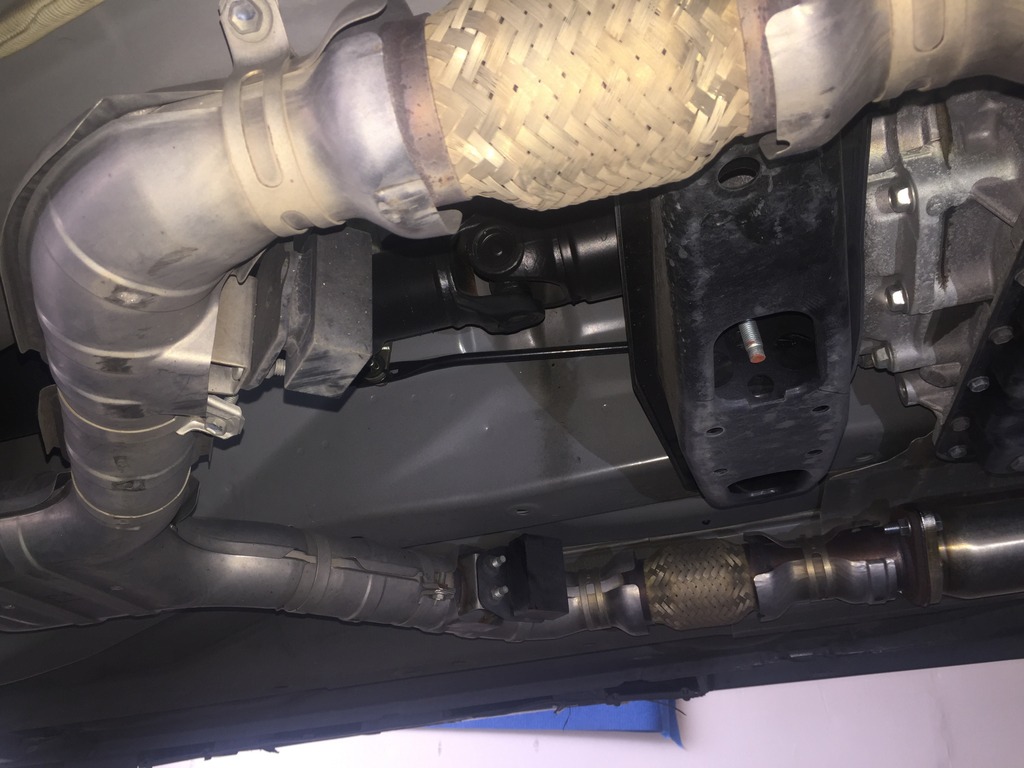
Driver's side, can't really see the gap between the support bracket and the 02 housing but it's there.
To me, it looks like there should be a bracket there, somewhere, supporting the exhaust.
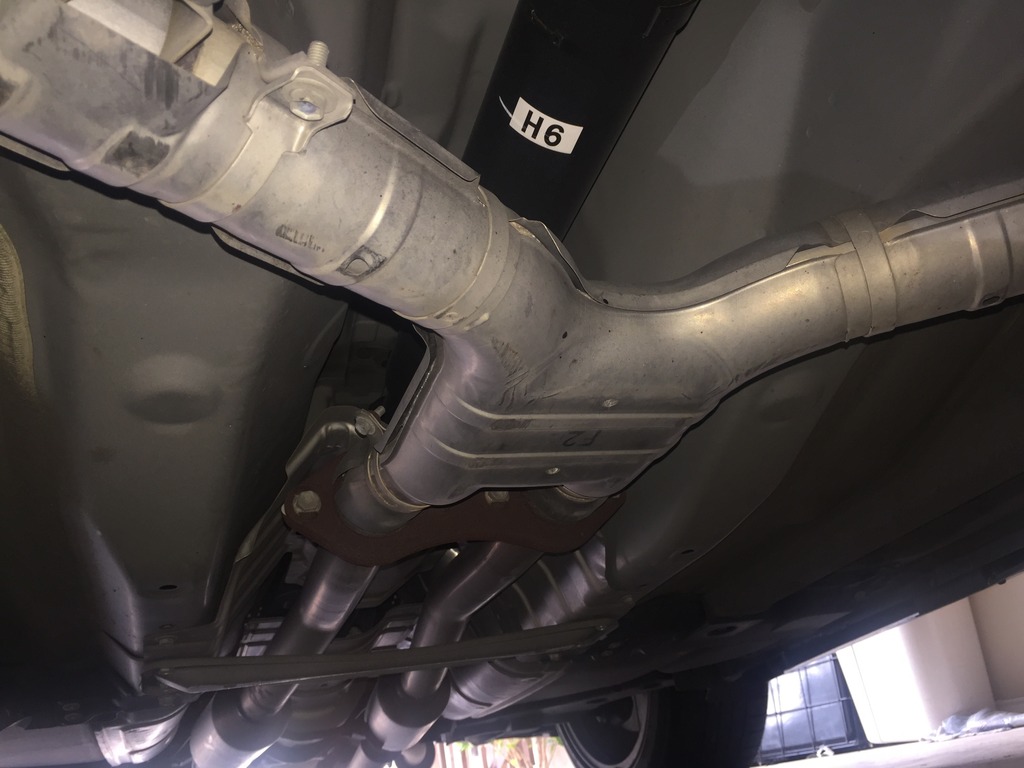
I'm not sure if they're hard rubber or plastic, but those black blocks, can't seem to see any actual purpose for them. They "look" like isolators but they're not attached to anything other than the exhaust piping.
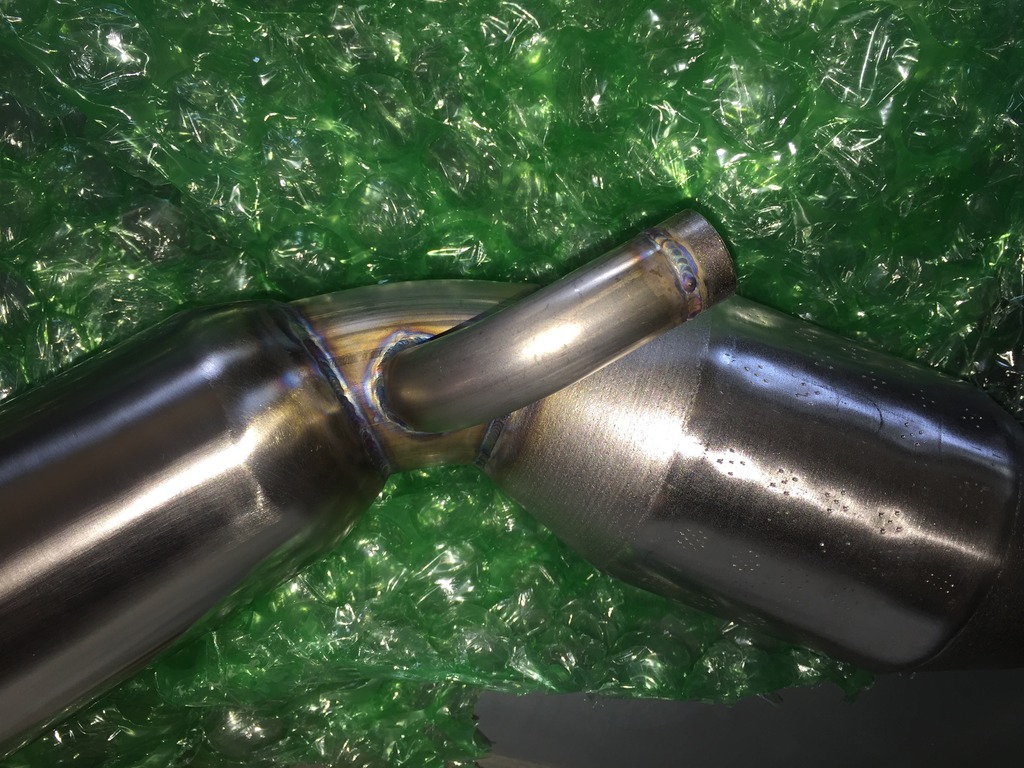
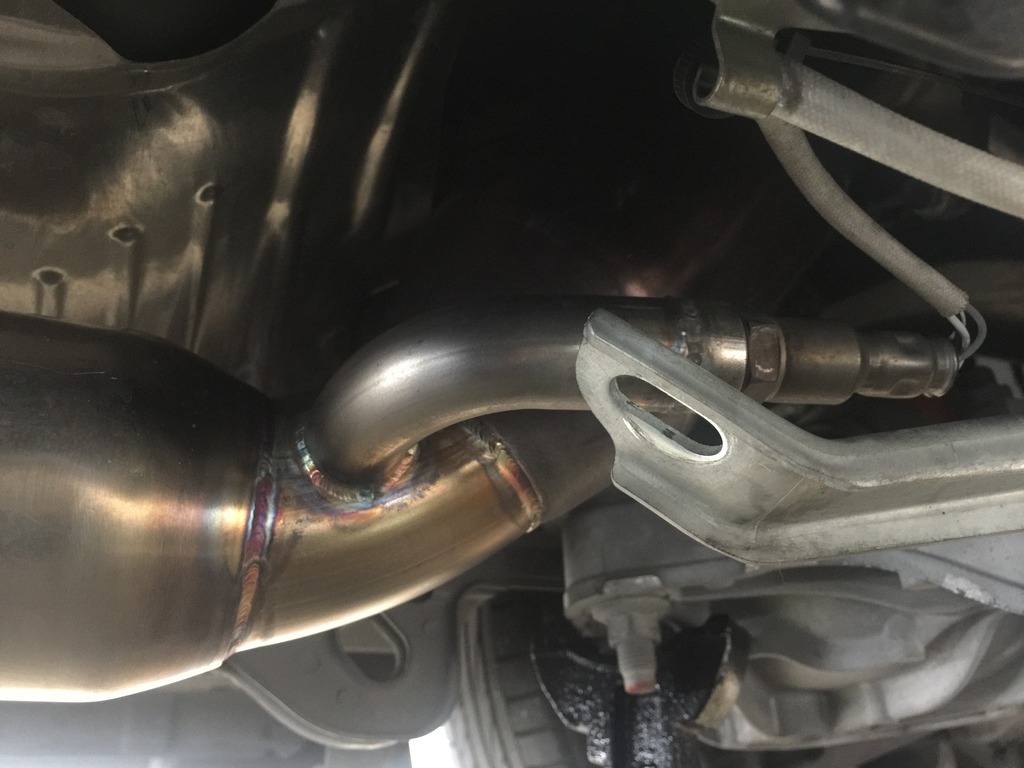
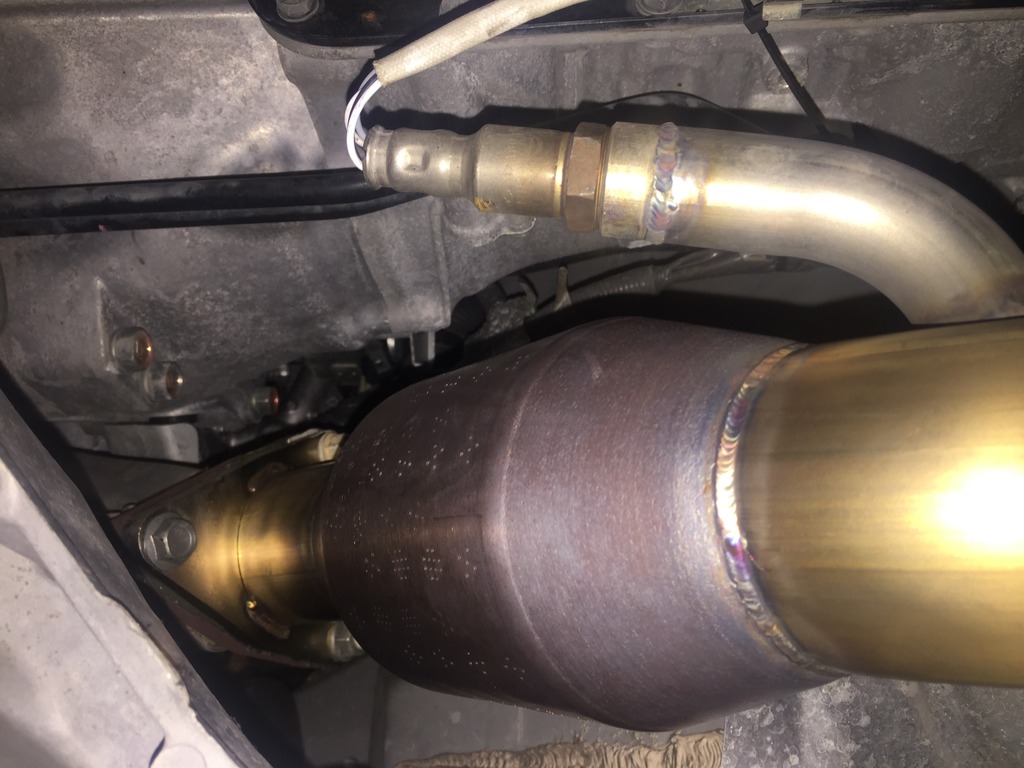
Looking up at the header to cat connection. They turned that color after two days (perfectly normal).
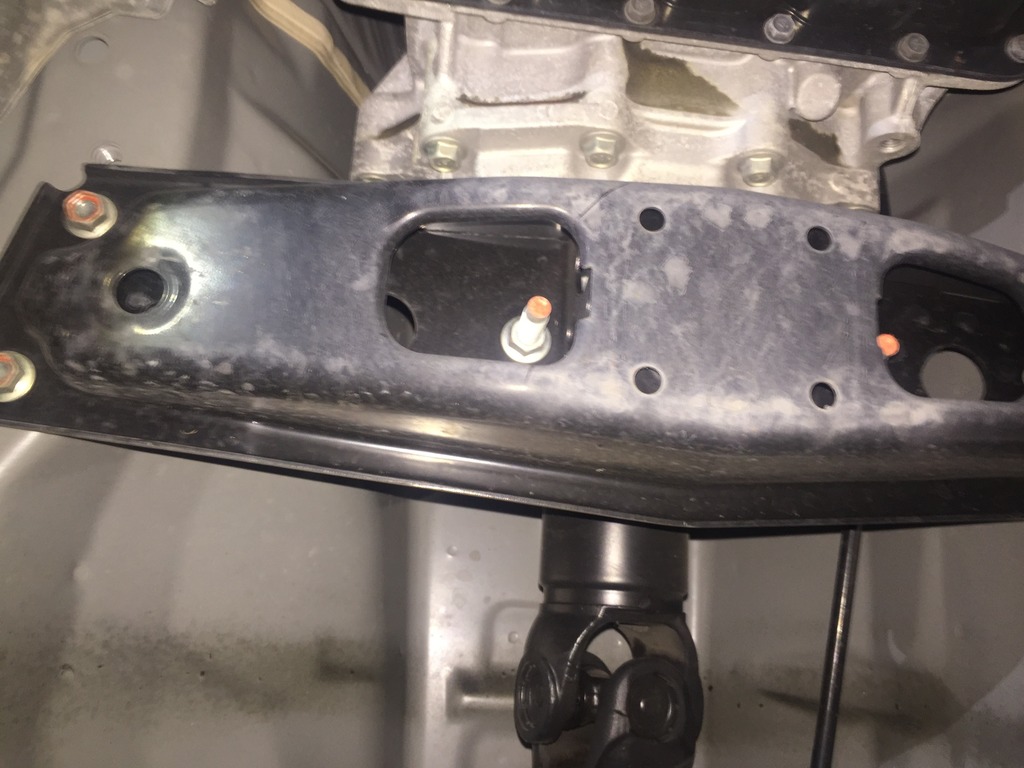
Here you can see where the bracket that normally supports and holds the 02 sensor harness is no longer in the right place and the wiring harness isn't long enough to loop back through it. Probably a small price to pay for no codes. Theoretically you could move it up one bolt but those are oil pan bolts and I'm not touching them with a ten foot pole. If there's one thing I hate, it's an oil leak.
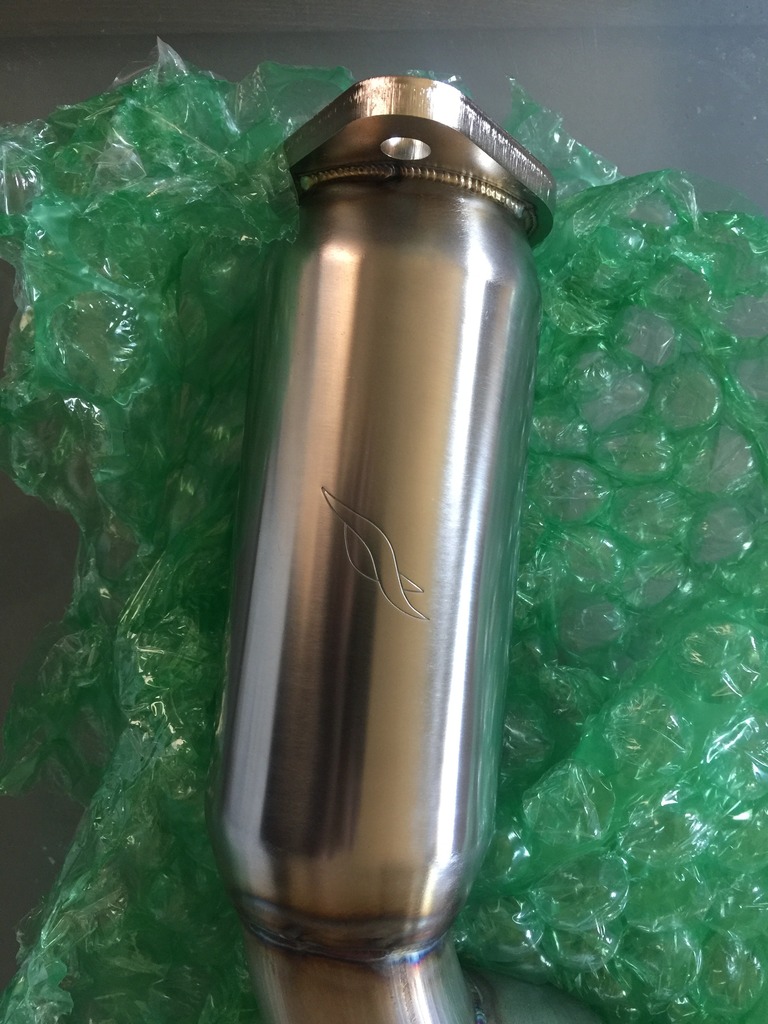
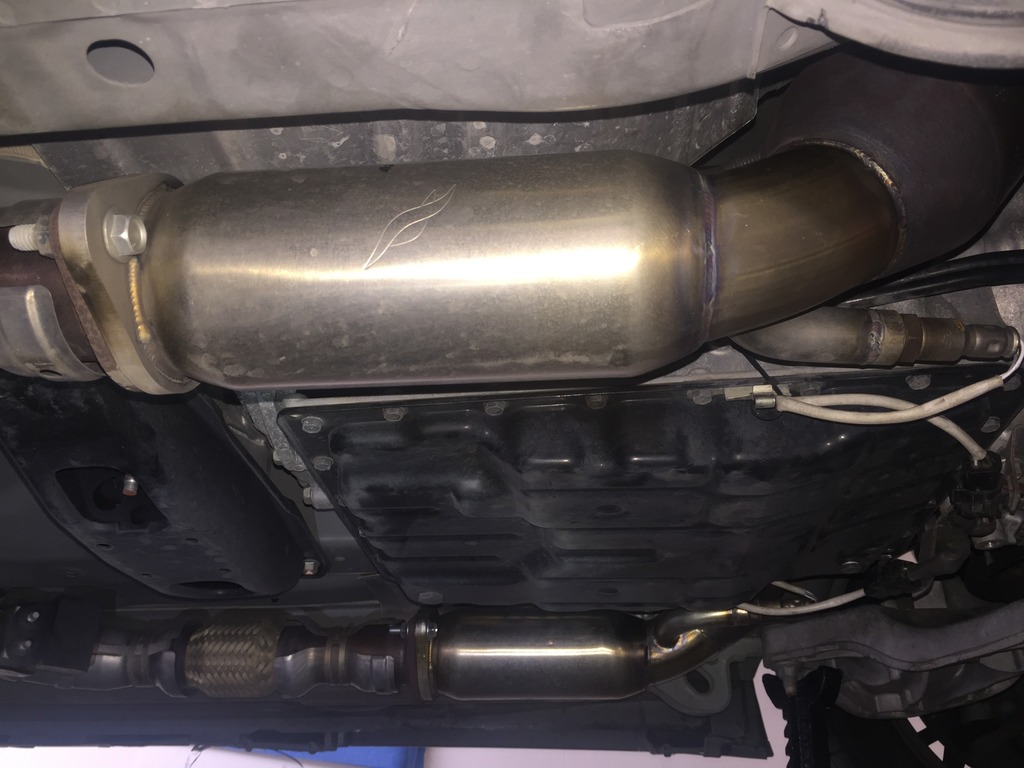
Here's a shot where you can see both the RHFC's complete with FI's logo.
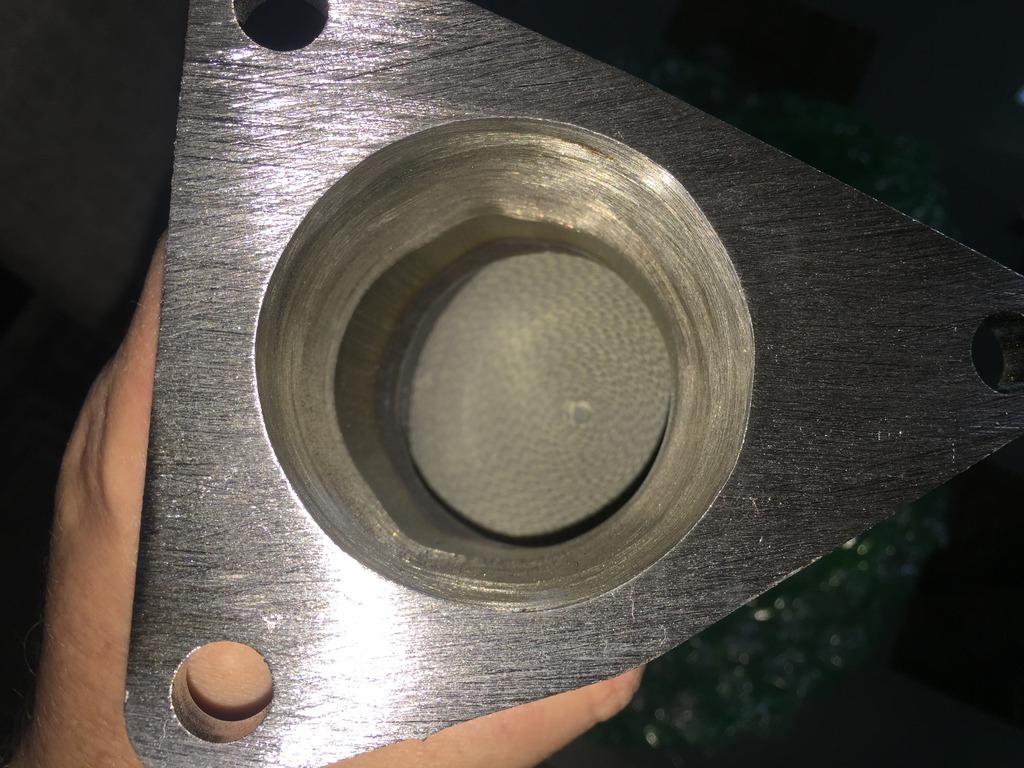
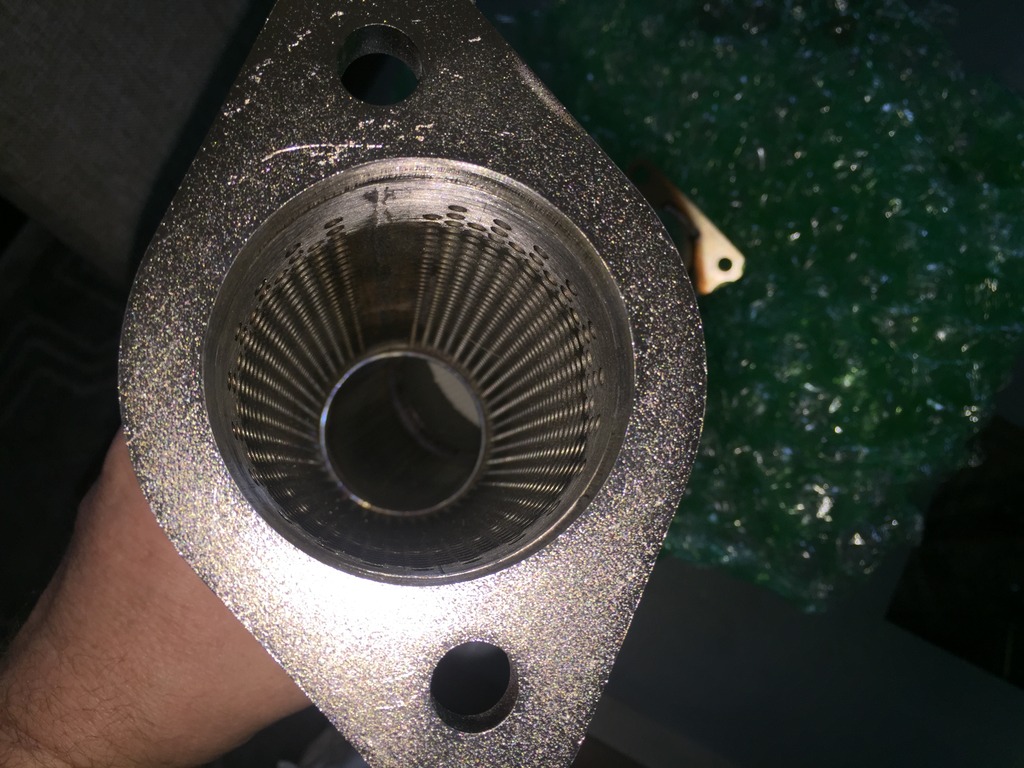
Pre-installation shots showing the ground down innards to provide unrestricted, turbulent-free flow.


I'm going to do a preliminary rating.
For performance, I'm going to give them a 10 assuming they work as advertised once the car is tuned.
For engineering, I'm going to give them a 6. I'd like to see that lip, like the stock cats, to prevent alignment issues and I'd like to see them properly designed with a bracket and more clearance between the OEM chassis to cat bracket and the 02 bungs.
For sound, 8 out of 10. I hear a bit of rasp in the video but the car isn't under load. I don't hear rasp when in the car under full throttle. Here's an at idle video, I have a second but it's still processing and I'll post it later:
Second video, the car's still not fully warmed up so I did not want to rev it much. I have a steep driveway. Looks like an up the skirt shot, LOL.
Another WOT run, feels a bit more even acceleration wise but lots of power to be had with a tune.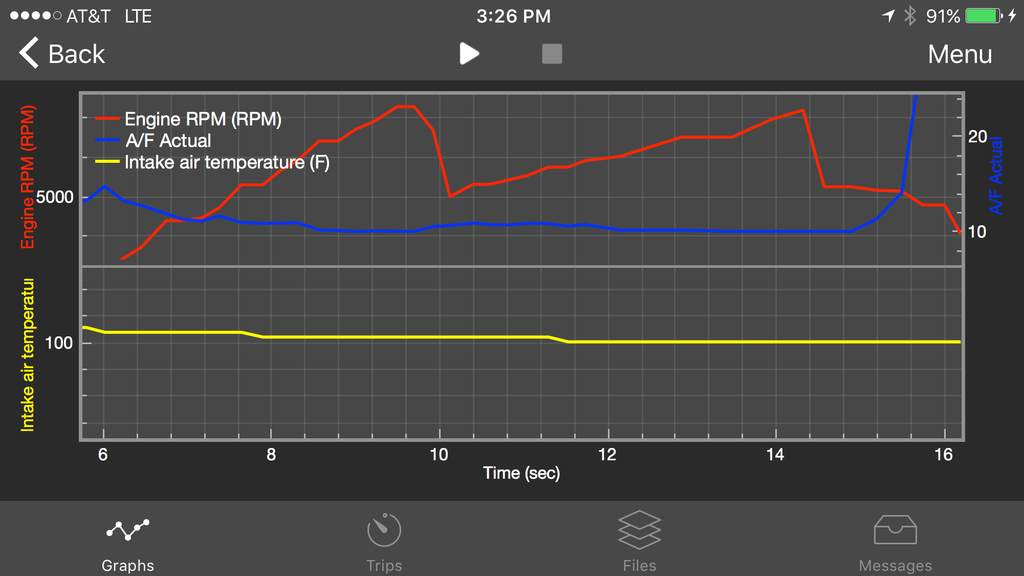

Zip ties did arrive yesterday and it's a no-go on using them in any sort of support role.
Problem number one is the end of the bracket hits the 02 bung on one side. There's a small gap on the driver's side but none on the passenger's side. Theoretically, I could finesse the bracket a bit more and open up the gap between the bracket end and the 02 bung but the zip ties aren't going to do a lick of good.
While I was under there, I made sure the cats were aligned properly with the exhaust. It was more of an eyeball job but I seem to be pretty precise when doing things that way.
I'll reiterate the car is louder on cold startup but quickly settles into a mellow idle once everything heats up, expands and fully seals. Other than the more defined idle burble, you'd not know it was modified in any way.
Zip ties. Yep, not going to do a damn thing.
Driver's side, can't really see the gap between the support bracket and the 02 housing but it's there.
To me, it looks like there should be a bracket there, somewhere, supporting the exhaust.
I'm not sure if they're hard rubber or plastic, but those black blocks, can't seem to see any actual purpose for them. They "look" like isolators but they're not attached to anything other than the exhaust piping.
Looking up at the header to cat connection. They turned that color after two days (perfectly normal).
Here you can see where the bracket that normally supports and holds the 02 sensor harness is no longer in the right place and the wiring harness isn't long enough to loop back through it. Probably a small price to pay for no codes. Theoretically you could move it up one bolt but those are oil pan bolts and I'm not touching them with a ten foot pole. If there's one thing I hate, it's an oil leak.
Here's a shot where you can see both the RHFC's complete with FI's logo.
Pre-installation shots showing the ground down innards to provide unrestricted, turbulent-free flow.
I'm going to do a preliminary rating.
For performance, I'm going to give them a 10 assuming they work as advertised once the car is tuned.
For engineering, I'm going to give them a 6. I'd like to see that lip, like the stock cats, to prevent alignment issues and I'd like to see them properly designed with a bracket and more clearance between the OEM chassis to cat bracket and the 02 bungs.
For sound, 8 out of 10. I hear a bit of rasp in the video but the car isn't under load. I don't hear rasp when in the car under full throttle. Here's an at idle video, I have a second but it's still processing and I'll post it later:
Second video, the car's still not fully warmed up so I did not want to rev it much. I have a steep driveway. Looks like an up the skirt shot, LOL.
Another WOT run, feels a bit more even acceleration wise but lots of power to be had with a tune.
 01-08-2017, 10:40 PM
#54
I've had these on for maybe five months now? LOVE the sound of the car. I still have one little spot of rasp but it's 99% disappeared. The car screams at wide open throttle and is silent when cruising. I sometimes get the urge to try out another exhaust but I have zero hiss and no droning. Don't want to mess with that.
01-09-2017, 12:21 AM
#55
Back to suspension.
Spent half a day installing the front arms and rear links along with a few other tasks.
One thing I noticed is the SPL arms, adjusted out as far as they recommend, are shorter than the stock arms. I didn't measure the difference but I'm guessing it's a bit less than half an inch. The alignment in the rear is way off but I'm taking the car in tomorrow morning for an alignment. My toe is pretty out, car looks knock kneed in the rear. Luckily I'm a mile from the shop.
Everything went in fairly easy, no major issues. Both the SPC's and the SPL's require some big open ended wrenches which I didn't have. I used channel locks instead. It'd be great if they listed the required tools in the instructions. As for instructions, there really aren't any to speak of but there are plenty of DIY threads on this and the370 forum.
Not the best shot of it installed but it was dark out by the time I finished.
Car is at the shop now, left it there as they couldn't get to it til noon. I had a not so pleasant clunking noise going over hard bumps. Asked them to check torque on front upper arms. Blackjack Speed Shop has actually been great to deal with and I feel like I can trust them to do things the right way.
It was like driving on ice on the way over. DEFINITELY don't recommend whatever toe setting I had on the rear, LOL. You could feel the rear end moving back and forth and feel the VLSD working. I don't think I got over 25mph on the way to the shop.
Ok got an answer back from SPL. I'm going to do a direct quote as I'm not sure if they're referring to their arm or the OEM arm.
"We have a longer adjuster if needed. For some reason there seems to be a slight change in the length of the arm from previous editions that we are just finding out about."
I "think" they're referring to a change in the OEM camber arm since they make everything there and have QC of their own product.
The shorter arm doesn't seem to have affected alignment issues at all. Everything's good.
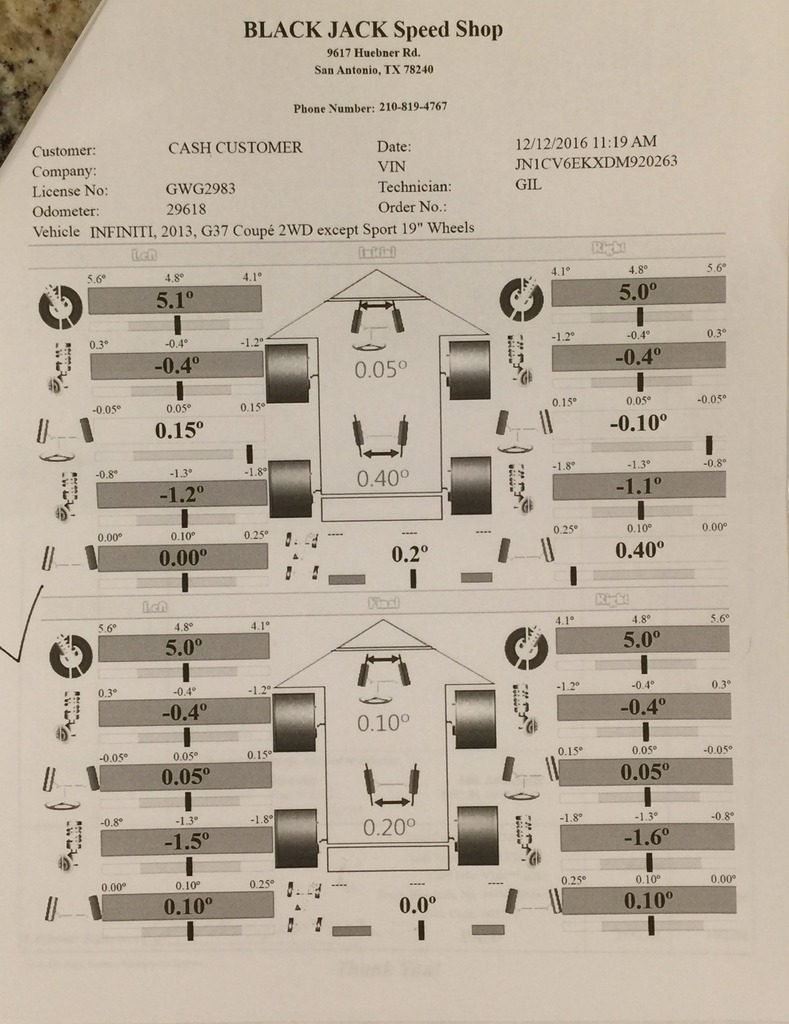
Alignment was a success yesterday and I have very conservative numbers all around. I'll post the alignment sheet in a bit. I may have them add a bit more negative camber but I'd like to go without replacing tires once a year. I drive between 8-10K per year these days, mostly highway.
The loud clunk persists and I don't think they took a look at it. Doesn't happen over bumps while driving, it's sharp, squared-edge impacts that cause it. Like the lip of a driveway. Sounds really bad (metallic clunk and a bit of a metallic squeak) so I'm about to go out, pull the front wheels off, yank out the dampers, and re-torque the SPC arms. I didn't reuse the little bushing that comes with the stock upper control arms, may throw those in too, dunno. Directions don't really do you any good in that regard.
Once the new, slightly taller tires are on, I should theoretically be able to lower the car a few mm lower and be at the same height. Taking measurements today prior to tomorrow's tire change.
I'm also going to go out later, after fixing whatever noise is being created, to see if the new rear alignment numbers help in the traction dept.
Here's the alignment sheet, current specs are on the bottom (checkmark next to it):
Spent half a day installing the front arms and rear links along with a few other tasks.
One thing I noticed is the SPL arms, adjusted out as far as they recommend, are shorter than the stock arms. I didn't measure the difference but I'm guessing it's a bit less than half an inch. The alignment in the rear is way off but I'm taking the car in tomorrow morning for an alignment. My toe is pretty out, car looks knock kneed in the rear. Luckily I'm a mile from the shop.
Everything went in fairly easy, no major issues. Both the SPC's and the SPL's require some big open ended wrenches which I didn't have. I used channel locks instead. It'd be great if they listed the required tools in the instructions. As for instructions, there really aren't any to speak of but there are plenty of DIY threads on this and the370 forum.
Not the best shot of it installed but it was dark out by the time I finished.
Car is at the shop now, left it there as they couldn't get to it til noon. I had a not so pleasant clunking noise going over hard bumps. Asked them to check torque on front upper arms. Blackjack Speed Shop has actually been great to deal with and I feel like I can trust them to do things the right way.
It was like driving on ice on the way over. DEFINITELY don't recommend whatever toe setting I had on the rear, LOL. You could feel the rear end moving back and forth and feel the VLSD working. I don't think I got over 25mph on the way to the shop.
Ok got an answer back from SPL. I'm going to do a direct quote as I'm not sure if they're referring to their arm or the OEM arm.
"We have a longer adjuster if needed. For some reason there seems to be a slight change in the length of the arm from previous editions that we are just finding out about."
I "think" they're referring to a change in the OEM camber arm since they make everything there and have QC of their own product.
The shorter arm doesn't seem to have affected alignment issues at all. Everything's good.
Alignment was a success yesterday and I have very conservative numbers all around. I'll post the alignment sheet in a bit. I may have them add a bit more negative camber but I'd like to go without replacing tires once a year. I drive between 8-10K per year these days, mostly highway.
The loud clunk persists and I don't think they took a look at it. Doesn't happen over bumps while driving, it's sharp, squared-edge impacts that cause it. Like the lip of a driveway. Sounds really bad (metallic clunk and a bit of a metallic squeak) so I'm about to go out, pull the front wheels off, yank out the dampers, and re-torque the SPC arms. I didn't reuse the little bushing that comes with the stock upper control arms, may throw those in too, dunno. Directions don't really do you any good in that regard.
Once the new, slightly taller tires are on, I should theoretically be able to lower the car a few mm lower and be at the same height. Taking measurements today prior to tomorrow's tire change.
I'm also going to go out later, after fixing whatever noise is being created, to see if the new rear alignment numbers help in the traction dept.
Here's the alignment sheet, current specs are on the bottom (checkmark next to it):
01-09-2017, 12:25 AM
#56
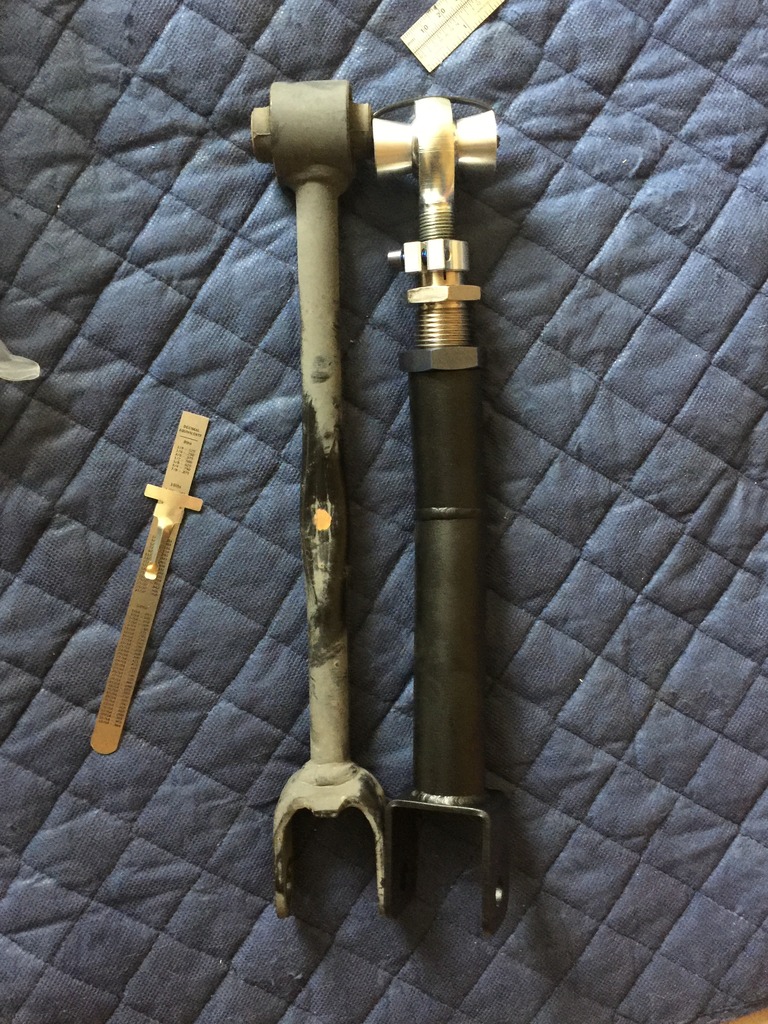
Ok found the culprit for the loud thunk/metallic squeak/grind. It's the leading bushing/forging closest to the nose of the car.
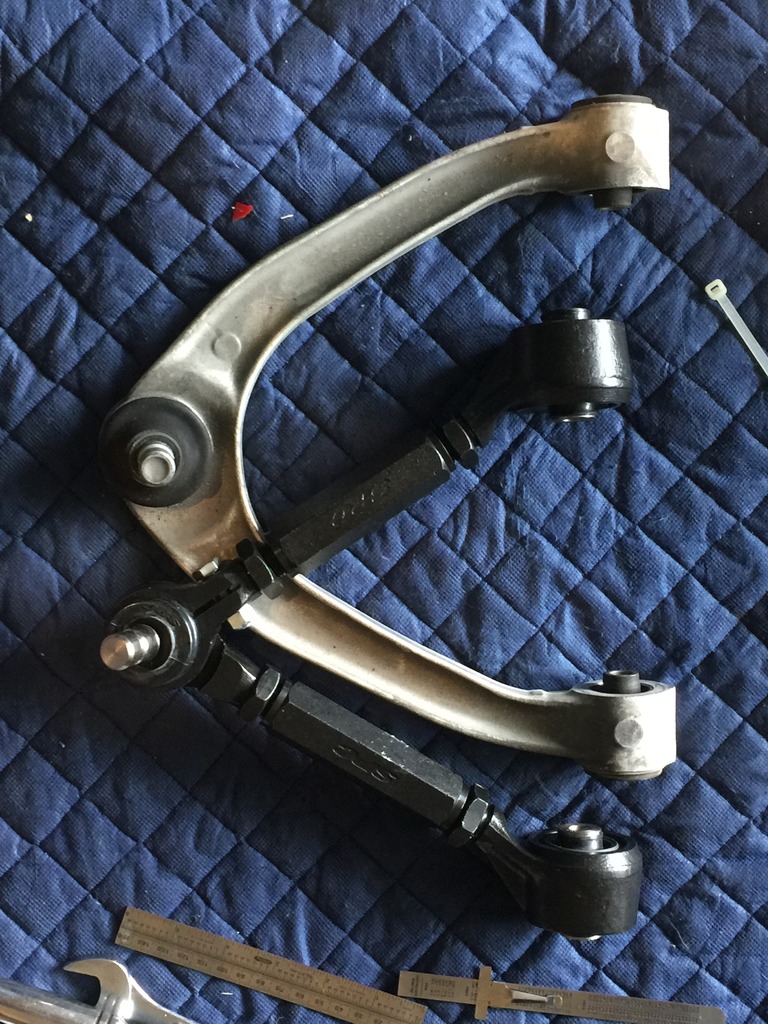
For those who've changed out their upper control arms, you'll understand. The upper arm is an A arm. The two inboard forgings with bearings connect to the car via a bolt. The forging/bearing basically sits in between the strut bulkhead on one side and sheetmetal on the other. The front forging, one closest to the nose of the car, is hitting the sheetmetal. It's dented it in already.
Now the instructions explicitly say to install either forging end so it's parallel to the sheetmetal/bulkhead. You don't want the bearing sitting at an angle. I did this when I installed them but it looks like the shop that did the alignment did not because they were very much skewed when I took the wheel off. It's easy to skew them while making adjustments.
What I did is loosen the back locking nut on the SPC arms and loosen the bolts holding them to the car. I had a 17mm open end wrench that was the right width and I stuck it in one side of the forging/bearing which kept it parallel to the sheetmetal. I then tightened the locking nut again on the SPC arm. Easy enough.
I did have to take the entire shock out. It's much easier to get everything right and due to the tall adjustment **** on the Aragostas, I couldn't "load" the arm and still have the shock out of the way enough to get a torque wrench in there without pinning the adjuster agains the top of the strut tower. Once removed, I then loaded the assembly by jacking up underneath the brake disk and pushing everything up. I then torqued the bolts and reinstalled everything.
I did a quick run up and down the driveway and didn't hear anything. I'll need to take the car out to see if it solved the issue. Personally, I don't think it did and I'm going to contact SPC to see if they have any insight.
Pics.
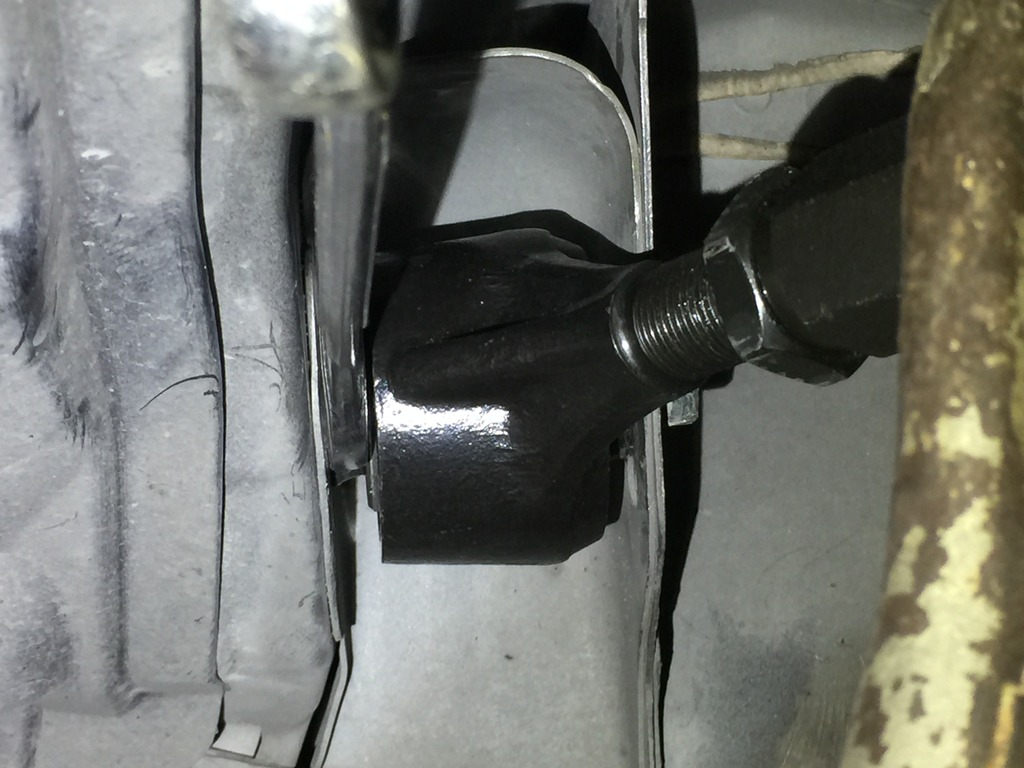
You can see the wrench on the left side of the forging/bearing keeping it parallel. This is on the passenger's side, rear forging.
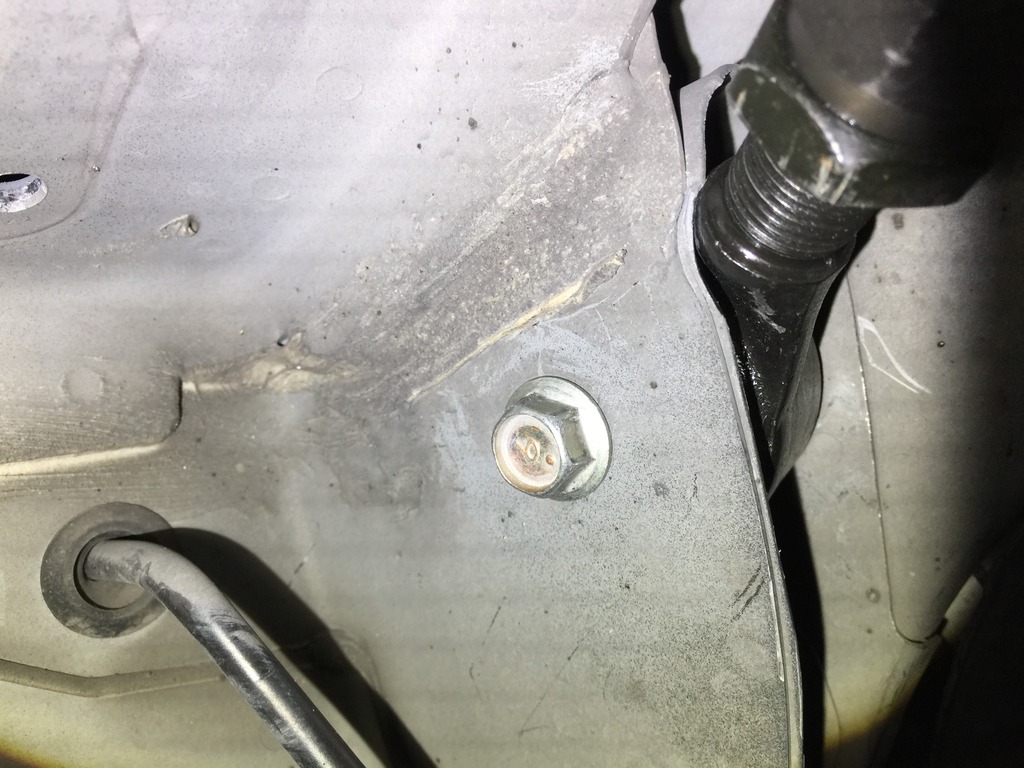
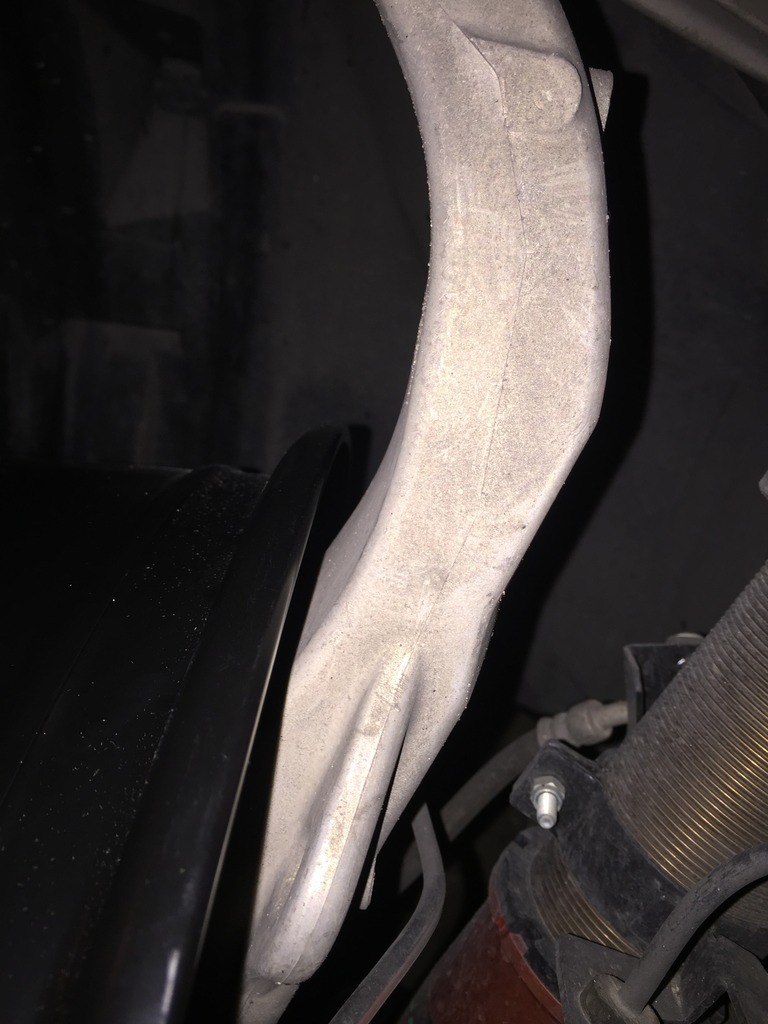
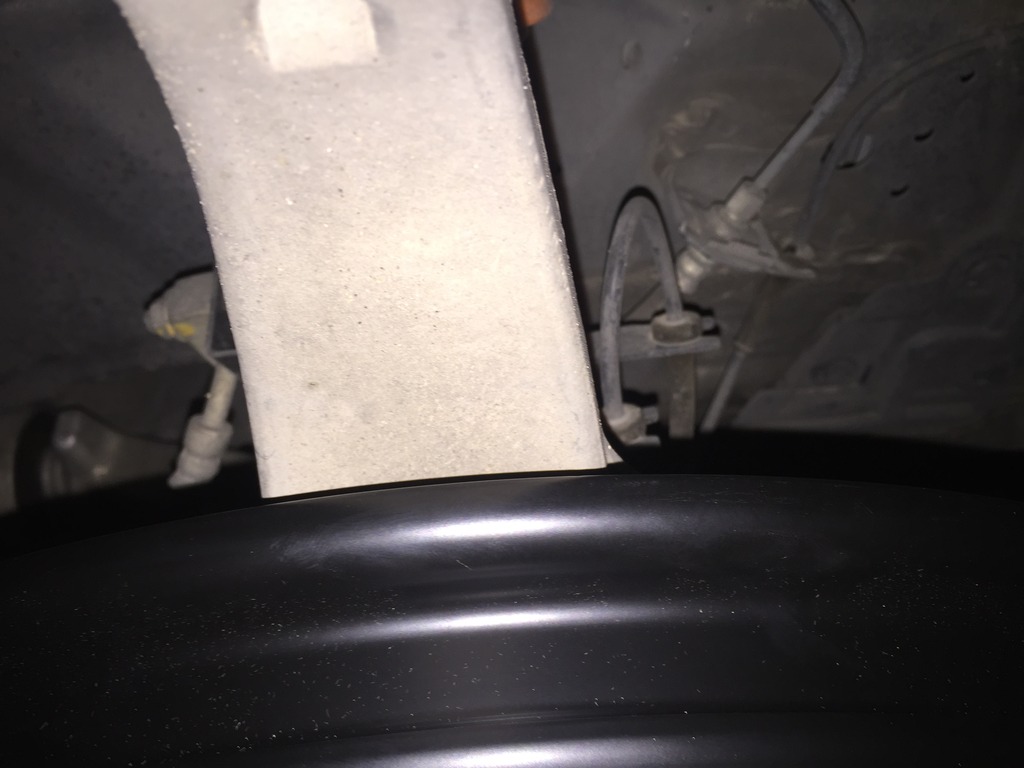
Here's a shot of the front forging/bearing, passenger's side, closest to the front of the car. You can see where the sheetmetal has been pushed out in an arc as the forging is pushed up. This is with the arm pushed fairly far up.
Here's a shot of the damage, with the arm all the way down (decompressed). This is before I took everything out to make adjustments and you can sort of see how the end of the control arm, the forging, is skewed and not parallel to the sheetmetal.
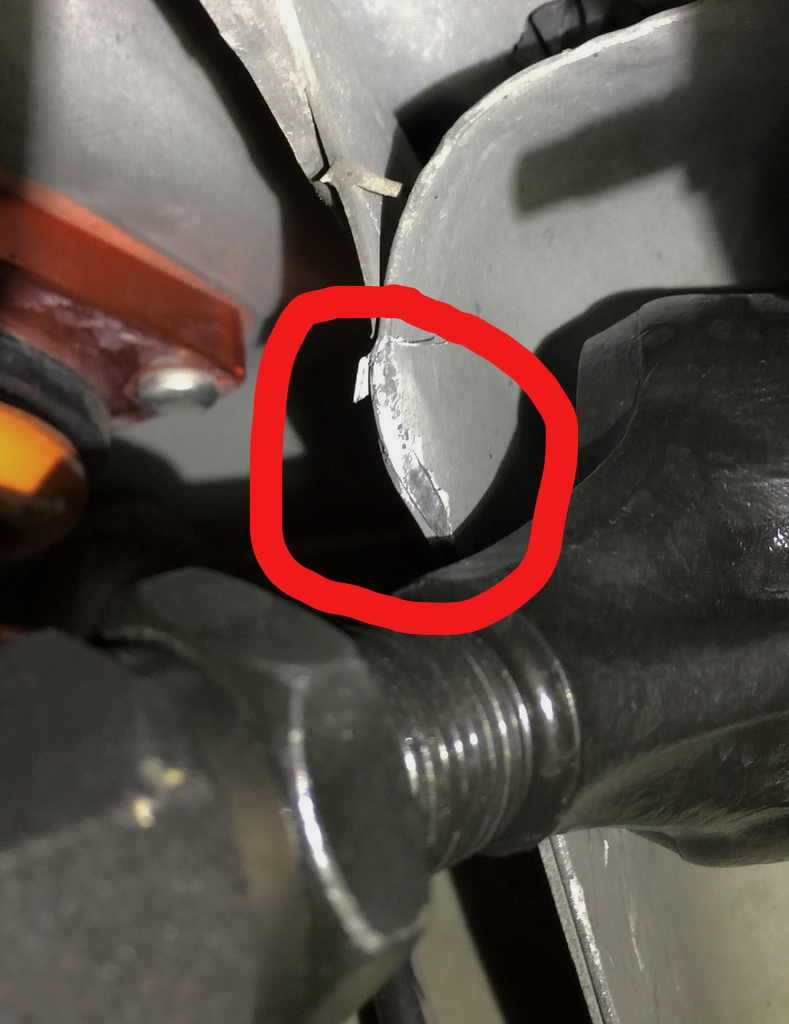
It seems like there's more clearance on the rear side of the control arm. It did this on both sides. I measured the length of each end and there's no difference.
Just found there's a video on the SPC site, with installation on a G35 but it's pretty much the same except we have a different pinch bolt design.
UPDATE
Ok just got off the phone with SPC. They're coming out with an updated FAQ related to this issue. Essentially it's a non-issue depending on how you look at it. He said straightening the forgings and making sure they're parallel to the sheetmetal alleviates it most of the time but it depends on your caster setting and it can interfere on higher settings. They're also seeing some interference on vehicles that are really lowered (mine isn't). He basically said to bend the metal back there at the top back a bit and problem solved.
Ultimately not the answer I'd like to hear and while it'll not really cause any long-term issues I'd rather not have this issue in the first place. As minor as it is (and it's a quick fix if you know to look for it) just take it into consideration before purchasing or installing. It's not enough of an issue, as long as it doesn't further deform or cause any abnormal noises, for me to swap them out to say the Voodoo or SPL.
For those who've changed out their upper control arms, you'll understand. The upper arm is an A arm. The two inboard forgings with bearings connect to the car via a bolt. The forging/bearing basically sits in between the strut bulkhead on one side and sheetmetal on the other. The front forging, one closest to the nose of the car, is hitting the sheetmetal. It's dented it in already.
Now the instructions explicitly say to install either forging end so it's parallel to the sheetmetal/bulkhead. You don't want the bearing sitting at an angle. I did this when I installed them but it looks like the shop that did the alignment did not because they were very much skewed when I took the wheel off. It's easy to skew them while making adjustments.
What I did is loosen the back locking nut on the SPC arms and loosen the bolts holding them to the car. I had a 17mm open end wrench that was the right width and I stuck it in one side of the forging/bearing which kept it parallel to the sheetmetal. I then tightened the locking nut again on the SPC arm. Easy enough.
I did have to take the entire shock out. It's much easier to get everything right and due to the tall adjustment **** on the Aragostas, I couldn't "load" the arm and still have the shock out of the way enough to get a torque wrench in there without pinning the adjuster agains the top of the strut tower. Once removed, I then loaded the assembly by jacking up underneath the brake disk and pushing everything up. I then torqued the bolts and reinstalled everything.
I did a quick run up and down the driveway and didn't hear anything. I'll need to take the car out to see if it solved the issue. Personally, I don't think it did and I'm going to contact SPC to see if they have any insight.
Pics.
You can see the wrench on the left side of the forging/bearing keeping it parallel. This is on the passenger's side, rear forging.
Here's a shot of the front forging/bearing, passenger's side, closest to the front of the car. You can see where the sheetmetal has been pushed out in an arc as the forging is pushed up. This is with the arm pushed fairly far up.
Here's a shot of the damage, with the arm all the way down (decompressed). This is before I took everything out to make adjustments and you can sort of see how the end of the control arm, the forging, is skewed and not parallel to the sheetmetal.
It seems like there's more clearance on the rear side of the control arm. It did this on both sides. I measured the length of each end and there's no difference.
Just found there's a video on the SPC site, with installation on a G35 but it's pretty much the same except we have a different pinch bolt design.
UPDATE
Ok just got off the phone with SPC. They're coming out with an updated FAQ related to this issue. Essentially it's a non-issue depending on how you look at it. He said straightening the forgings and making sure they're parallel to the sheetmetal alleviates it most of the time but it depends on your caster setting and it can interfere on higher settings. They're also seeing some interference on vehicles that are really lowered (mine isn't). He basically said to bend the metal back there at the top back a bit and problem solved.
Ultimately not the answer I'd like to hear and while it'll not really cause any long-term issues I'd rather not have this issue in the first place. As minor as it is (and it's a quick fix if you know to look for it) just take it into consideration before purchasing or installing. It's not enough of an issue, as long as it doesn't further deform or cause any abnormal noises, for me to swap them out to say the Voodoo or SPL.
01-09-2017, 12:27 AM
#57
Just went out for a hard drive. Good news, problem solved! No noise, no grinding, zero, nada, nothing. I can "maybe" detect an ever so slight increase in vibration/road feel but it pretty much feels the same as stock which is a good thing.
As for traction issues, the new alignment seems to have cured it mostly. I get a bit of slip and then it's all go. Man I'm a happy camper as it just saved me from spending $2K+ on a new limited slip differential setup. I'm sure the Michelins will help even further. Time for a tune!
As for traction issues, the new alignment seems to have cured it mostly. I get a bit of slip and then it's all go. Man I'm a happy camper as it just saved me from spending $2K+ on a new limited slip differential setup. I'm sure the Michelins will help even further. Time for a tune!
01-09-2017, 12:35 AM
#58
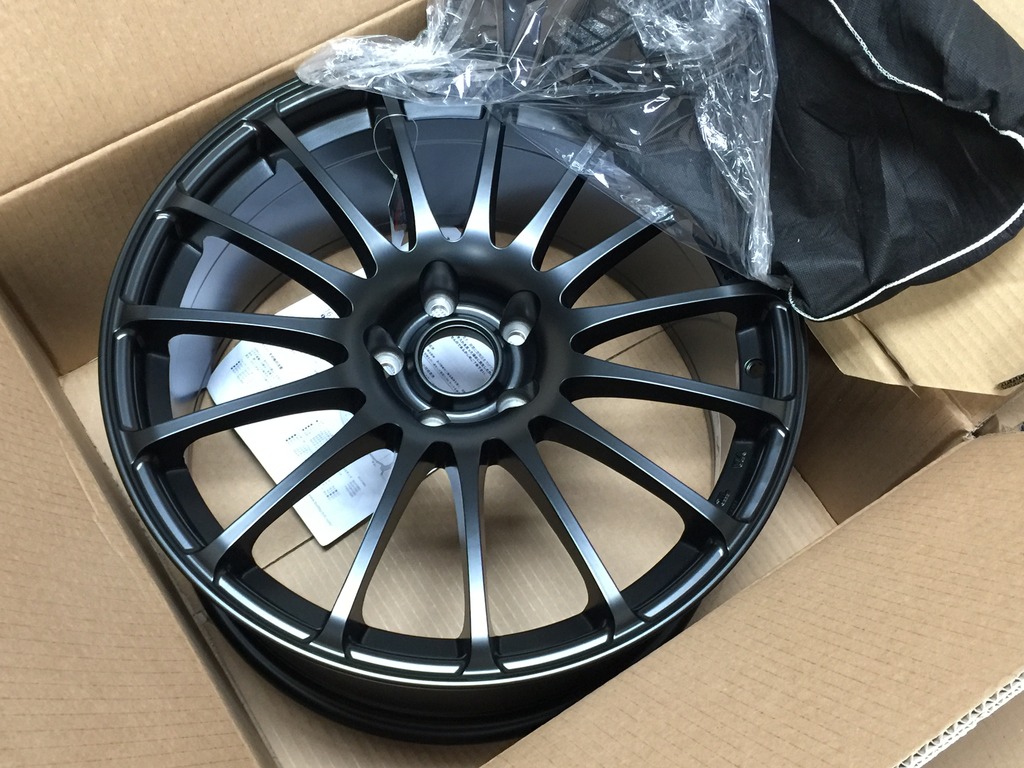
Time for wheels and tires! Now that I have a solid alignment, I'm ready to install new rubber.
As I mentioned earlier, I was dead set on a square setup that lost a bit of weight and didn't break the bank.
I ordered the Buddy Clubs from ConceptZ and they arrived in four boxes in a matter of days.
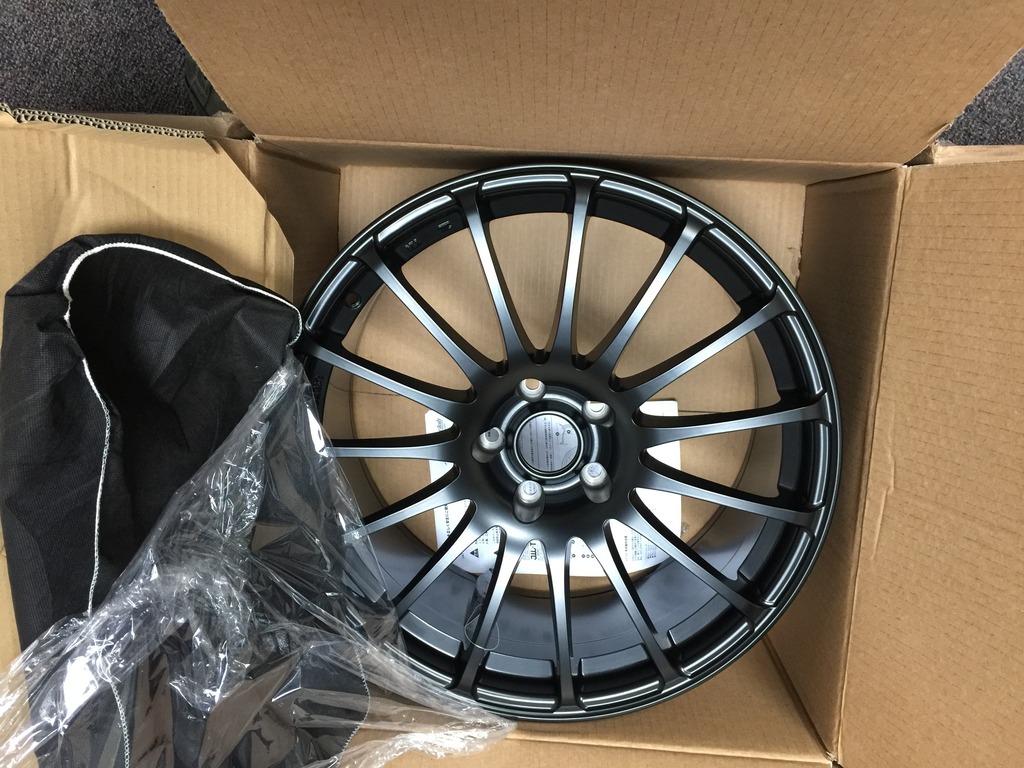
I don't have rubber for them at this point so all I can do is run some test fitment scenarios with different spacers (or none at all).
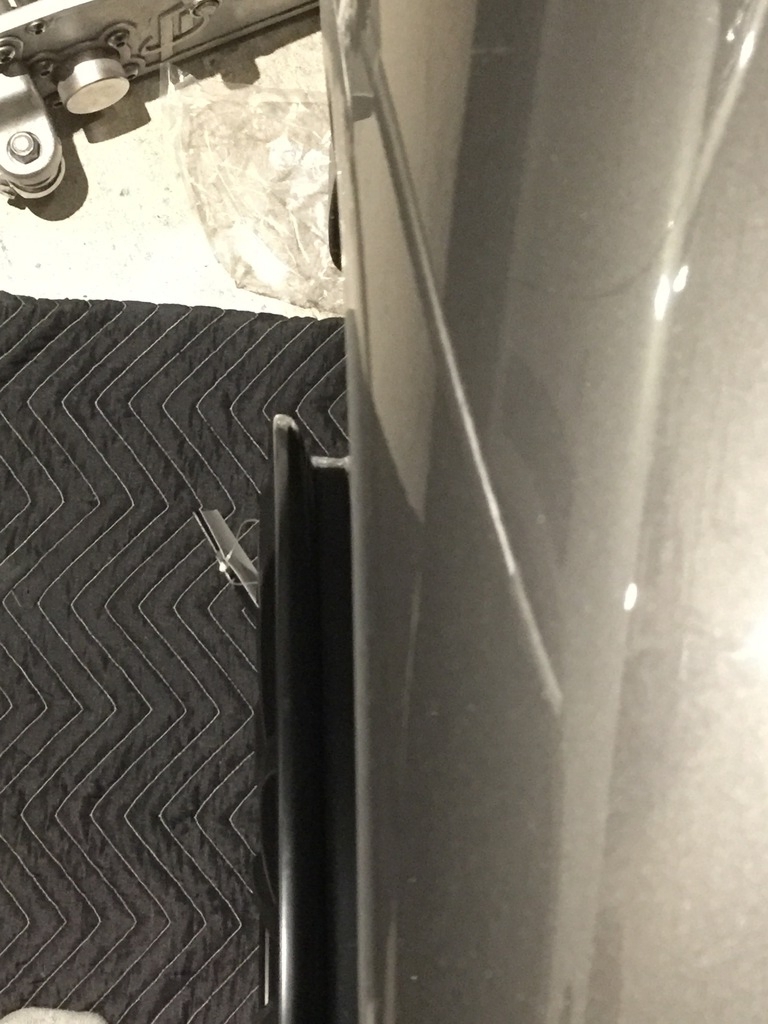
Rear wheel test fit with 25mm spacers. Yep, a bit too far out.

No spacer, looks like it'll be flush and there's tons of clearance everywhere so no worries there.
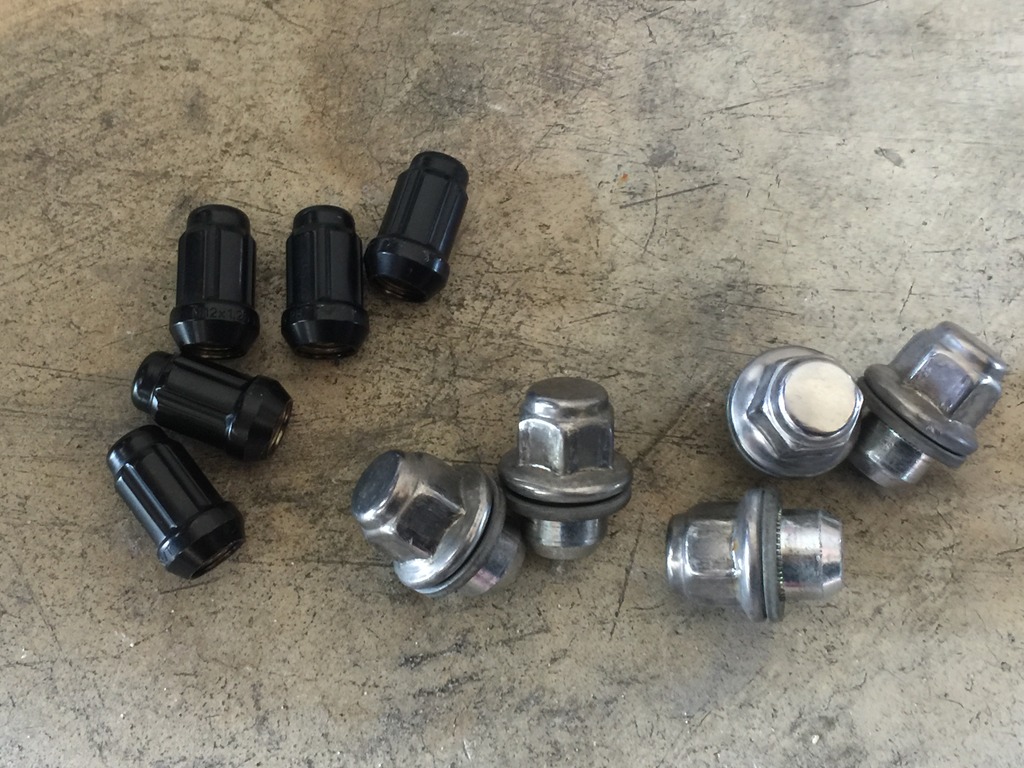
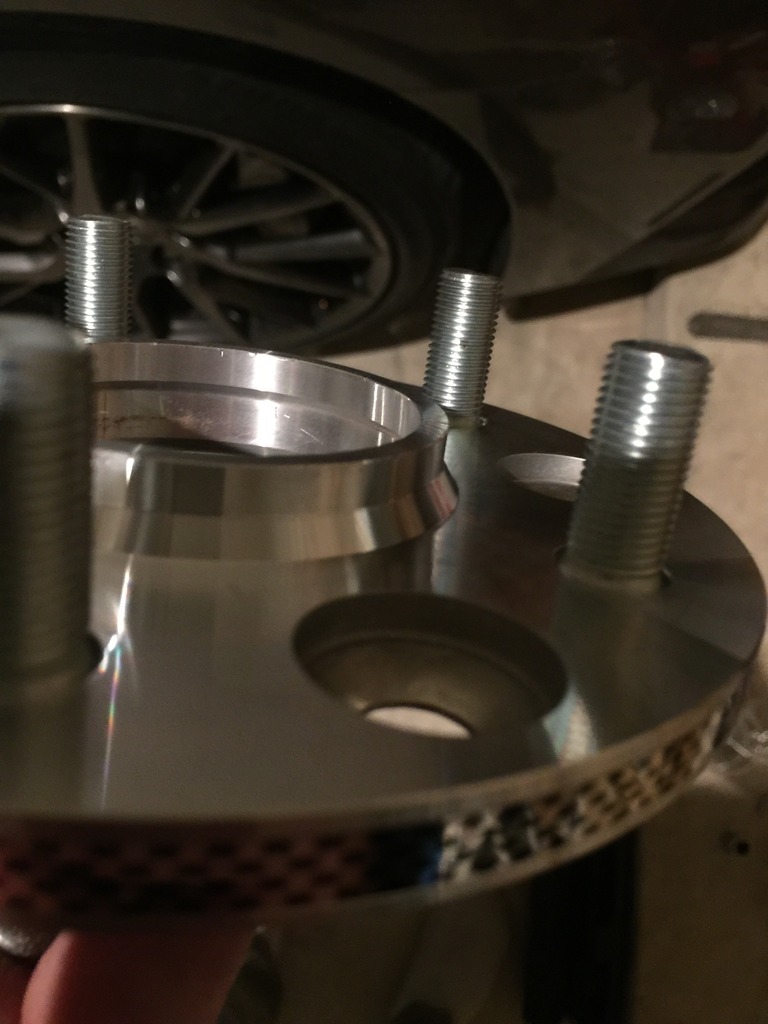
OEM vs. the new lugs.
Weighed a few things.
Front wheel/tire weighs in at a whopping 52 pounds
Rears are 54 pounds.
OEM lugs are 72 grams each, 2.6oz, 13.3oz for each wheel.
New lugs are 33 grams each, 5.9 oz for a set of five.
Since it looks like I'll run these wheels sans spacers, I'll save a pound or two there too. The SPC front camber arms, the new style with turnbuckles, are heavier than the stock arms. I forgot to weigh them but they're about twice as heavy.
As I mentioned earlier, I was dead set on a square setup that lost a bit of weight and didn't break the bank.
I ordered the Buddy Clubs from ConceptZ and they arrived in four boxes in a matter of days.
I don't have rubber for them at this point so all I can do is run some test fitment scenarios with different spacers (or none at all).
Rear wheel test fit with 25mm spacers. Yep, a bit too far out.
No spacer, looks like it'll be flush and there's tons of clearance everywhere so no worries there.
OEM vs. the new lugs.
Weighed a few things.
Front wheel/tire weighs in at a whopping 52 pounds
Rears are 54 pounds.
OEM lugs are 72 grams each, 2.6oz, 13.3oz for each wheel.
New lugs are 33 grams each, 5.9 oz for a set of five.
Since it looks like I'll run these wheels sans spacers, I'll save a pound or two there too. The SPC front camber arms, the new style with turnbuckles, are heavier than the stock arms. I forgot to weigh them but they're about twice as heavy.
01-09-2017, 12:43 AM
#59
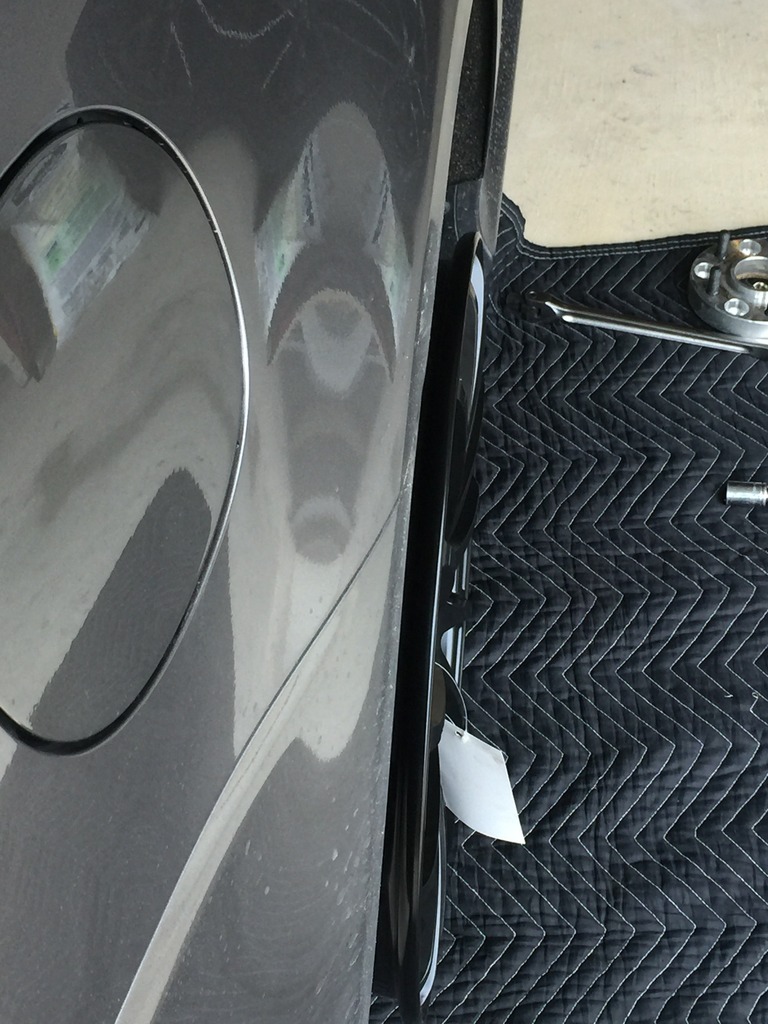
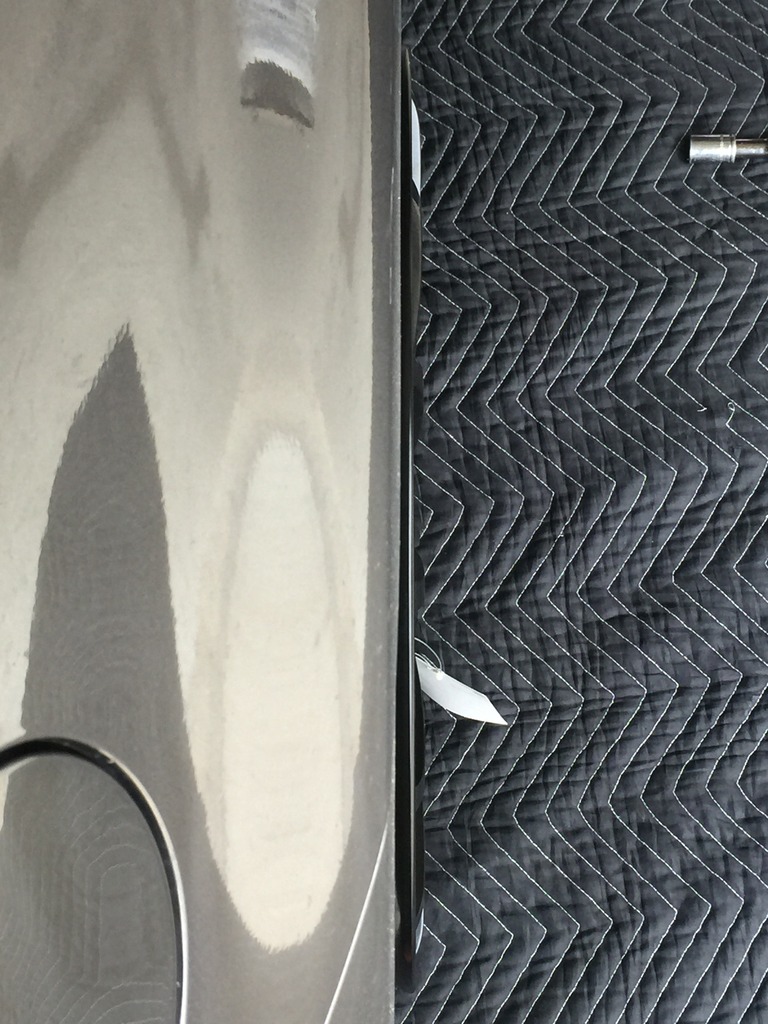
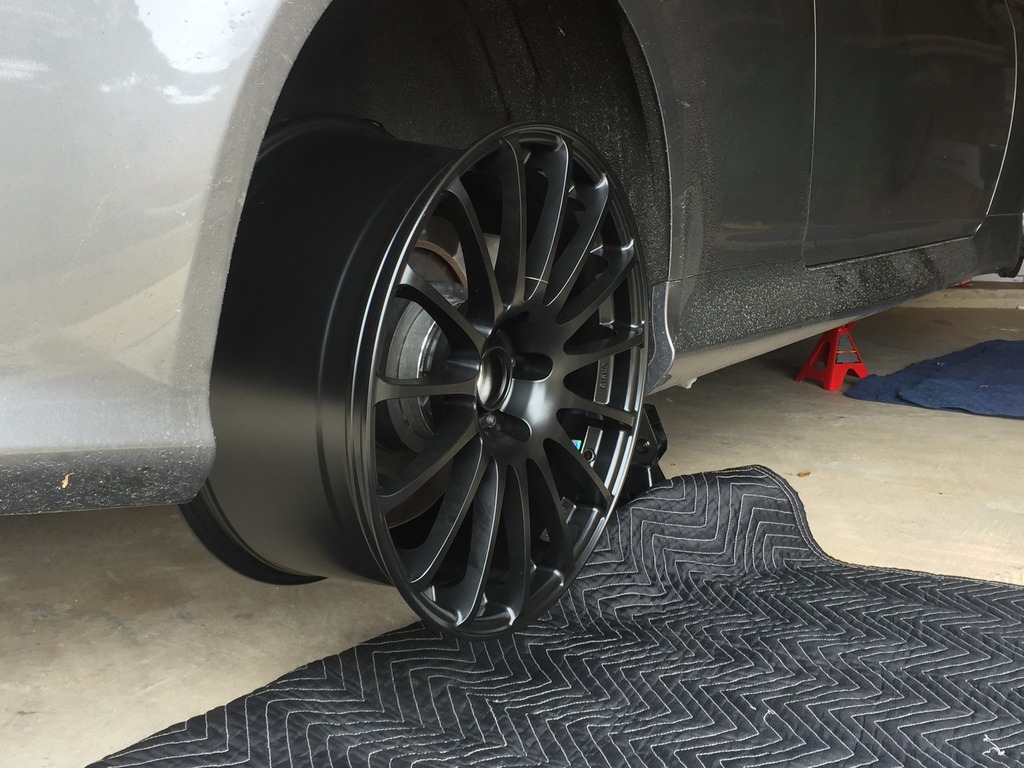
I had a bit of time to test-fit my new wheels on the front.
My current setup is the stock IPL wheels with 20mm front and 25mm rear spacers (bolt on). That's an 8.5" wheel front, 23mm effective offset, and a 9" wheel with a 20mm effective offset.
My new wheels are 19x9.5" with a 45mm offset. TONS of caliper clearance. Like more than a finger, with NO spacer. These wheels would most likely clear every big brake kit out on the market for the G37.
With no spacer and no tire on the wheel, the front wheel inner clearance between the edge of the rim and the portion of the lower control arm that meets the upper is less than a finger width. It almost looks like, with a tire, it would rub but the arm continues to arc out as it goes up. I'll be using a 255/40 which is 27.1" tall (26.9 is OEM tire height). It's not so much the height as it approaches the upper control arm ball joint as it is the width.
I was originally concerned the tires would rub the upright but (spoiler alert) they do not.
So why don't I just add spacers and call it a day? Well I did a test fit with the 20mm spacers (25mm effective offset) and felt they stuck out way too far for my tastes. It's also hard to gauge with no tire and the suspension drooping but this gives you a rough idea.
I then tried the 10mm and encountered another issue I'll get to in a moment, which brought me back to no spacer and what looks to be a flush fitment but with inner wheel clearance questions.
The 10mm spacers are hub centric. I'm using adapter rings to go from 73mm to 66.1mm for the wheels. Yep, the inner lip of the hub centric fitting on the spacer has it's own flared out section towards the base. So the spacer doesn't sit flush and it looks like when I put the wheel on, it too, doesn't sit flat against the spacer. No bueno.
It may not be possible to make a 10mm spacer that's not flared at the base. Dunno.
Here you can see the hub centric ring on the spacer and the gap between the spacer face and the bottom of the hub centric ring.
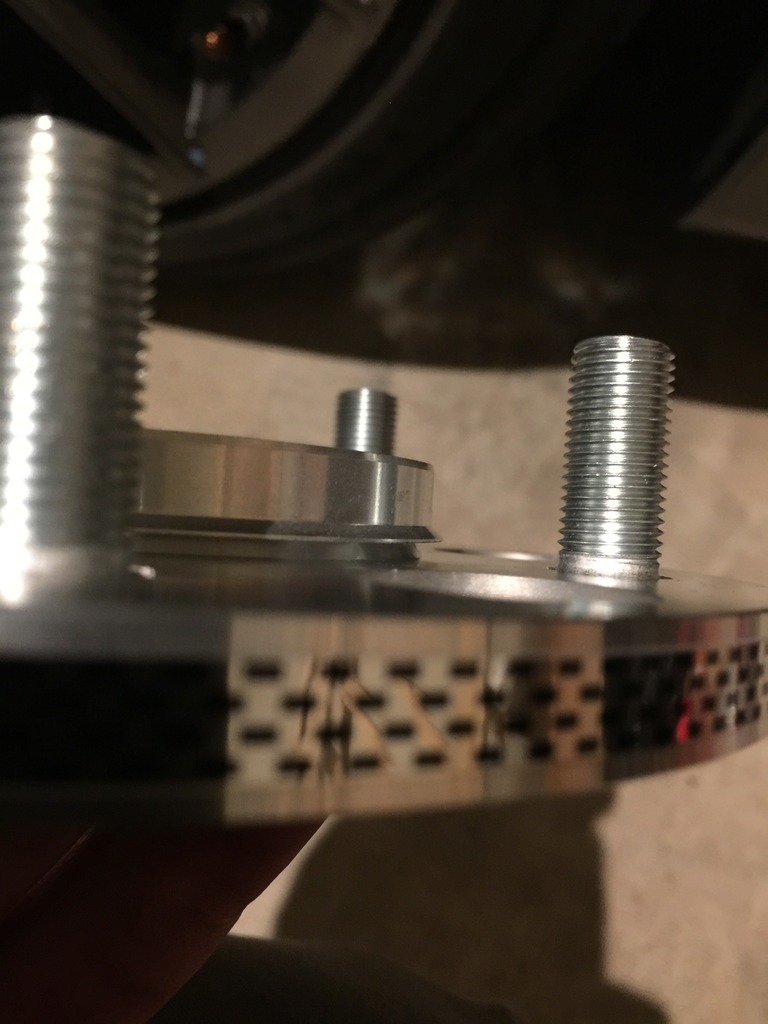
No hub centric ring, noticed the beveled bottom edge as the spacer's hub centric meets the face of the spacer.
My solution was to order super lightweight 5mm spacers. They're lighter than one of my lug nuts and cost under $15.
http://www.ebay.com/itm/381851573024?_trksid=p2057872.m2749.l2649&ssPageName=STRK%3AMEBIDX%3AIT
I also ordered a set of tire pressure monitors, part number PMV-107S. I have an appointment at Infiniti to get them coded to the car.
I was initially concerned with the silver valve stem covers that come on Infiniti cars clashing with the black wheels so I ordered black valve stem covers.
Unfortunately, the new black valve stems are significantly longer than the OEM stem covers. I thought it'd be fine as it then covers all of the threaded portion in addition to the stem's mid section. The caps that are included thread on just fine but they're long enough that it bottoms out on the stem cover instead of the cap's rubber gasket which sits inside the cap at the top.
The caps are made for Mackin Industries (Volk distributor here in the U.S). Tough to find them, only a few shops carry them and most ch.arge like $12 to ship them which is ridiculous. Got mine off of Ebay with shipping included. Just be aware when you're shopping around.
Pics!
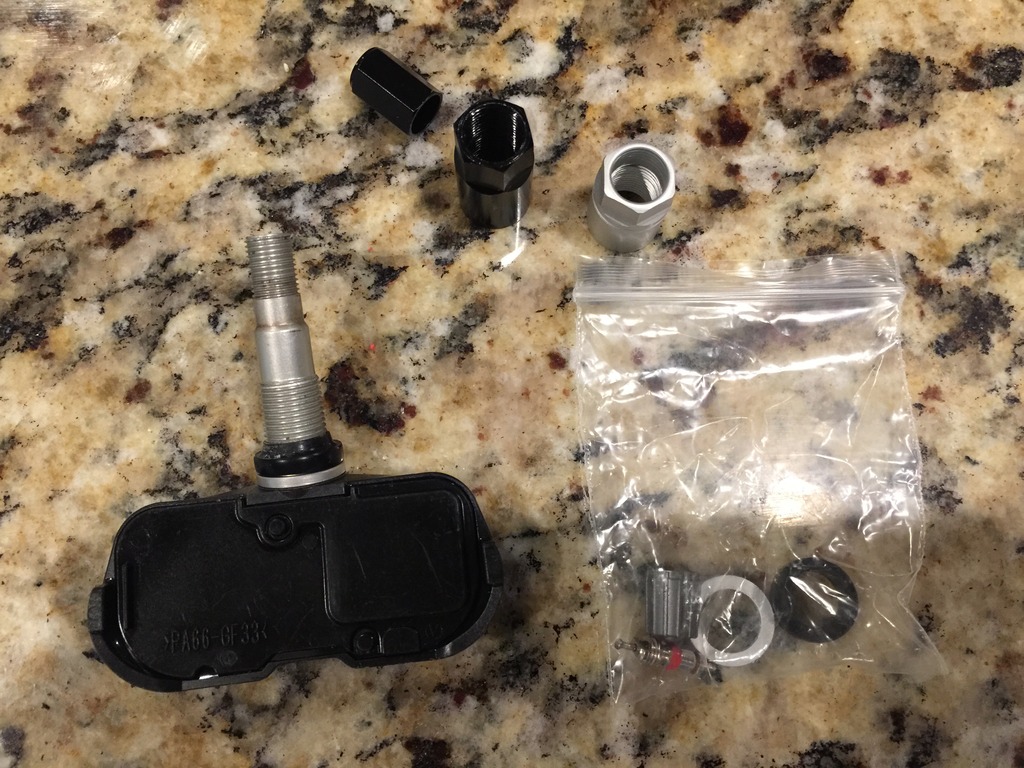
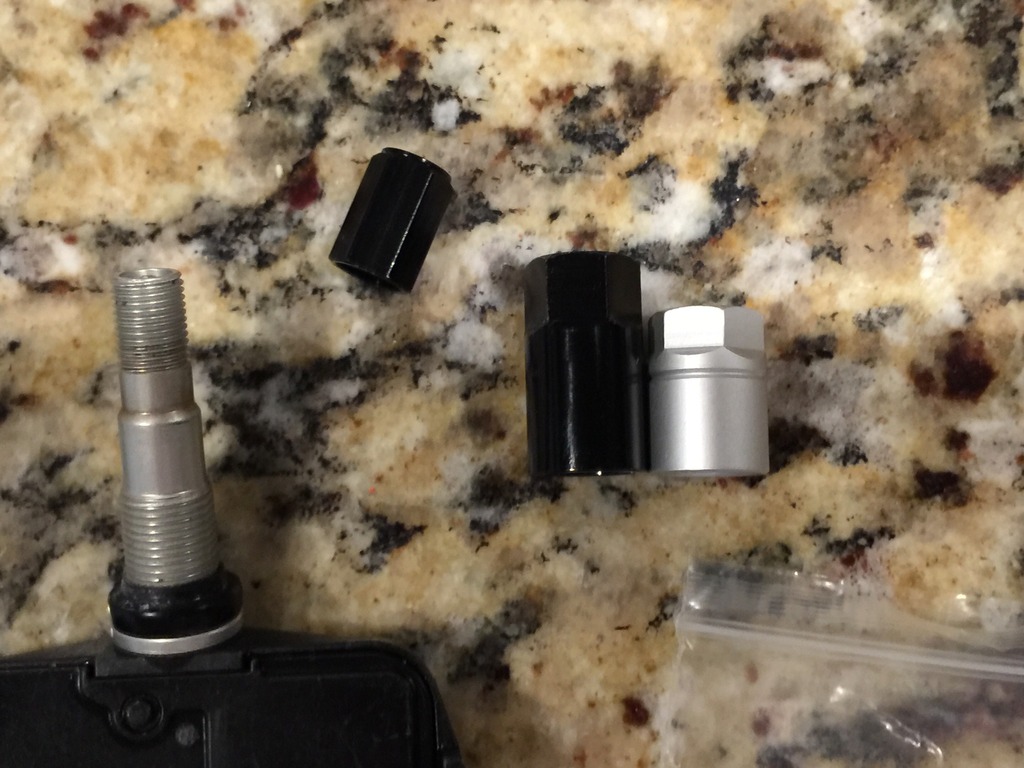
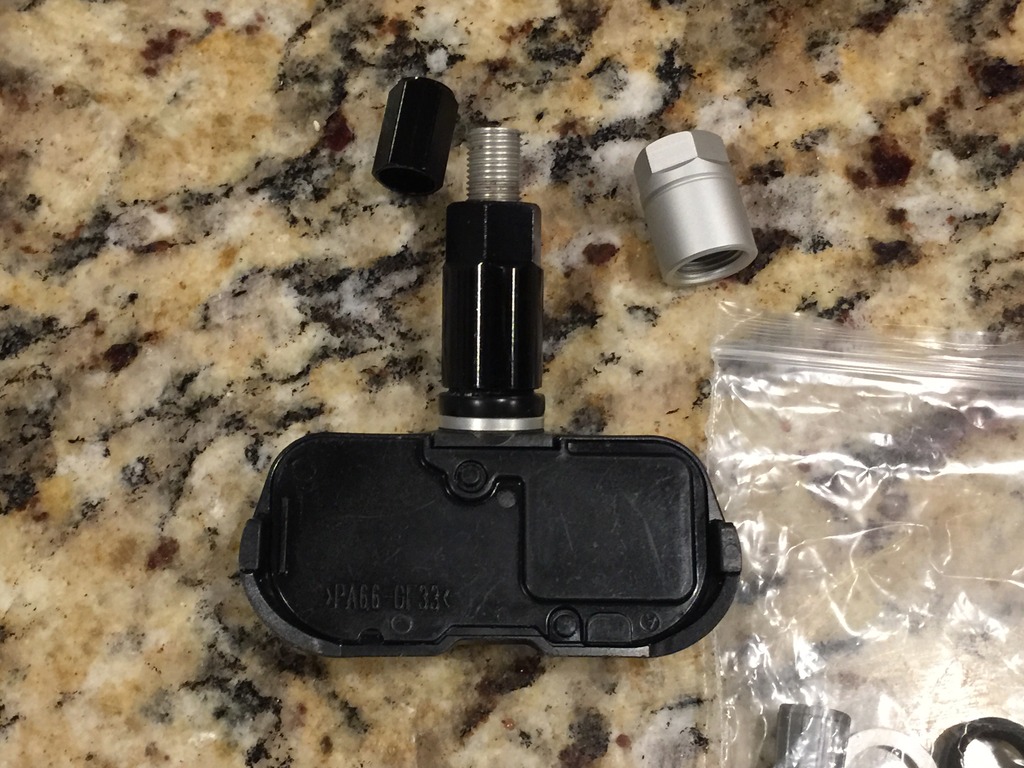
So we ended up NOT using the stems. On the TPMS valve stem, you have a base metal washer, rubber seal and then you add another washer on top before screwing in the valve stem cover. With that washer, it's too long and would require you to torque the cover past spec and possibly distort the gasket.
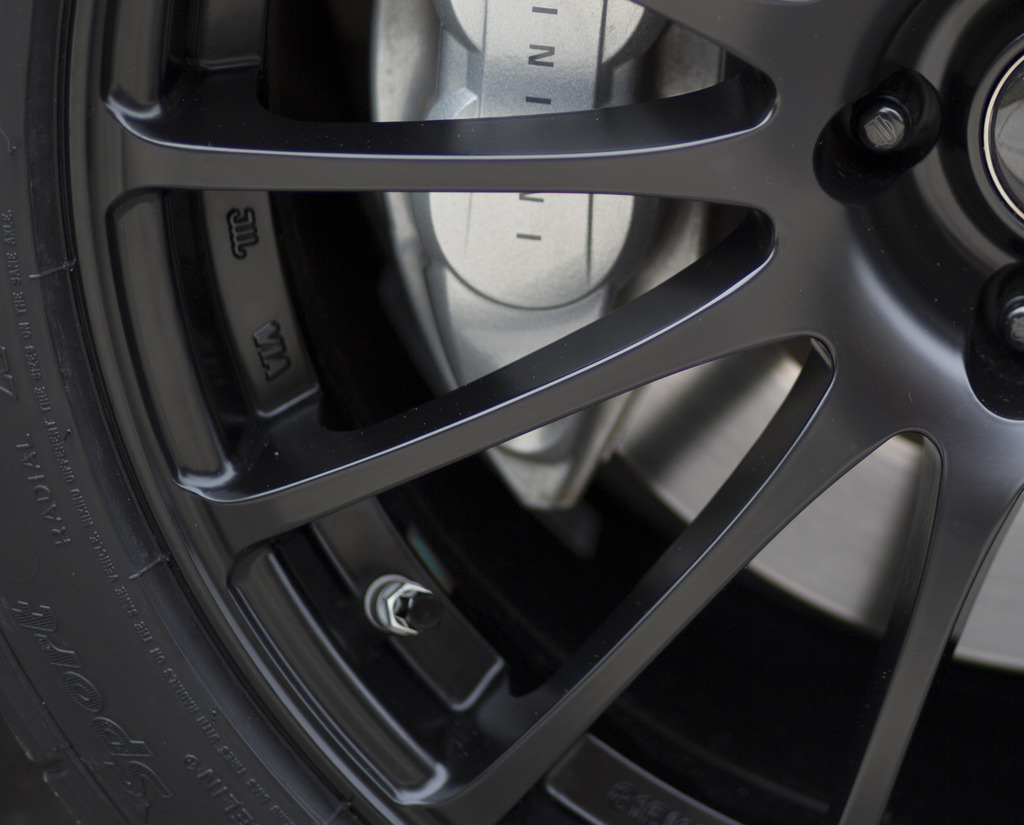
So....I've got the black covers on there for now and I'm going to have the stem covers shortened. There's an area that doesn't have any threads and by removing material up to the threads, it'll be short enough to work. Just has to be done with some precision at a right angle so it sits squared up against the base.
As it is now.
My current setup is the stock IPL wheels with 20mm front and 25mm rear spacers (bolt on). That's an 8.5" wheel front, 23mm effective offset, and a 9" wheel with a 20mm effective offset.
My new wheels are 19x9.5" with a 45mm offset. TONS of caliper clearance. Like more than a finger, with NO spacer. These wheels would most likely clear every big brake kit out on the market for the G37.
With no spacer and no tire on the wheel, the front wheel inner clearance between the edge of the rim and the portion of the lower control arm that meets the upper is less than a finger width. It almost looks like, with a tire, it would rub but the arm continues to arc out as it goes up. I'll be using a 255/40 which is 27.1" tall (26.9 is OEM tire height). It's not so much the height as it approaches the upper control arm ball joint as it is the width.
I was originally concerned the tires would rub the upright but (spoiler alert) they do not.
So why don't I just add spacers and call it a day? Well I did a test fit with the 20mm spacers (25mm effective offset) and felt they stuck out way too far for my tastes. It's also hard to gauge with no tire and the suspension drooping but this gives you a rough idea.
I then tried the 10mm and encountered another issue I'll get to in a moment, which brought me back to no spacer and what looks to be a flush fitment but with inner wheel clearance questions.
The 10mm spacers are hub centric. I'm using adapter rings to go from 73mm to 66.1mm for the wheels. Yep, the inner lip of the hub centric fitting on the spacer has it's own flared out section towards the base. So the spacer doesn't sit flush and it looks like when I put the wheel on, it too, doesn't sit flat against the spacer. No bueno.
It may not be possible to make a 10mm spacer that's not flared at the base. Dunno.
Here you can see the hub centric ring on the spacer and the gap between the spacer face and the bottom of the hub centric ring.
No hub centric ring, noticed the beveled bottom edge as the spacer's hub centric meets the face of the spacer.
My solution was to order super lightweight 5mm spacers. They're lighter than one of my lug nuts and cost under $15.
http://www.ebay.com/itm/381851573024?_trksid=p2057872.m2749.l2649&ssPageName=STRK%3AMEBIDX%3AIT
I also ordered a set of tire pressure monitors, part number PMV-107S. I have an appointment at Infiniti to get them coded to the car.
I was initially concerned with the silver valve stem covers that come on Infiniti cars clashing with the black wheels so I ordered black valve stem covers.
Unfortunately, the new black valve stems are significantly longer than the OEM stem covers. I thought it'd be fine as it then covers all of the threaded portion in addition to the stem's mid section. The caps that are included thread on just fine but they're long enough that it bottoms out on the stem cover instead of the cap's rubber gasket which sits inside the cap at the top.
The caps are made for Mackin Industries (Volk distributor here in the U.S). Tough to find them, only a few shops carry them and most ch.arge like $12 to ship them which is ridiculous. Got mine off of Ebay with shipping included. Just be aware when you're shopping around.
Pics!
So we ended up NOT using the stems. On the TPMS valve stem, you have a base metal washer, rubber seal and then you add another washer on top before screwing in the valve stem cover. With that washer, it's too long and would require you to torque the cover past spec and possibly distort the gasket.
So....I've got the black covers on there for now and I'm going to have the stem covers shortened. There's an area that doesn't have any threads and by removing material up to the threads, it'll be short enough to work. Just has to be done with some precision at a right angle so it sits squared up against the base.
As it is now.
01-09-2017, 12:47 AM
#60
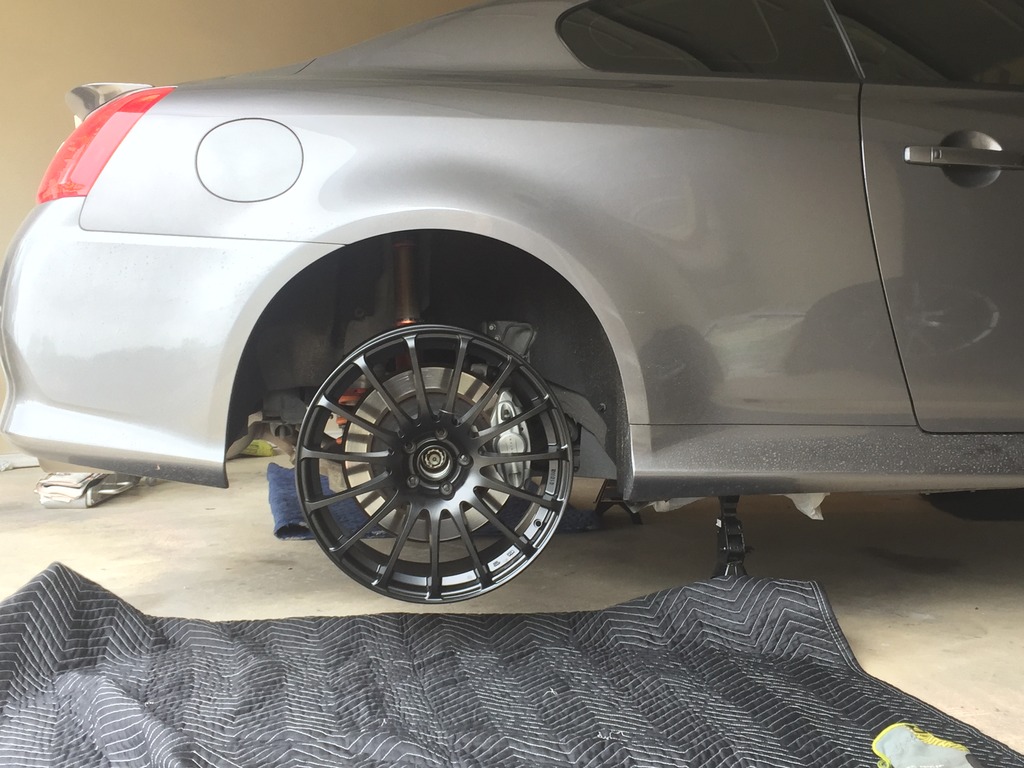
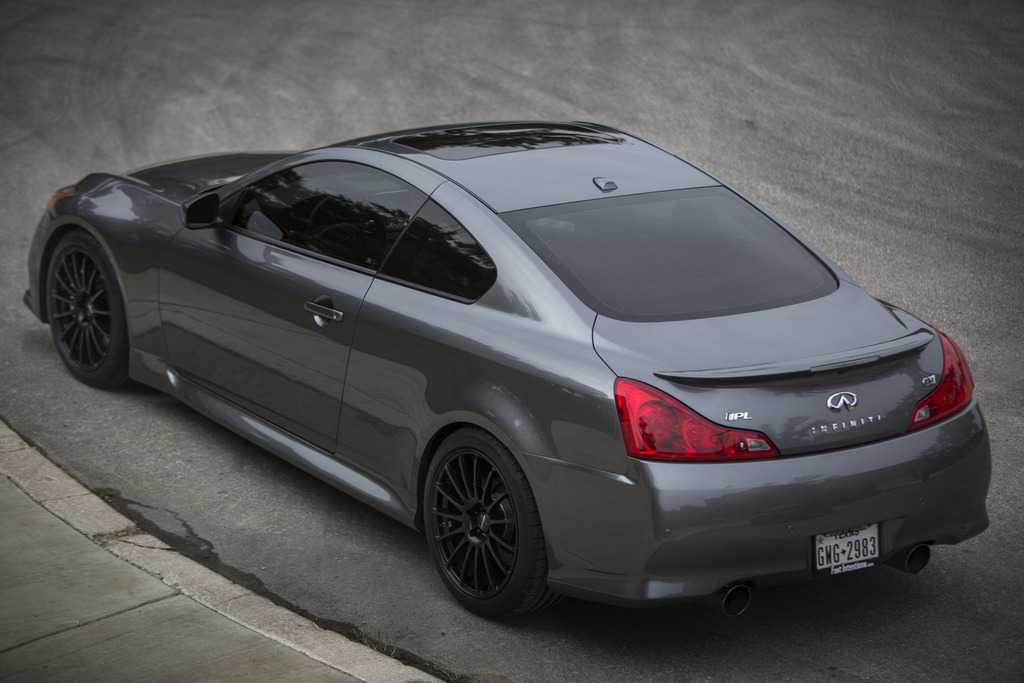
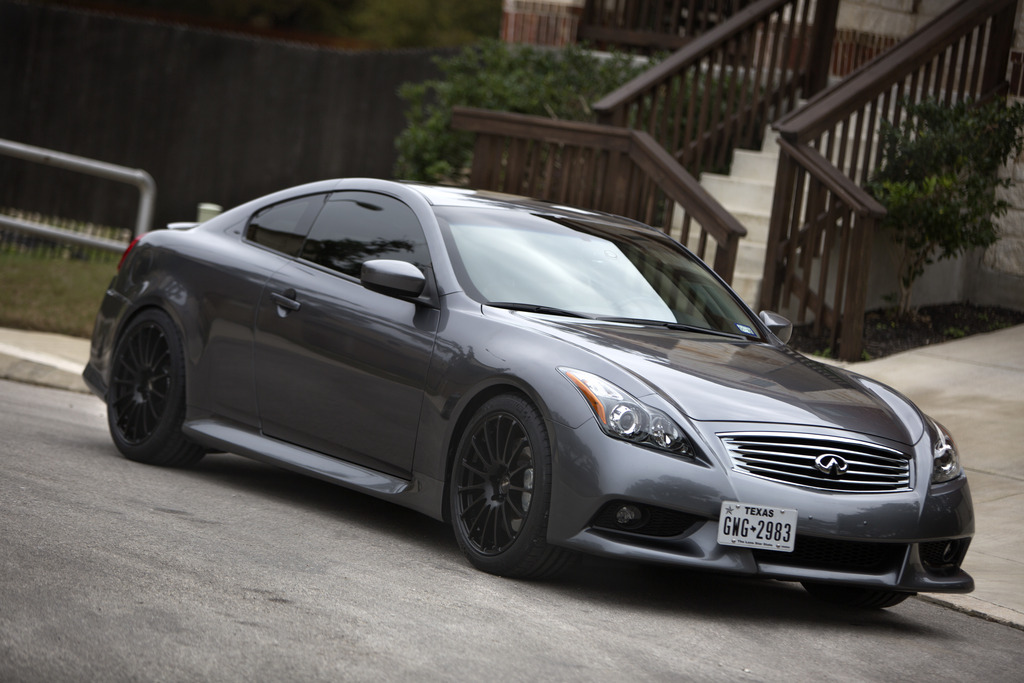
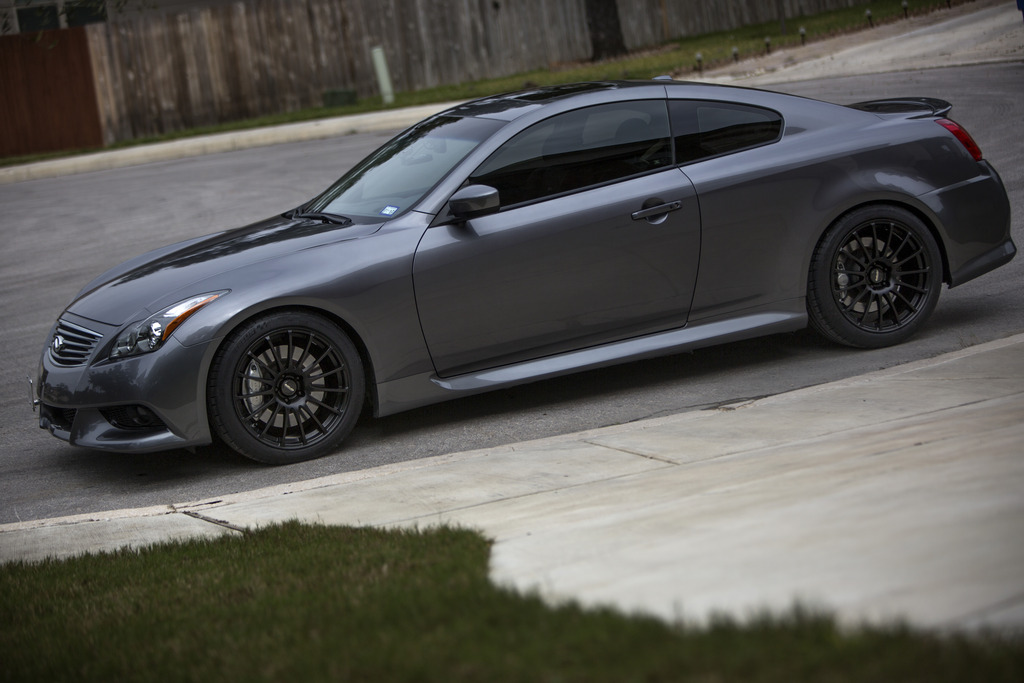
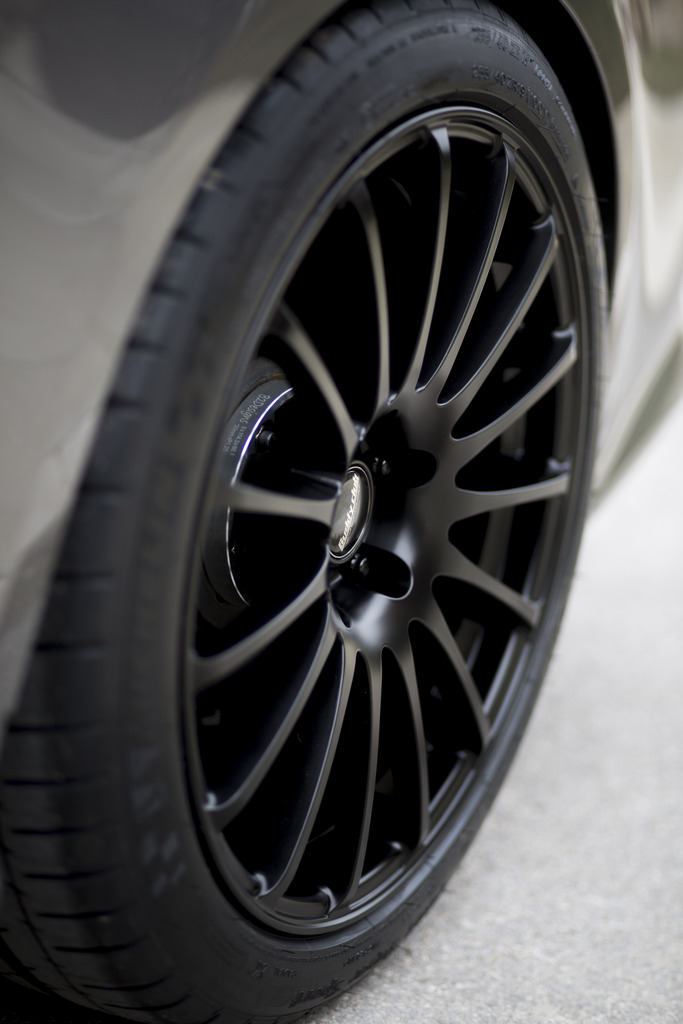
Installed!
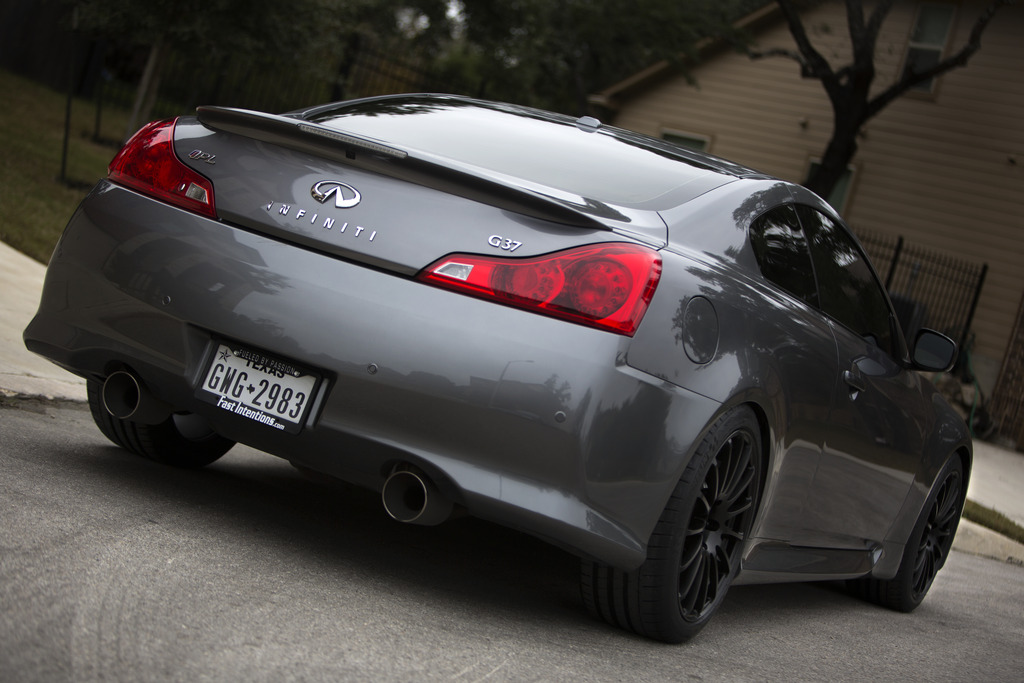
Buddy Club Zen 19x9.5", Michelin Pilot Super Sports, 255/40/19
No spacers in front, 20mm spacer in the rear. I could probably use a 15mm in the back but I'll leave it as is for a while. Will put 5mm spacers on the front.
Buddy Club Zen 19x9.5", Michelin Pilot Super Sports, 255/40/19
No spacers in front, 20mm spacer in the rear. I could probably use a 15mm in the back but I'll leave it as is for a while. Will put 5mm spacers on the front.