When you click on links to various merchants on this site and make a purchase, this can result in this site earning a commission. Affiliate programs and affiliations include, but are not limited to, the eBay Partner Network.
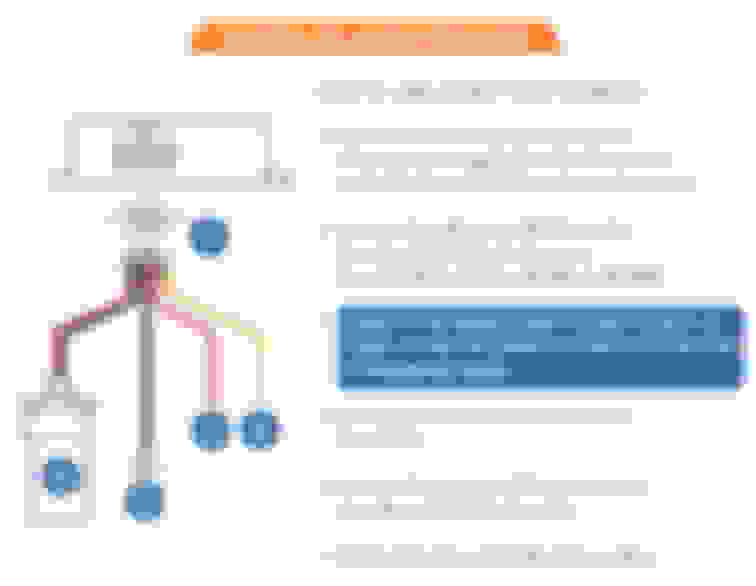
Which fuse do you connect to? See image below. As for the grounding wires, you just need to find a small bolt behind the kick panel, loosen it and connect the ground wires to that bolt.
Pic on the right shows the right way to do it with a fuse tap kit. Found here: http://amzn.to/28Z6HLn
#6 - Connect to Dash Cam!
#3 - Red Wire connects to the socket fuse (acc)
#4 - Yellow Wire connects to the Meter fuse (bat)
#5 - Ground wires. Find a tiny bolt behind the kick panel (remove the kick panel to make your life easier) loosen the bolt, use a plier to make the metal loop bigger. Slide the loop behind the bolt you loosened, tighten bolt and ur done with that part.
Have fun tucking in the wires. If you have OCD, Zip ties are your friend.
Last edited by User 122320; 07-04-2016 at 06:54 PM.
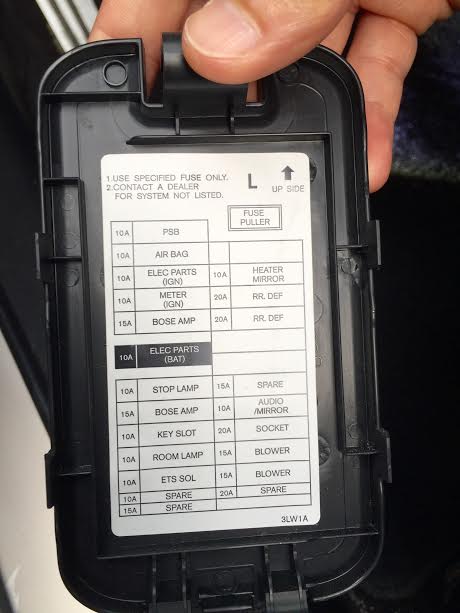
Just to add some more info to this, I have a 2014 Q60 6-MT and my fuse box compared to the one picture above was different (see below). I ended up using the "ELEC PARTS (BAT)" for my batt+ and the "SOCKET" as the acc. Also its worth noting that mine wasn't working initially because I had the controller set at 12V but upon dialing it down to 11.8V, the controller worked! Again as stated above, zip ties are your friends. I kind of wished I got the 2-channel, perhaps on my new 2017 Coupe next year
Do you guys have pictures of where you mounted your dash cams?
Trying to figure out where to mount mine where it's unobtrusive, but still easily accessible.


 10-18-2015, 04:30 PM