How to: replace your center channel speaker.
 10-27-2014, 02:52 PM
#1


How to: replace your center channel speaker.
What's up guys, hadn't found any information on this when searching, so I figured I'd recap my experience with replacing this speaker. It was a lot easier than I expected. I had read somewhere that the A/V unit had to be removed, but I did it without removing any of my center console. Here's what I did:
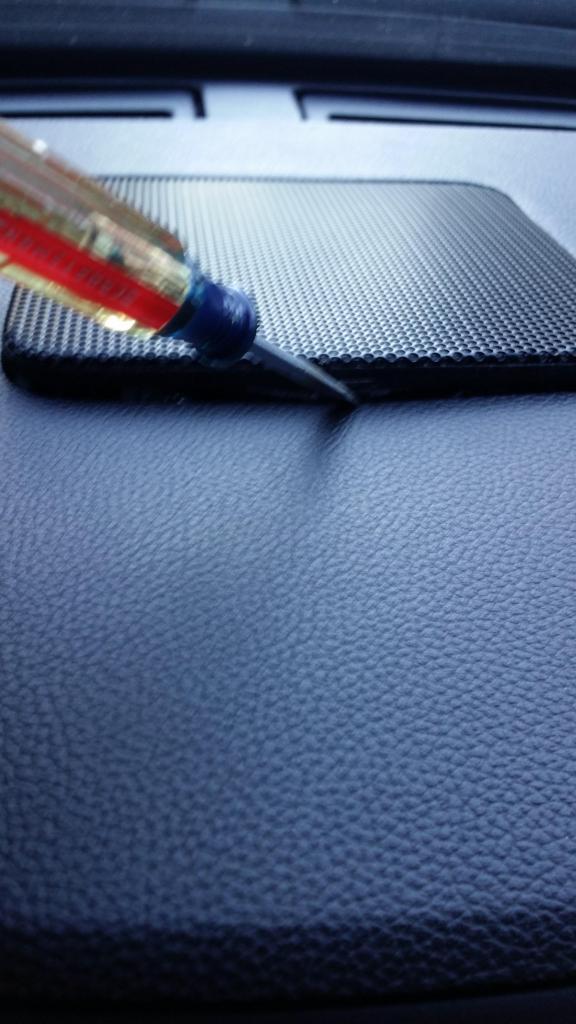
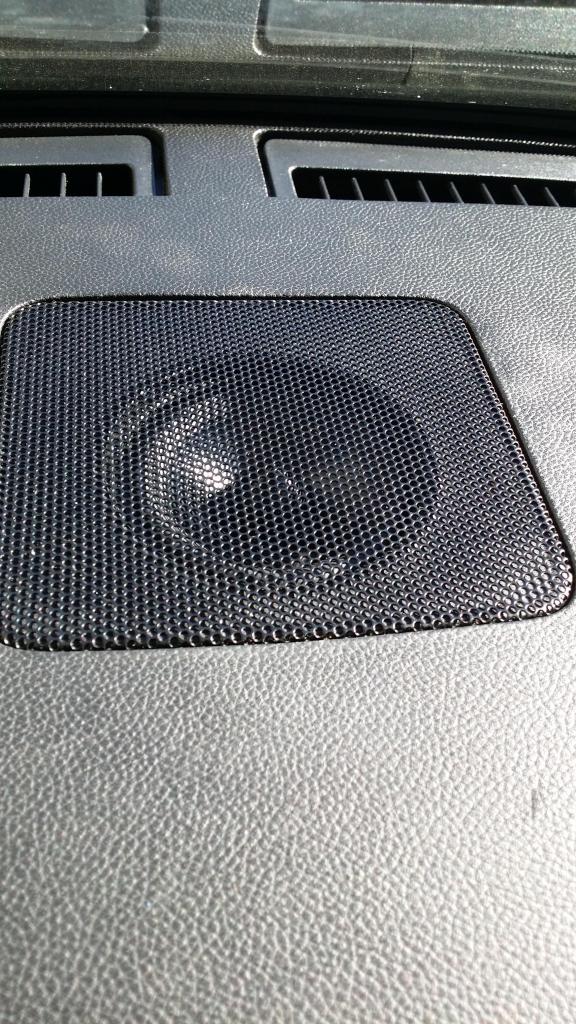
1) Place a small strip of tape (not shown) on the edge of the dash to prevent any marks or scratches. Insert a small flat head screwdriver directly in the center of the grille as shown. Apply light pressure to pop it up:
2) Once you remove the grille, this is what you'll see. 4 phillips screws. Removed with a short phillips screwdriver:

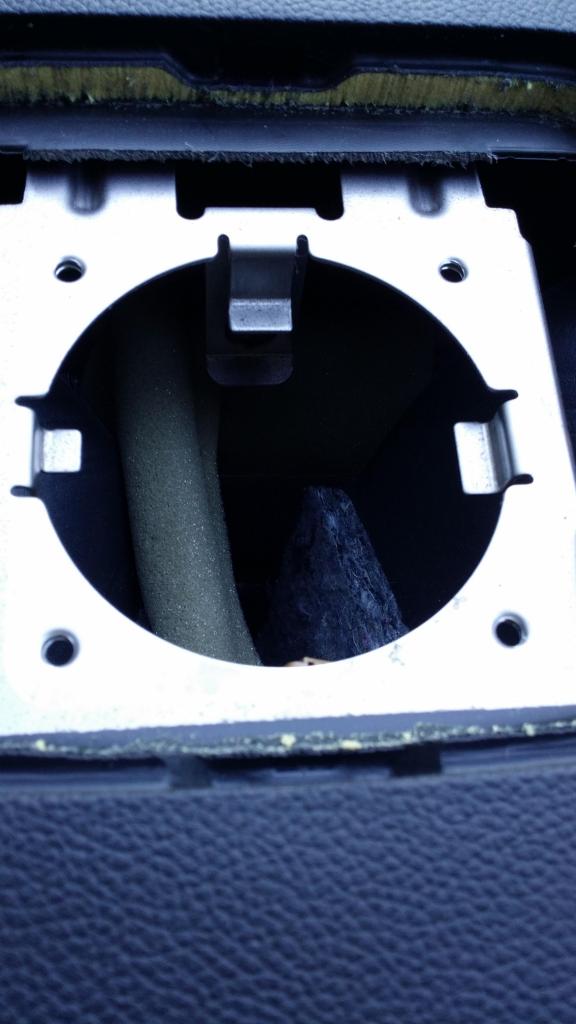
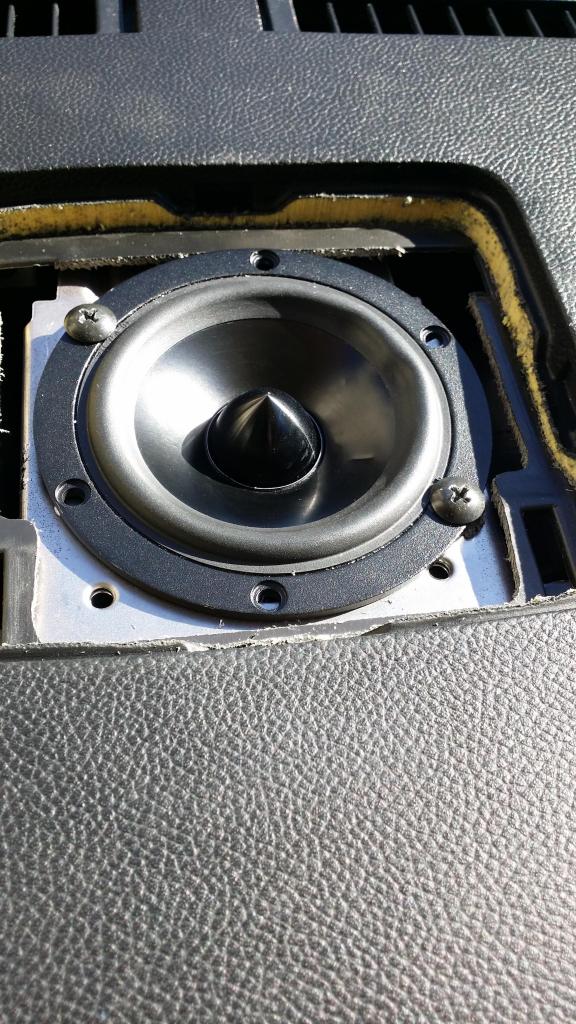
3) Once the speaker comes out, the opening looks like this. I used a set of vice grips to bend those metal tabs inward, out of the way - they were preventing the new speaker from dropping in:
*NOT SHOWN - forgot to take a photo* The wiring harness at the bose center channel has a light blue and dark blue wire connecting to the speaker. I found that the darker blue is the (+) while the lighter blue is the (-). I spliced and soldered about 8" of speaker wire into these wires, and connected them to my new speaker.
4) The speaker that I was using was the 4" Dayton RS100-4. I knew that the stock speaker was a 3 - 3 1/2" so I expected some cutting. This was where it got interesting . After bending the bracket, the magnet dropped right into the opening, but the speaker needed to go down another 1/4" to 1/2" to sit flush on the bracket. I was intent on getting this speaker to fit. I knew that I'd have to either cut the metal bracket in the car, or modify the speaker. Cutting the bracket is possible, but would have been more work than I had time to do, due to the awkward location. I paid $20 for the speaker, so I opted to hack the speaker
 . Used my dremel to hack off one of the posts. After cutting I was left with this:
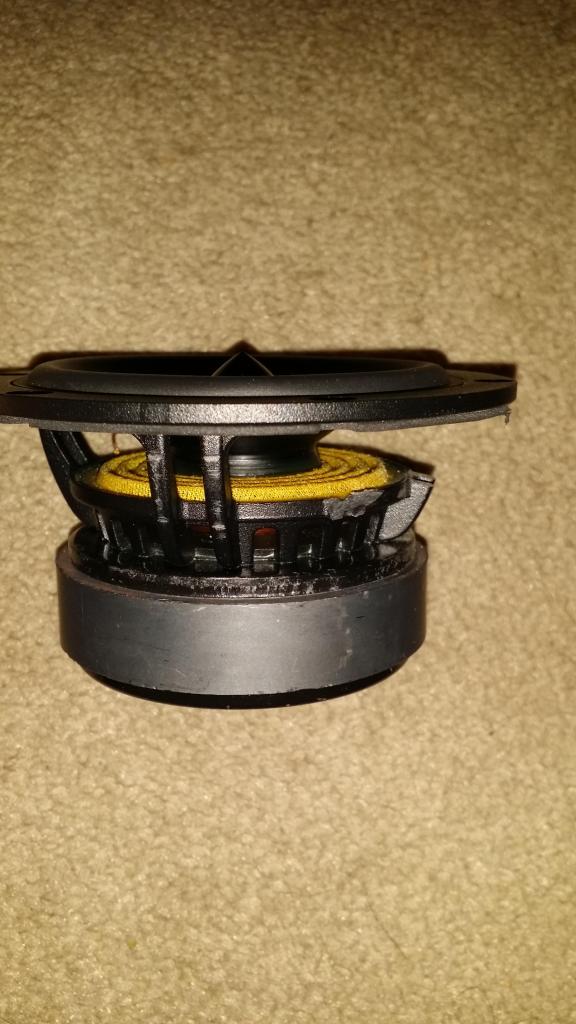
5) I realize that it may not have been the preferred method for some, but cutting the speaker had no impact on the structural stability or performance of it. It was now able to drop right in! (dent in the cone and surround happened prior to install - someone dropped the speaker out of its box, and tossed it into my toolbox).
The bolt holes do not line up, so I used one of the stock holes and had to drill a new hole on the opposite side. Was easy with a right angle drill bit attachment. Tightened the screws down, and it sits securely with just two bolts, so I didn't bother to drill any more.
Stock grille snaps right back on, no issues at all with clearance. Done!
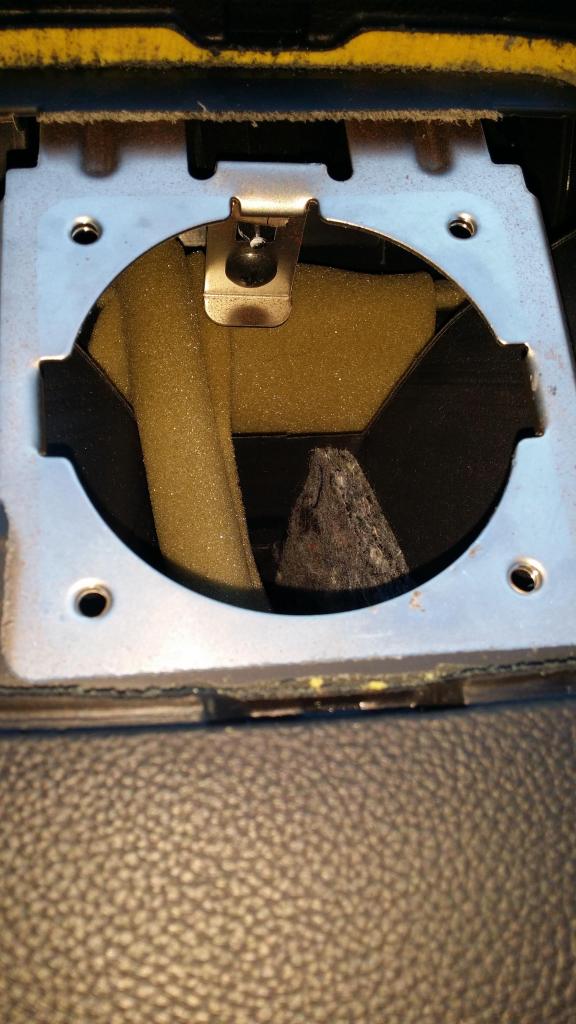
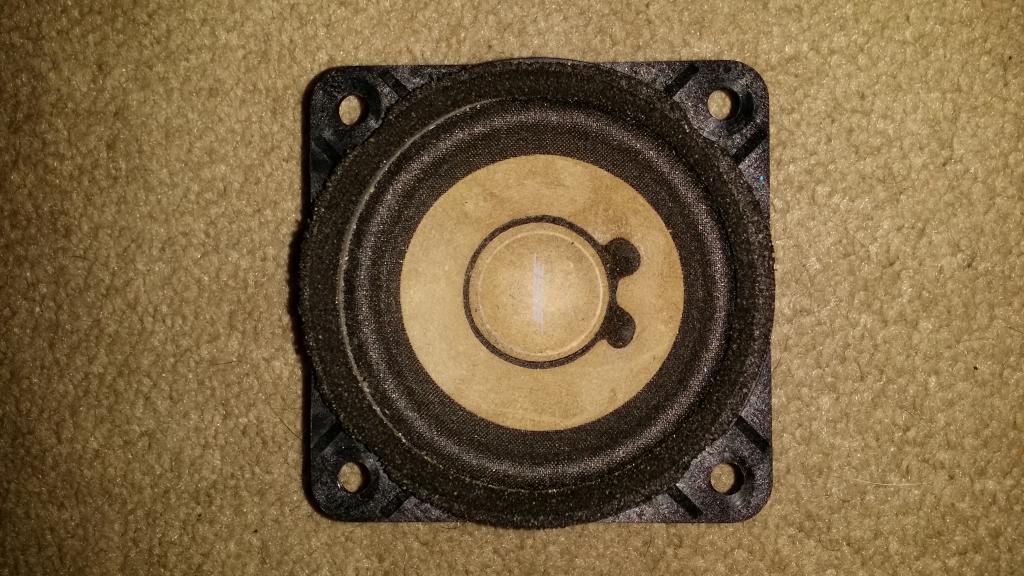
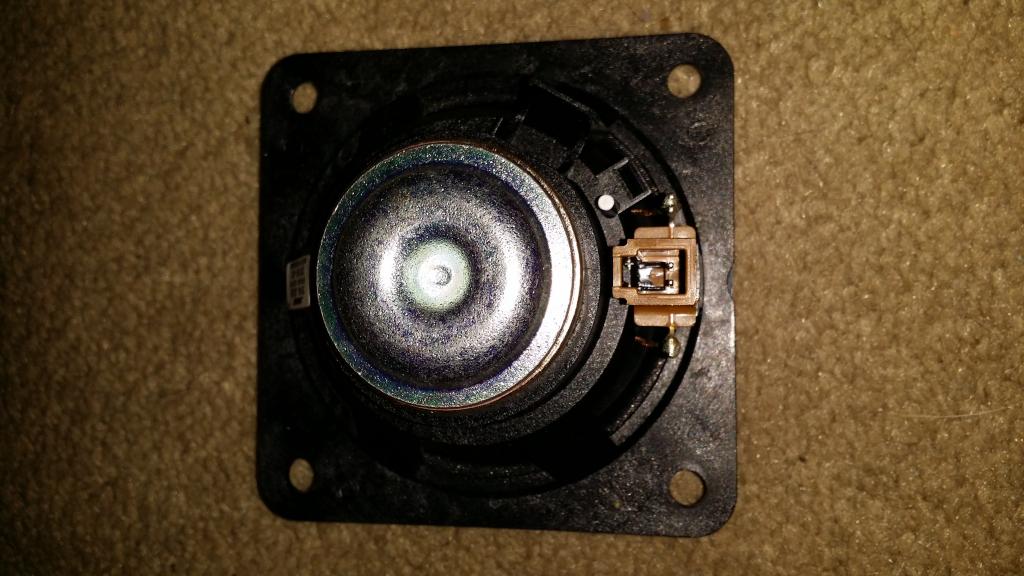
For reference, a couple pictures of the bose center. This is why it had to come out:
Very pleased with the sound quality. Those of you with aftermarket processors / amps know the hefty role that the center channel can play. I'm glad to have finally wrapped this up. The speaker may not look pretty after hacking it, but it functions perfectly
Hope this can help anyone out there in the future.
1) Place a small strip of tape (not shown) on the edge of the dash to prevent any marks or scratches. Insert a small flat head screwdriver directly in the center of the grille as shown. Apply light pressure to pop it up:
2) Once you remove the grille, this is what you'll see. 4 phillips screws. Removed with a short phillips screwdriver:
3) Once the speaker comes out, the opening looks like this. I used a set of vice grips to bend those metal tabs inward, out of the way - they were preventing the new speaker from dropping in:
*NOT SHOWN - forgot to take a photo* The wiring harness at the bose center channel has a light blue and dark blue wire connecting to the speaker. I found that the darker blue is the (+) while the lighter blue is the (-). I spliced and soldered about 8" of speaker wire into these wires, and connected them to my new speaker.
4) The speaker that I was using was the 4" Dayton RS100-4. I knew that the stock speaker was a 3 - 3 1/2" so I expected some cutting. This was where it got interesting
. After bending the bracket, the magnet dropped right into the opening, but the speaker needed to go down another 1/4" to 1/2" to sit flush on the bracket. I was intent on getting this speaker to fit. I knew that I'd have to either cut the metal bracket in the car, or modify the speaker. Cutting the bracket is possible, but would have been more work than I had time to do, due to the awkward location. I paid $20 for the speaker, so I opted to hack the speaker. Used my dremel to hack off one of the posts. After cutting I was left with this:5) I realize that it may not have been the preferred method for some, but cutting the speaker had no impact on the structural stability or performance of it. It was now able to drop right in! (dent in the cone and surround happened prior to install - someone dropped the speaker out of its box, and tossed it into my toolbox).
The bolt holes do not line up, so I used one of the stock holes and had to drill a new hole on the opposite side. Was easy with a right angle drill bit attachment. Tightened the screws down, and it sits securely with just two bolts, so I didn't bother to drill any more.
Stock grille snaps right back on, no issues at all with clearance. Done!
For reference, a couple pictures of the bose center. This is why it had to come out
:Very pleased with the sound quality. Those of you with aftermarket processors / amps know the hefty role that the center channel can play. I'm glad to have finally wrapped this up. The speaker may not look pretty after hacking it, but it functions perfectly
Hope this can help anyone out there in the future.
Last edited by CRiME; 10-27-2014 at 03:23 PM.

The following 4 users liked this post by CRiME:
10-27-2014, 03:52 PM
#2

Thanks for the post. Can you post the actual dimensions of the OEM speaker including diameter, depth, and hole spacing so that those that would rather not modify the opening or the replacement speaker know what size will fit perfectly without modification?
The following users liked this post:
aflores37 (03-17-2024)
10-27-2014, 04:35 PM
#3
The outer diameter of the OEM bose speaker is 3 1/4".
The inner diameter is 3".
The distance between bolt holes (straight across, from the center of one hole to the center of another) is 2 3/4".
The diagonal distance between bolt holes is 3 3/4".
The depth of the speaker, from bottom of the magnet to the underside of the plastic mounting tab, is 1 3/8". From the magnet to the very top of the speaker, it measures 1 3/4".
The diagonal distance from corner to corner of the speaker is 4 3/8".
The following 5 users liked this post by CRiME:
Black Betty (10-27-2014),
Detail (11-05-2014),
G37Xtreme (11-26-2014),
krazyfiend (07-14-2015),
Presto (11-30-2014)
 10-27-2014, 10:07 PM
#5
Sounds great. The MS8 makes pretty heavy use of the center channel, so that was my reasoning for shoehorning the 4" into the small space. For a ~$25 speaker, the rs100-4 sounds very clean. Crystal clear voice. It sure doesn't look so hot after hacking it to death, but I'm all about the sound 
 10-28-2014, 07:54 AM
#7
Thanks WillCo. Yeah, with the bose system, I found that audio was output through the center speaker at all times. Switching on the driver's sound stage function resulted in just that, staging that favored the driver / front of the vehicle; it appeared to raise the level at the center channel.
Trending Topics
10-28-2014, 08:23 AM
#9
True, BB. I essentially went about this project backwards - I bought the equipment first, then worried about installation afterwards  . I read great things about that particular Dayton driver, though, so that's the one that I really wanted to pair with the ms8. So far, I'm very pleased with the outcome.
. I read great things about that particular Dayton driver, though, so that's the one that I really wanted to pair with the ms8. So far, I'm very pleased with the outcome.

The following users liked this post:
CRiME (10-30-2014)